
Our Goodnotes vs. Notability article was most recently updated in January 2026.
The Goodnotes vs. Notability debate has been around for years. Both apps are powerful tools for students and business professionals who want to use their iPad and Mac devices like a digital whiteboard to capture handwritten notes and compile detailed documents.
So how do they compare, and which one is right for you? We originally reviewed both apps in 2019, and we’ve kept an eye on them every year since.
With so many new features released recently, we’ve taken a fresh look at each app to help you decide which one can deliver the best notetaking experience in 2026.
Ready? Let's go.
Key takeaways
- Goodnotes offers a full-featured app for a yearly subscription or a one-time cost, while most of Notability’s features are locked behind a yearly subscription.
- Notability’s sidebar offers better navigation throughout the app, but Goodnotes’ infinite nesting folders offer more thorough organization.
- Both apps offer similar toolkits for notetaking, audio recording, and sticker insertion, but there are some key differences.
| Basic features | Goodnotes | Notability |
| Free version | ✓ | ✓ |
| Annual subscription | $ | $ |
| One-time payment | $ | ✕ |
| Unlimited notetaking | $ | $ |
| Community Gallery (Free user templates) | ✓ | ✓ |
| Marketplace (Paid add-ons) | ✓ | ✕ |
| Compatible with Apple School Manager | ✓ | ✓ |
| Stylus support | ||
| Palm rejection | ✓ | ✓ |
| Left-hand support | ✓ | ✓ |
| Undo/Redo gestures | ✓ | ✓ |
| Tools | ||
| Basic tools (Pen, Pencil, Highlighter, Lasso, Shapes, Ruler) | ✓ | ✓ |
| Tape tool | ✓ | ✓ |
| PDF annotation | ✓ | ✓ |
| Convert handwriting to text | ✓ | $ |
| Math conversion | ✓ | $ |
| Audio recording features | ✓ | ✓ |
| Audio transcription | ✓ | ✓ |
| Presentation mode | ✓ | ✓ |
| Stickers | $ | $ |
| Flash cards | ✓ | ✓ |
| Elements Tool (Duplication tool) | ✓ | ✕ |
| AI-powered tools | ✓ | ✓ |
| Interactive Exam Practice | $ | ✕ |
| Customization | ||
| Customizable toolbar | ✓ | ✓ |
| Custom Pen/Highlighter colors | ✓ | $ |
| Custom fonts (3rd party app required) | ✓ | ✓ |
| Interchangeable paper templates | ✓ | ✕ |
| Unlimited paper templates & customization | $ | $ |
| Whiteboard (Infinite canvas) | ✓ | ✕ |
| Organization & Navigation | ||
| Flexible scrolling (horizontal & vertical) | ✓ | ✓ |
| Multi-Note support | ✕ | ✓ |
| Notebook creation & design workflow | ✓ | ✕ |
| Search notes & files | ✓ | $ |
| Handwriting recognition / OCR | $ | $ |
| Document tabs | ✓ | ✕ |
| Document management | ✓ | $ |
| Import documents, images & more | ✓ | ✓ |
| Nested folders | Unlimited | 5 levels |
| PDF hyperlink navigation | ✓ | ✓ |
| Bookmark pages | ✓ | $ |
| Backup & Sharing | ||
| iCloud syncing | ✓ | $ |
| Auto-backup to 3rd party | ✓ | $ |
| Collaborative note editing | ✓ | ✕ |
| Note sharing (link & email) | ✓ | ✓ |
| Password-protected notes | ✓ | ✓ |
| Compatibility | ||
| Mac | ✓ | ✓ |
| iPad | ✓ | ✓ |
| iPhone | ✓ | ✓ |
| PC | ✓ | ✓ |
| Android | ✓ | ✕ |
$ is used to indicate features that are unlocked upon upgrade to a premium subscription.
The basics
For over a decade, Goodnotes and Notability have been the top two contenders for the best notetaking app. Both are highly rated and offer unique features that set them apart from other competitors.
But the question remains: Which is better?
Let’s break down the differences between these two powerhouses to find out.

Goodnotes
- Price. Limited free plan available; $11.99/year for Essential or $35.99 one-time purchase from the App Store for Special Edition (Same features as Essential); $35.99/year for Pro; Optional $9.99/month for AI Pass.
- Platform. Available for iPad, iPhone, Mac, Windows, and Android.
- Reviews. Goodnotes currently has 4.7 stars based on 381,000+ reviews.
Created by Time Base Technology Limited in 2011, Goodnotes was designed to replace paper and pen with a robust digital notetaking experience. It has consistently ranked among the top apps on the Apple App Store and even won the Apple iPad App of the Year Award in 2022.
This full-featured app includes all the tools you need to jot down and organize your thoughts and ideas, including page customization, nesting folders, flashcards, AI tools, and collaborative capabilities.

Notability
- Price. Free plan available; $7.99/month or $20/year for Plus; $20/month or $99/year for Pro.
- Platform. Available for iPad, iPhone, Mac, and Web (Beta).
- Reviews. Notability is currently rated 4.8 out of 5 stars on the App Store with 434,000+ reviews.
Notability was created in 2010 by Ginger Labs, Inc. as a notetaking tool for students and professionals. Over the years, it’s become one of the most popular notetaking apps, with thousands of positive reviews.
Features like audio recording, math conversion, and PDF annotation are just a few of the tools that make it easy to capture information during classes or meetings.
Display & user interface
The first thing you’ll notice when comparing Goodnotes and Notability is the app layout and user interface. While both apps make search and navigation easy, they each approach this core functionality in very different ways.

Layout
When you open Goodnotes, you’ll be treated to either a list or grid layout (your choice), which displays all of your notes, folders, and notebooks in a quick and easy-to-read format. This has to do with the way Goodnotes wants you to create and organize your notes and notebooks (more on this below), and it makes complete sense. You can also tap on the name of any document or folder to access additional menu items.
You’ll also be able to open a sidebar by clicking on the icon at the top left, which includes a place for your documents, quick access to your bookmarked note pages (Favorites), your shared documents, and the in-app Marketplace, where you can purchase new paper templates, covers, stickers, and more.
At the top right of your screen, you’ll find icons for a few more handy tools, including settings, search, bulk editing, and notifications.

Notability takes a different approach. Upon opening the app, you’ll see your subjects (folders) on the left sidebar. The notes you’ve housed within those subjects are displayed as either a list or a grid on the right. You can add dividers that function as collapsible toggles to help keep your workspace neat and tidy.
Aside from creating new subjects for your notes and dividers to separate your subjects, there’s not much else to see here. It’s a practical, efficient, and effective no-frills approach. That makes it perfect for users who prefer a more minimalist take on layout design.
You’ll see a few icons across the top of the screen with various functions. On the left side, you’ll find your settings. On the right, you’ll see a More button and the + New button for note creation.
The Notability Gallery — where you can connect with the community, download new templates or documents, and publish your own notes — is in the left sidebar.

Navigation
Goodnotes’ navigation is relatively straightforward. Besides giving you a list or grid view of your folders and notebooks, you can also sort these items by Name, Date Created, Last Modified, or Type.
The downside to this layout is that you can’t see individual notebooks or notes if they’re nested in folders from the Documents screen. Instead, you’ll have to open the folder, and if you have multiple levels of folders, you’ll have to click through each one to get to the specific notebook you need.
Fortunately, there are a couple of ways around this. Using the sidebar, you can quickly access any of your shared documents or bookmarked documents, so those are always easy to find. You can also use the search function on this menu. Goodnotes has powerful handwriting recognition, allowing you to search for any term throughout typed and handwritten notes.

Navigation within Notability is also pretty simple. Unlike the sidebar in Goodnotes, Notability’s sidebar contains dividers. By default, you’ll also be able to see all your subjects within the dividers, but you can collapse any unnecessary dividers to save space.
Individual notes from the subject you have open will take up the right side of the screen, and you can click the More button at the upper right to choose from list or grid view or to sort by Name, Modified Date, or Created Date.
The Notes section in the sidebar contains your Recents, Shared, Favorites, and Unfiled notes as tabs to save space on the sidebar (Notability Plus only).
The search function can also help you find what you need, but you’ll need a subscription to be able to search through handwritten notes.
Verdict
Notability ekes out the win here, but only if you’ve got a subscription.
While navigation is simple and easy in both apps, Notability’s sidebar offers better access to every divider, subject, and note within the app.
However, if you don’t have a subscription, the lack of visibility for bookmarked note pages and shared notes is a pretty significant disadvantage. While these bookmarks can be accessed from within the original note, you’ll need to find and access that note before you can view those bookmarks.
Goodnotes lets you access favorites on the sidebar, whether you’re using the free or paid version. It has also put a bit more effort into “dressing up” the document management process, and both the navigation display and user interface benefit from those design choices.
Document management & creation
Keeping your notes neat and organized can make a big difference, especially if you plan on taking a lot of them.
Notability and Goodnotes handle organization and note creation quite differently, but both get the job done.
Here’s what to expect from each app.

Organization
If you’re trying to stay organized using Notability, the app provides two essential tools — subjects and dividers — to help you stay on top of everything. This is helpful when you need to keep track of multiple documents simultaneously or create several notes in a single day.
Overall, Notability’s document management is straightforward: From the main screen, you’ll create a subject on the left sidebar and house all notes within that subject.
You can also drag and drop notes between subjects, so relocating a misplaced note is simple and easy.
Subjects go in dividers, and you can nest dividers up to five layers deep for extra organization.
Strictly speaking, this level of organization isn’t even required due to the sorting capabilities mentioned above. If you’re just creating notes on an ad-hoc basis, you could keep everything in the All Notes tab and access every note that way.

Goodnotes offers a few more options to help you keep your notes neat and tidy.
Goodnotes users can enjoy vertical layers of custom organization thanks to the app’s nested folders (folders inside of folders).
We tested it to 10 layers of depth, which is probably more than anyone will ever need, and Goodnotes still let us create new folders with no problems. You can also change the color of folders and add an icon or emoji to the cover to help differentiate between content types.
The Goodnotes workflow makes it pretty clear that notebooks, designed for large collections of work, are the preferred way to organize and manage your content.
You can also use the search function to find your notes, which features handwriting recognition in the Plus and Pro version, to locate items. Goodnotes uses optical character recognition (OCR) to read your handwriting and will show your handwritten notes in search results if you search for written phrases.
Notability can do the same thing, but it’s a paid feature that’s locked behind the annual subscription.

Note creation
To create a new note, all you need to do is hit the + New button in the top right corner of the Notability interface, and the app will instantly create a new note within the subject you’ve selected on the left sidebar.
And that’s it. Note creation in Notability is fast and simple, without any unnecessary frills or setup. It’s great for users who need to take notes now and want to figure out the rest later.
The velocity of note creation also encourages you to create new notes often. Create a note for every classroom session or every meeting, take notes until you’re done, and start a new note next time. Keep your notes in the right subject, and they’ll always be organized in a simple and logical way.

Notes in Notability come with a default template and seamless, vertical scrolling. You can change all of these preferences under the Documents tab within the Settings Menu.
The default template is what Notability uses to generate any new note, but you’ll find Rule, Grid, or Dot page options at the bottom of the screen when you open a new note.
You’ll also see options for Templates or to import or scan. When you tap Templates, you go to the full gallery of options. Notability offers more built-in templates than Goodnotes, including digital planners, worksheets, recipe pages, etc.

Within your note settings, you can also switch from seamless/vertical to single-page scrolling so that you’ll have to swipe left and right to switch between the pages of your notes. This is great for users who want a little more definition regarding how their notes fill up the page.
However, keep in mind that while these settings are global defaults, they’re just starting points. Much like in Goodnotes, you can change both the template and the scrolling direction on a per-note basis from the Options menu inside each note, which allows you to pick and choose how each note acts based on your needs.

With Goodnotes, document management and creation are a two-part process. When you try to create a new document in Goodnotes, the app will ask what kind of document you’d like to create (notebook, text doc, whiteboard, folder, etc.) and then guide you through the appropriate workflow.
And this is where things get a little complicated.
What you choose to create determines what options you have.
A Whiteboard is an infinite canvas where you can create mind maps or diagrams. A Text Doc is for typed text, tables, or images. Notebooks and QuickNotes will hold your notes, images, and scanned documents, while folders can hold anything.
But while Notebooks can hold other types of content, like pictures and PDFs, that’s only true if you add those through the notebook submenu.
If you use the image option to import a photo through the document creation workflow, Goodnotes treats that photo as a standalone object.
This isn’t a huge issue, though, because Goodnotes allows you to easily move or combine pages and notebooks. You can drag and drop to rearrange your pages or select one or more pages to move to a different notebook.

Creating a notebook follows a uniform workflow. Once you choose to create a notebook, you’ll be directed to a setup screen where you can select your notebook cover and the type of paper you want to use. After you make these choices and give your notebook a name, a new note will open, and you can start jotting down your handwritten notes.
Goodnotes treats every single notebook you create as a separate entity, and all customization options are unique to each notebook, down to the individual page. Within a notebook, you can change themes, colors, and layouts on a page-by-page basis.
You can even create your own custom themes! You can create custom page sizes, adjusting the height and width to whatever you desire. You can also change both the background and foreground page colors to create something really unique and tailored to your aesthetics.
This is great if you’re trying to contain a similar body of work in one place. You don’t have to generate a new note just because you need to change the layout or format of your pages. All you’d need to do is change your paper theme to the selected page.
So if you needed to create a graph on page 17 of your notebook, you could switch that page to dotted or squared paper with just a few taps while keeping all other pages in your notebook themed to your original preferences.
Notability users can’t do that.

In Notability, all pages inside a note are the same. Adding a new color or changing the page template changes every page in the entire note, which means that you’ll need to create an entirely new note in order to create your graph in ideal conditions.
For Goodnotes users, this level of versatility is a plus, especially because it removes the need for tedious switching between notes when your workflow changes.
Verdict
Depends on personal preference.
If you want to treat your notetaking app as a quick place to jot down important notes and ideas, Notability is probably the winner here. The streamlined, no-frills approach is perfect for people who just want to open the app and get started quickly.
However, if that’s the case, you might want to look at something like Apple Notes, Evernote, or Microsoft OneNote before you jump headfirst into an annual subscription fee.
With Goodnotes, creating a notebook feels more like a commitment — and that isn’t necessarily a bad thing. The app has a great aesthetic, looks amazing, and comes with a ton of features that feel good to use. The good looks and solidly built workflows are among our favorite features of both apps.
Nested folders in Goodnotes are also a huge plus for productivity and organizational lovers who want to organize their workspace based on their own system or workflow.
If you’re likely to be working in the same space for a while, it makes sense to customize everything to your liking before you settle in. Goodnotes offers many options to make your experience feel unique and personal, which is a nice touch in the long term.
The other factor to consider is searchability. If you’re planning to store notes in either app, you need to be able to find them later.
To that end, the lack of handwriting recognition on Notability’s free plan cripples the app’s search functionality. We feel this is an essential feature in an app that currently offers so little by way of organization. Without it, old notes will be more difficult for both avid and infrequent users to find compared with Goodnotes.
But it’s also worth pointing out that while Goodnotes offers more functionality in their full version, their free plan also lacks handwriting recognition.
With all of that in mind, the question for users is pretty simple: How much time do you plan to spend in the app, and how much customization do you really need to get the job done?
Further reading
- Best Notetaking Template Packs for College Students
- How to Transition from Paper to Digital Notetaking
- How to Brainstorm on Your iPad
Taking notes
Without a doubt, both Goodnotes and Notability provide a robust toolkit for taking notes. Both apps have a lot to love, and both companies have spent a lot of time figuring out what works best for their users.
Ironically, that’s also why many of the features offered by both apps are so similar. Each app takes advantage of the digital workspace, allowing you to customize your environment to suit your style and preferences.
(Although, from our last section, it’s safe to say that Goodnotes offers a little more flexibility in both organization and styling).
But what about actually taking notes?

Tools & toolbars
Within each app, you’ll see a similar set of features and tools to help you get your thoughts and ideas onto the page.
Regardless of the app you use, you’ll be able to change the layout, color, and design of your paper.
You’ll also have access to a similar toolkit. Both Goodnotes and Notability include each of the following tools for your immediate use:
- Pen
- Pencil
- Highlighter
- Eraser
- Lasso Tool
- Text Box
Each app also has some unique tools to help it stand out. For Goodnotes, the big highlights are the Elements Tool and the Time Keeper, while Notability has a movable Toolbox.
One neat feature in both apps is the ability to customize your toolbar. You can choose exactly which tools you want and get rid of anything you don’t need for a more functional and uncluttered toolbar.
Despite the similarities, both apps offer slightly different configurations for their toolkits — and there are upsides and downsides, no matter which app you choose.

Pen/Pencil
Goodnotes has three pen types, while Notability only has two. They both include a ballpoint and a fountain pen, but Goodnotes also adds a brush pen - designed for more artistic sketches, drawings, and lettering.
In Goodnotes, all three pen types offer a slider for stroke stabilization, which allows you to write more smoothly and neatly. Both the fountain pen and the brush pen offer a slider for pressure sensitivity, and the fountain pen also offers sliders to adjust the tip’s sharpness and flatness.

Both notetaking apps give users the ability to create dashed and dotted lines with their Pen tool.
Notability’s Pen also has a slider for stroke width, but it doesn’t let you adjust the pen’s sensitivity in any way.
The Pencil Tool has its own icon in both apps, and in Notability, you’ll see basically the same options as the pen, minus the bar with pen types. In Goodnotes, you can adjust the pencil thickness and change the colors, but you don’t have any sliders for pressure sensitivity or any of the extras that you get with the fountain pen.

The Pencil Tool from Notability is a pretty great tool for a few reasons:
- It uses vector-based ink, which means (without getting too technical) you can easily resize your drawings without losing quality.
- It’s pressure-sensitive, so the harder you press, the darker your lines get.
- It has tilt-activated shading, allowing you to both sketch and shade without switching tools.
Goodnotes’ Pencil Tool also has pressure sensitivity and tilt-activated shading, but it doesn’t look quite as neat and sharp as Notability’s.

Eraser & highlighter
Goodnotes offers a few options for the Eraser, but you can also use your Apple Pencil to scribble out any mistakes to automatically erase them.
The Highlighter tool offers a slider for width and color options, but doesn’t allow you to create dotted or dashed lines.
Meanwhile, Notability offers the same selection options for its eraser and highlighter that it does for its pen, giving users a wider selection overall.
Both highlighters only allow for one layer, even when you go over the same area again, and only highlights the background. In the past, Goodnotes highlighter got darker with each layer, which made it hard to see the text, but this is no longer the case.

Favorites & colors
Notability used to have a Favorites Bar, but they eliminated this in favor of streamlining their toolbar.
With this change, you can no longer save your favorite pen type or width, but you can still add your favorite colors to the preset options, and you’ll get up to eight slots for this purpose.
This isn’t much different from Goodnotes, which gives you seven slots for your favorite colors but allows for unlimited custom colors. With Notability, custom colors are only available on the premium plan, though this feature is permanently unlocked for users on the Classic Plan.

Lasso & shapes
Both apps also feature a selection tool (Lasso) for selecting and moving anything on the page. This feature is similar in both tools, with both offering a variety of options regarding what you’d like to do with your selected text.
One major difference between the two apps is that Goodnotes lets you move items using the Lasso tool from one page to another. In Notability, you can only move items to a different spot on the same page.
However, when you’re moving things around on the same page with Goodnotes, the Lasso tool isn’t even necessary, because you can now select anything simply by drawing a circle around it with your pen and tapping on the circle.
To get clean shapes, Notability offers shape detection: draw the desired shape with your Apple Pencil and hold it in place. As soon as the app recognizes the attempted shape, it redraws it using uniform lines and dimensions.
Goodnotes offers the same thing and also offers a Shape tool that you can use to fill shapes with color and/or snap shape lines together.

Text tool
Both Goodnotes and Notability are designed around the idea of taking handwritten notes. However, both apps still allow you to type text, if that’s what you prefer.
The Text tool in Goodnotes allows you to create text boxes that you can resize and move around the page.
When you tap on the text box icon, you’ll see a drop-down toolbar of your text settings. Here you can choose from a variety of fonts, the size and color of your text, and more. With the keyboard open, you’ll see your normal styling options, such as bold, italics, strikethrough, and bulleted lists.
Notability’s Text tool isn’t much different as far as all of the text settings are concerned. However, this app doesn’t really give you a specific text box. Instead, you can just click anywhere on the page after tapping the Text tool and start typing. Because of this, you’ll need to use your Lasso tool to resize or move any typed text.
This is somewhat similar to Goodnotes’ Text Doc, which is one of the documents you can create if you plan to type your notes. This allows for full-page typing and comes with many of the options you’d enjoy in a word-processing program, such as headings, indenting paragraphs, bulleted lists, and more.
The downside to using this type of document is that you won’t get as much customization. You can’t even change the font or font size. If you prefer typing your notes, you’re better off using something like Evernote or OneNote.

Ruler & tape
Two other very useful tools are a Ruler and Tape.
The Ruler is available in both Goodnotes and Notability for free and premium users (it was originally only available to subscribers). This tool makes it easier to get straight lines in your notes. You can rotate it to whatever angle you need, then slide it off the page when you’re done.
The Tape tool is another cool feature in the Notability toolkit and Goodnotes. It lets you temporarily hide your content by covering it with a piece of digital tape. You simply drag it over any of your notes to hide the text, then tap the tape to remove it. If you’re trying to memorize something, this is a particularly useful tool to help you study.
In Notability, you can choose from four different colors and four different patterns. In Goodnotes, you’ve got more options. You can adjust the tape thickness with a slider and choose from a variety of solid colors and fun patterns.

Stickers/Elements tool
Stickers, images, and gifs are another big thing that has taken the digital notetaking space by storm in recent years. Both Goodnotes and Notability support this multimedia to some degree.
In Notability, stickers are built into the app and can be downloaded via the Notability Plus menu (subscription required).
If you’re looking to import custom stickers, you can use the Media tab inside a note. You’ll import them from your Photos app on your iPad, and Notability will treat them as images. Afterward, you can save the image as a sticker and reuse it across all your notes, but you can only add stickers one at a time, which can be a bit of a pain.
Goodnotes integrates stickers and other media via the Elements tool. This feature allows you to avoid endless copy/pasting and importing by creating a collection of elements for fast and easy duplication. Once you create your collection, you can select items from the Elements tool and add them to your note in seconds.
The best part? This works with any collection of images and makes it ridiculously easy to import third-party sticker packs for your notes.

Handwriting
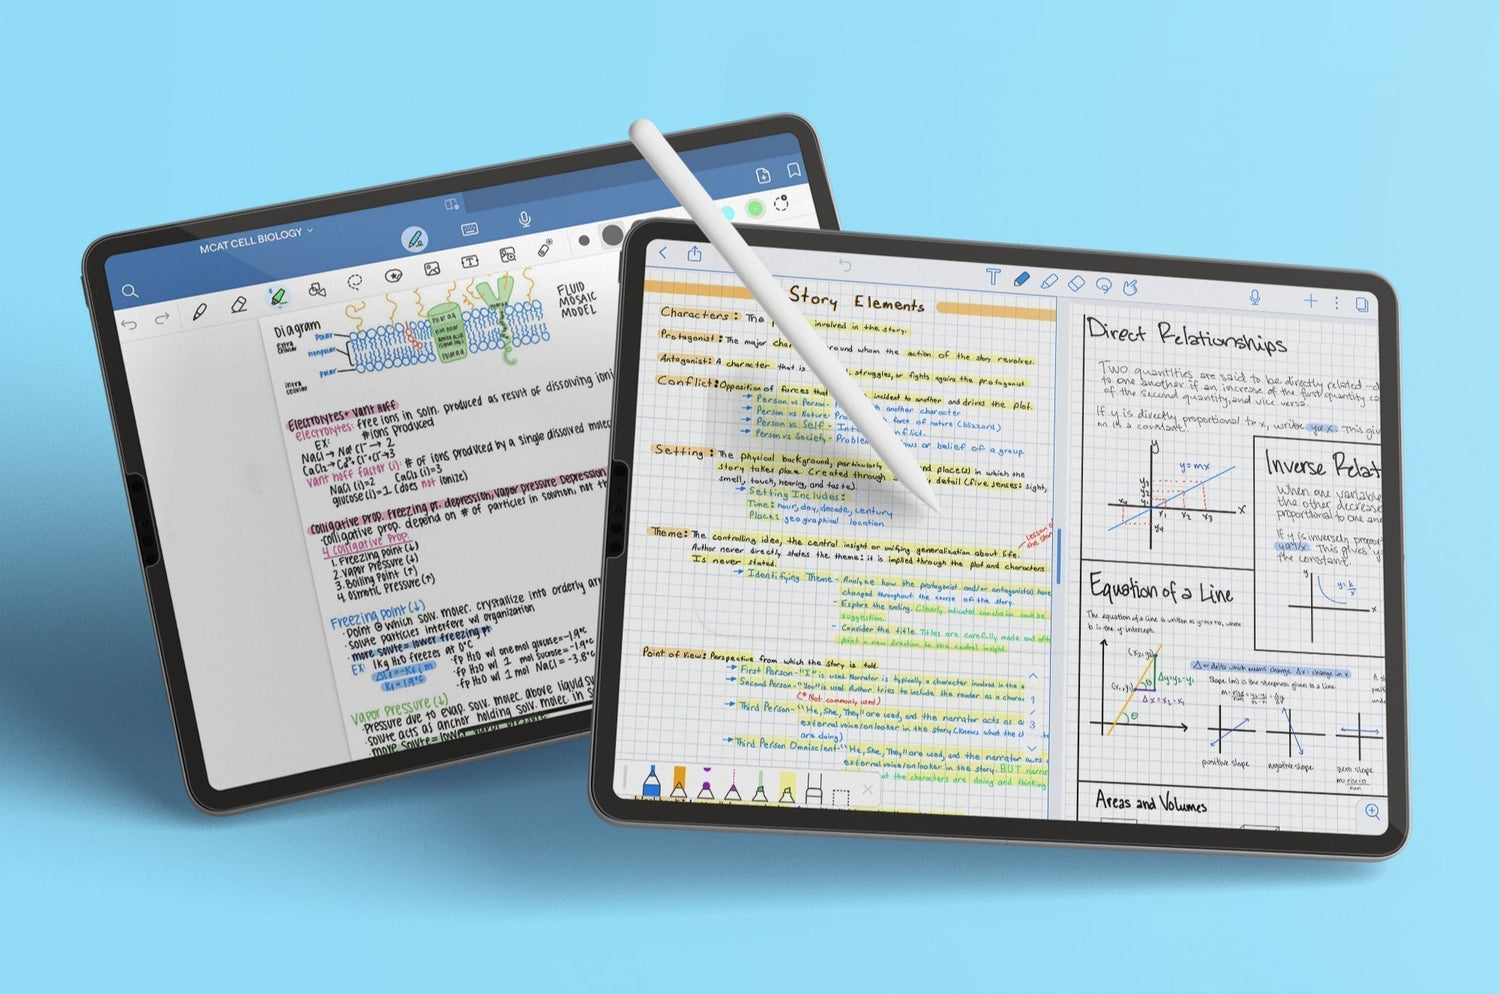
Both Goodnotes and Notability support using the Apple Pencil (2nd generation), Apple Pencil Pro, or a 3rd party stylus for the iPad, so you can use your favorite drawing and sketching tools to create handwritten notes. The built-in palm rejection and left-handed support in both apps make using a stylus seamless.
You can even add a Paperlike 3 Screen Protector to your iPad setup so that its surface feels like real paper.
If your handwriting is sloppy and you prefer to keep your notes neat and organized, both apps support handwriting-to-text conversions, too. To do this, you can highlight your handwriting with the selection tool and select Convert. However, in Notability, this feature requires a subscription.
Both apps will provide a preview window to verify the conversion. In Notability, you can tap the Convert button, and the converted text will drop onto the page in a resizable text box. In Goodnotes, you’ll also get a text box, but it’s more difficult to resize. You’ll have to go through the text box settings on the toolbar to change this to what you want.
One of the cool features that you’ll only see in Goodnotes is AI-powered writing aids. These aids allow Goodnotes to learn and generate text in your handwriting. Right now, it can spellcheck and will correct errors in your own handwriting style (or pretty close), and (coming soon) it can also suggest words as you write.
These are on by default, but you can turn them off by tapping on the pen icon and then Writing Aids.
After testing the spellcheck, we found it’s much like a Word document, with a dotted red line appearing under any words with errors, and it takes a little bit of time to show up. Still, having an app that can spellcheck handwriting is something that you definitely won’t find anywhere else, and it’s a handy little feature.

Multi-note
Notability also shines when working on multiple documents. While Goodnotes supports document tabs (think of tabbed browsing when surfing the web), Notability allows users to open two notes side by side in a split-screen view. This makes comparing notes much easier.
With iPadOS now supporting multiple windows with Split View, you can create similar functionality by opening two instances of Goodnotes at the same time on your iPad. But it’s clunky because it’s relying on iPadOS’s multitasking feature rather than offering the app-based, native integration that Notability has supported for years.
Verdict
This one was a tough one for us, but we feel like Notability takes the prize.
While Goodnotes offers some customization for its tools, Notability has stepped up to the plate and made some improvements to its toolkit.
Notability’s Pencil Tool feels nicer and more intuitive, and they often introduce new features before Goodnotes (audio recording, pencil, and tape, to name a few).
But that doesn’t mean that Goodnotes is lagging far behind. In fact, Goodnotes often releases similar features within a few months or so after Notability, and, in recent years, it has added a fair amount of additional flexibility around how the app handles things like page customization, sticker importing, and shape snapping that Notability just doesn’t have.
If customizing your notetaking experience is important to you, then Goodnotes is the better choice.
Further reading
Extra features
Writing down notes may be the main focus of digital notetaking apps, but there are plenty of other features that can be extremely helpful.
Both Notability and Goodnotes share a few of these features, such as PDF annotation, audio recording, and presentation mode, but they also each have unique features that could be helpful for students.

Whiteboard
The Whiteboard is a new feature that Goodnotes recently added, and Notability doesn’t offer anything like it.
It’s a digital whiteboard that gives you an infinite canvas to draw pictures, brainstorm, create mind maps, draw diagrams, and more. It even comes with ready-made templates to help you get started, depending on your needs.
There’s a mini-map in the bottom-left corner that lets you see your entire canvas and quickly navigate to the area you need.
It also has the same toolbar as your regular notebooks, but one cool feature is the Draw Shape tool. Instead of using the regular Shape tool, you can click the Draw Shape icon on the main toolbar to get a floating shape toolbar. Not only does this have premade shapes, but you can also click on the arrows to easily connect your ideas.

PDF annotation
If you need to import and annotate a PDF, image, or document, the process is similar in both apps. Both offer access to the full toolkit for markup, including the pen/pencil for writing in the margin and the highlighter.
There is really only one difference we found between the two: the way the apps handle highlighting.
In Goodnotes, you need to manually highlight your document, just like you would if it were a printed copy. The highlighter appears exactly as you draw it, but you can turn on Draw in Straight Line in the highlighter menu to help you keep it neat.
In Notability, PDF text highlighting is faster and smarter. When you tap and hold on the text, Notability’s highlighter snaps the highlighter onto that text, and you can drag your stylus down to wherever you’d like the highlighting to end. It takes a little getting used to, but once you’ve got the hang of it, highlighting becomes quick and easy.
You can also do something similar in Goodnotes, but you have to use your finger rather than your stylus. Press and hold to select your text, and choose Highlight from the pop-up menu.

Audio recording
Notability was the first to offer the most unique and useful audio recording feature for notetakers. When using the in-app recording tools, Notability’s audio is synced in real time with the notes as you’re writing them.
During playback, Notability will highlight the text as it was written during the recording, so you can better understand what prompted you to write something down. For many college students, this audio syncing is a dream come true, especially when prepping for an exam!
Goodnotes saw the popularity and usefulness of this feature and added it to their own app. Audio recording and playback function almost identically to what you’ll see in Notability, syncing the recording to the notes during playback.
Notability also introduced audio transcription. With this feature, you can get automatic, time-stamped transcripts for any audio that you record. You can then copy and paste the most vital information directly into your notes, rather than having to write it out yourself.
Goodnotes followed suit, addingaudio transcription and Ask Goodnotes (more on this later), which can summarize your audio transcripts for you.
Math conversion
A great feature you used to only get with Notability is its math conversion (subscription only).
The app will recognize common mathematical expressions, elements, and rules. This includes Greek symbols, chemical elements, rules, and mathematical notation. If you use a lot of equations in your notes, you really can’t beat this feature.
Goodnotes also has math conversion, and it’s now comparable to what you’ll find in Notability.

Flashcards
In Goodnotes, there’s a dedicated tool called Study Sets that makes it quick and easy to create and start studying flashcards.
In the past, you had to create cards using your digital notes by writing the question on the top half of the page and the answer on the bottom half. This was pretty clunky, but Goodnotes added Study Sets that streamlined the process.
Don’t worry, if you already had flashcards previously, you can still use them. Just tap on the More button in the upper right corner (three dots) and scroll down to Convert Flashcards to Study Set.
These Study Sets integrate with the app’s Smart Learn function. Using science-backed learning techniques, Study Sets help you study more efficiently by customizing each session to focus on the flashcards that you’ve missed and notifying you when it’s time to come back and study them again.
It’s not the most convenient or easiest flashcard maker (more options available here) on the market, but it’s nice that it’s built into the Goodnotes app, so you don’t have to buy a separate app to study.
Notability also added flashcards to their app. This came with Notability Learn (more on this later), which is an AI-powered tool that automatically creates flashcards from your notes when you tap on the flashcard icon.

Learning tools
Goodnotes also has two learning tools specifically for students.
The first is Interactive Exam Practice. This is a great concept that lets you download SAT and DSE math prep courses (more coming soon) to practice in the app.
Unfortunately, accessing these materials isn’t very intuitive because you have to download them from the Marketplace. To do this, open the Sidebar and tap Marketplace. From there, you’ll need to navigate to the Education tab at the top of the page.
You’ll see a variety of options, including revision notes and practice courses. Once you find the one you want, you can download it to the app and access it from the Documents screen.
The other new tool you can check out is AI Math Assistance. When you’re working through a math problem, Goodnotes can catch any mistakes or wrong equations.
This only works when you’re working in one of the prep courses, and at this time, it can only check for errors. Goodnotes has plans to turn this into a full-fledged AI tutor in more STEM subjects in the future.
While Notability does have some worksheets available for academic subjects, this doesn’t really compare to the learning tools available in Goodnotes.

AI-powered tools
Both Goodnotes and Notability offer AI tools to help you with your notes.
While these are called something different in each app (Ask Goodnotes and Notability Learn), the features are basically the same. You can summarize pages or sections of your notes, create quizzes or question and answer sessions, ask for explanations, and more.
(Keep in mind that both Notability Learn and Ask Goodnotes are only available on the paid versions of each app.)
This is something that’s still pretty new to both apps, and new features and assistance continue to roll out periodically.
For example, Goodnotes AI can generate templates, drawings, or initial drafts of anything you need. Goodnotes AI for Math can solve or teach equations through tutorials and guidance. You can also chat with Goodnotes AI and ask any question you want about your notes. (Not all features are available on every plan. See what you can access on each here.)
Notability Learn continues to add new features, such as mix-and-match quizzes. It can even generate action items from your notes to keep you on track.
Verdict
We have to give Goodnotes the win here.
Here’s why: In previous iterations of this article, we felt that Notability won due to the audio recording and the math conversions.
However, Goodnotes has added both of those features, and they’re on par with what you’ll find in Notability. On top of that, Goodnotes offers extra features (like the Whiteboard) and tools that really elevate the app.
Study Sets are a much more useful feature for all students and even some business professionals who may need to memorize information. And the new learning tools and AI-powered writing aids are something that you won’t find in any other app.
While both apps are improving their AI-powered tools, at this time, Goodnotes still has some bonus features that Notability hasn’t added yet.
Further reading
Storage, backup, & sharing
You can’t beat the convenience of digital notes over paper, especially with the ability to easily store, sync, and share your notes across devices.
Goodnotes and Notability handle these areas similarly, except that Notability requires a subscription for most of them.
Storage & backup
In the past, both Goodnotes and Notability used Apple’s iCloud sync to back up your notes. This is standard for most Apple devices, since syncing automatically updates documentation across all devices and is particularly useful because both apps have iPad/iPhone and Mac versions.
For Goodnotes users, nothing has changed. But Notability now has its own cloud service that allows you to sync across iOS devices and the Web version. Unfortunately, this means that iCloud is no longer supported.
However, both apps allow users to back up their files to 3rd-party storage services like Dropbox, Google Drive, and OneDrive via Auto-Backup. Notability has a few more options (Box and WebDAV), and the backup process is roughly the same between both applications.
With Auto-Backup, users can select the service of their choice and create a secondary, one-way backup on that service. The iCloud sync in Goodnotes and the Notability Cloud sync still take place unless separately disabled.

Sharing
Both apps allow you to export and share your content, but they handle these aspects differently.
With Notability, you can use the link sharing feature to create publicly accessible links that anyone can use to view your notes in any browser or on any device. Collaborative editing isn’t possible using this feature. While you do have to create an account in order to share content, viewers aren’t required to register with Notability in order to view it.
You can also publish your notes to the Notability Gallery for others to read and edit. While this isn’t the same as being able to collaborate on the same piece, it does allow you to create a template, notes, or anything else for someone else to use.

Meanwhile, Goodnotes has gone in another direction.
The Goodnotes app only allows non-users to view notes outside of their platform. However, to collaborate, everyone must have an updated version of the app on their own devices.
Using shared links, multiple Goodnotes users can collaborate on the same document, and you can even sync your view with a collaborator’s for real-time collaboration — something that just isn’t possible with Notability.
You can even share across platforms (iOS, Windows, Android, and Web), making this one of the few notetaking apps that’s cross-platform compatible. You will have to purchase both an iOS and an Android/Windows subscription, though.
Verdict
If you need to be able to collaborate, Goodnotes is the clear winner.
Both apps allow you to safely back up your content using either iCloud or Notability Cloud and 3rd-party syncing. The export tools for each app are on par with one another.
Notability’s link sharing is more convenient if you need someone to look over your notes who doesn’t have a notetaking app, but Goodnotes’ collaborative ability far surpasses anything Notability has to offer.
Pricing & updates
Before we wrap up, it’s worth discussing pricing and updates since these are where the two apps diverge.
Both Goodnotes and Notability offer a free version, but they serve different purposes.
While you can use the free version of Goodnotes for as long as you want, it’s essentially just a free trial that never expires, because you only get three notebooks to use. To fully take advantage of this app, you’ll need to buy it. Aside from the limitation on notebooks and a few things like handwriting recognition, importing documents via email, and some of the more advanced AI features, everything is unlocked.
On the other hand, while Notability’s free plan is very usable for casual notetakers who don’t need all the bells and whistles, it comes with some notable restrictions around AI assistance, saving, and storage.
We’ve done our best to differentiate between what you get on both the free and paid plans offered by each company.
Here’s the pricing as it currently stands:
- Goodnotes offers a free trial version, with an upgrade to the Essentials version available via either a one-time in-app purchase for $35.99 or a subscription for $11.99 per year. The Pro version offers a few upgrades, but it costs $35.99 per year. You can also add on the AI Pass for full access to all AI features for $9.99 per month on either plan.
- Notability offers a free version and a Plus subscription for $7.99 per month or $20 per year as an in-app purchase. The Pro version costs $20 per month or $99 per year.
But here are a few other things to consider if you’re shopping based on price:
- Notability and Goodnotes both offer free versions, so you can try out the basic features at no risk and choose to upgrade if you wish.
- Prior to the switch to a subscription model in 2021, Notability never charged for app updates. However, the company did offer a few in-app purchases over the years to expand the app’s capabilities.
- Goodnotes’ free version is more of a perpetual free trial, but you can pay the full cost of the app up front as a one-time purchase when you decide to upgrade or choose a subscription plan.
- Goodnotes (2026) is the seventh version of Goodnotes, and GoodNotes 5 users were forced to repurchase or subscribe when Goodnotes 6 launched. Although Goodnotes offered a discount for this and didn’t charge at all for the current Goodnotes, it’s possible that new versions will require similar expenditures. This is especially true for users who upgrade using the buyout option rather than the subscription model. When the latest version launched, Goodnotes switched to an Essentials and a Pro plan, instead of having only one paid version available.
- If you want to send your Goodnotes content back and forth from Mac/iOS to Windows/Android, you’ll need to subscribe to the platform in both environments. Expect to pay for both platforms to make that work.
- Any educational institution using Apple School Manager will have full access to both Goodnotes and Notability for free.
If you’re looking for a great notetaking app without paying for anything, Notability is a great entry-level contender.
Keep in mind that the free version of Notability actually limits the number of edits that you can make to your documents per month, but the company is vague on exactly how many edits you can make.

If you find the idea of limited edits off-putting, and you’re not planning to become a notetaking power user, something like Apple Notes (review here) might be a better solution.
The other thing to consider is how the app operates across multiple environments.
With Goodnotes, you’ll get the app for your iPad, iPhone, and Mac without any extra purchases required. You’ll even be able to get a Windows and Android version (separate purchase required). This means Goodnotes users can enjoy the app across all their products and devices.
With Notability, you can get iOS, Mac, and Web apps, and the Notability Cloud will automatically sync across them.
As far as updates are concerned, Goodnotes still appears to make all content and updates available for every user inside Goodnotes, with the main limitation for free users being restrictions on the amount of content you can create inside the app, rather than the features available for use.
Notability has said that new features may be locked behind the subscription requirement, depending on the feature and how expensive it is to maintain. With that in mind, it’s difficult to say how the company will decide which features will be available on the free plan and which will remain in the paid tier.
Verdict
If you’re looking strictly at costs, Goodnotes is still your best bet (even with the new subscription plan). The subscription cost is less than Notability’s, and you’ve also got the option to make a one-time payment to save money if you’re planning to use the app longterm.
But keep in mind that $20 per year for a Notability subscription equates to about $1.65 per month. That’s a small price to pay if Notability is an app that you think you’ll really love.
Goodnotes vs. Notability: Final verdict
When we first created this guide, we went into the Goodnotes vs. Notability debate completely blind, without looking at what others had to say before making our decision.
In the past few years, we’ve watched both apps grow and evolve. As a result, our position has shifted.
Based on what we see and how we think we (and our readers) would use these apps, we believe Goodnotes is currently a better value for most users.
However, we still believe that Notability is a more practical notetaking experience. It’s still a great tool for someone who just wants to take notes and get work done — especially on an “as needed” basis.
If you’re opening your notetaking app for a specific purpose and don’t plan to spend much time with it afterward, the tools and features that Notability provides are probably a great fit.
But Goodnotes feels nicer to use, especially over the long term. The app has some incredible features, and, overall, the document creation workflow and user interface feel more complete.
When you’re just jotting down your thoughts, creating a sketch, or looking for a dedicated workspace that you can truly call your own, the customization and functionality that Goodnotes offers makes you feel more comfortable and in control.
And that’s hard to ignore.

FAQ
Is Goodnotes or Notability better for college students?
Either app can work for college students, and the one you choose will depend on your specific needs and budget.
Both apps offer some great features for studying, such as the tape tool and AI-powered quizzes and flashcards.
However, some of these are only available with a premium subscription. For college students who are on a budget, you’ll need to decide which you can afford.
Goodnotes has a lower subscription cost and the option of a one-time fee that’s much more affordable, with all the features most students will need and then some. It offers more customization, better organization, allows for collaboration, has AI-powered writing tools, and has exam prep materials, making it a pretty strong choice for college students.
Keep in mind that both Notability and Goodnotes are free for any educational institution using Apple School Manager, so the cost may not be a factor if your school is a participant.
Are these apps worth paying for?
Goodnotes offers a subscription plan, but you can also choose to pay a one-time fee for full access to the app and most of its features. If you plan to take a lot of notes, it’s more than worth the cost.
Notability Plus requires a yearly subscription, which is a commitment. If you prefer the app's simplicity, it may be worth the investment.
Can you make templates using Goodnotes and Notability?
With the release of Notability’s Gallery, users can now create their own custom templates to use in the app. You can read all about the Notability Gallery and how to make templates right here.
While you can’t really create custom templates inside of Goodnotes (other than changing the page size and the colors), you can create a template from an existing page. You can also import custom templates into the template library for future use.
How do Goodnotes and Notability handle imported objects like PDFs?
Both apps let you import PDF files, images, and more. This is one area where the two apps are pretty similar.
While the Goodnotes user interface when annotating imported objects is more intuitive, Notability offers the same tools and ability to markup your documents.
What hardware do I need in order to use these apps?
Notability is available on Mac, iPad, iPhone, or Web.
Goodnotes is available on Mac, iPad, iPhone, Android, and Windows.
Regardless of the platforms available, we recommend the iPad and an Apple Pencil, as that makes the most sense for digital notetaking purposes.
For a more natural experience, we also recommend picking up a Screen Protector by Paperlike and our Pencil Grips for maximum comfort during long notetaking sessions.
Can I sync my notes and apps across all platforms?
The answer depends on your hardware setup.
Both Notability and Goodnotes users can sync notebooks and information across all Apple platforms (macOS, iPadOS, iOS) without issues. If you’ve purchased the Android or Windows version of GoodNotes, you can sync to those devices as well. For Notability, the new Notability Cloud will automatically sync to the Web version, too.
Goodnotes already lets you share notes across platforms, but to sync your entire notebook library, you’ll need Goodnotes Cloud. The pilot program for this is rolling out, so you can expect to see it in the future, if you haven’t already been invited to use it.
Final thoughts
Goodnotes and Notability are both strong choices in 2026, and they’re closer than ever in core features. The real difference is how each app fits into your routine: how you like to organize, how often you revisit old notes, and what you need your notes to do after you write them.
If you’re not sure which direction to go, test them the same way you’d actually use them. Create a few notes, import a PDF, record audio once, and try finding something you wrote a few days later. See which one feels better and which one works best for you.


