
| What are the top note taking methods? |
| The 5 note taking methods that are the most popular include Cornell Notes, the Outline Method, the Mapping Method, the Charting Method, and the Sentence Method. Each works best for different types of information and learning situations. |
Most of us have been taking notes since grade school, but nobody ever really taught us how to do it well. It’s just something you pick up along the way.
Turns out, there are some really useful systems out there, and they’re not hard to learn.
I’ll walk you through five of the most popular note taking methods, plus a couple of other approaches, so you can find the one that fits your needs.
What are note taking methods?
There’s no right way to take notes, but there are systems that help you capture and organize information. They can be very structured or more flexible, depending on what you’re trying to learn.
Cornell Notes are the best choice for studying and review, while Mind Mapping makes more sense for connecting ideas and brainstorming. The best note taking method is the one that fits your situation, which means you might use a different one depending on the day. (That’s what I do.)

Cornell Notes
Best for: Information you plan to study and review.
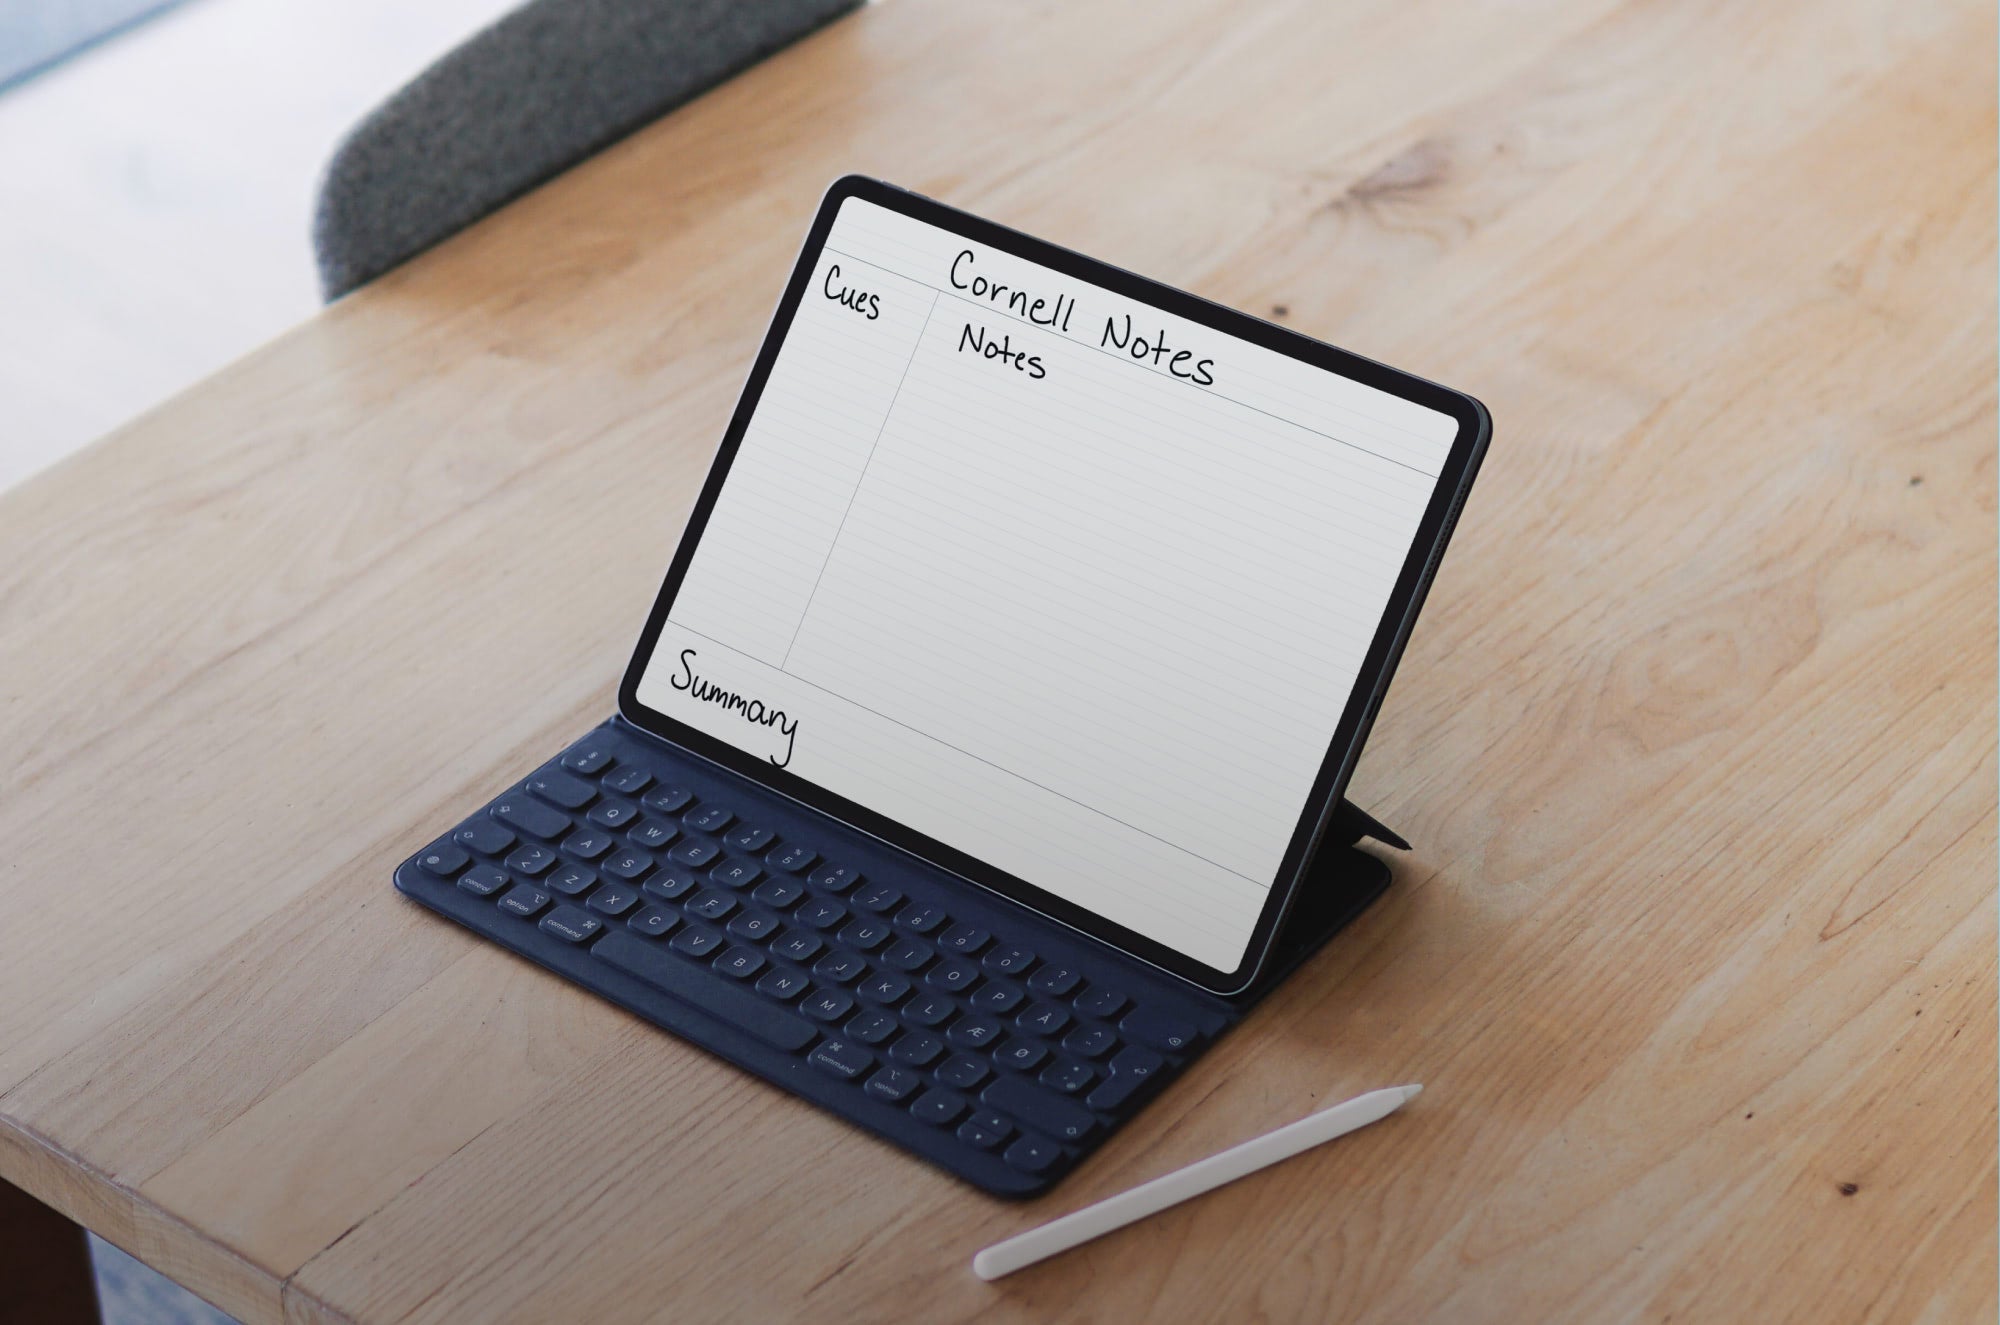
The Cornell method is probably the most popular and talked-about note taking methods. It divides your page into three sections: a notes section, a narrow cue column, and a summary at the bottom. As you take notes, you’ll write everything in the main section on the right, then pull out any key points or questions and put those in the left cue column. At the end, you’ll write a one- to two-sentence summary.
The extra structure takes more effort, but it also makes your notes more useful. You have to process the information as you go instead of just recording it all, and it forces you to pull out the important ideas and condense them into something easy to review. By the end, you have a ready-to-go study guide instead of a wall of text that, let’s face it, you’re never going to reread.
Here’s an example of my Cornell Notes about photosynthesis.

Try Cornell Notes when you:
- Need to study or review your notes later.
- Want to organize a lot of information.
- Have trouble figuring out what’s most important.
- Want your notes to double as a study guide.
You can draw lines to mark out sections on a piece of paper, or you can use a digital template included in most note taking apps for iPad. If you want the full breakdown, check out my complete guide to the Cornell Method.

Outline Method
Best for: Lectures, textbooks, meetings, and any information with a clear structure.
The Outline Method is the one that I grew up using without even realizing it had a name. You start with your main topic and then use bullet points and indenting to separate key details and supporting information. Keep the most important stuff as numbers or bullets and indent further right for any minor points, creating a clear hierarchy of information.
It’s the same type of outline you’d create for a paper or essay, but you’ll be building it as you learn, rather than planning ahead.
I took the same photosynthesis topic from above and redid my notes in the Outline Method, so you can see the difference.

The thing that I like about outlining is that it’s probably the fastest and the most familiar way to take notes. Also, if you’ve done it correctly, you should be able to easily pick out the main ideas and the details that support them without having to read through every word you’ve written, which is important when you’re trying to cram at 11 pm the night before a test.
Try the Outline Method when you:
- Are taking notes from something that has a logical structure.
- Need to capture a lot of information quickly.
- Want to easily differentiate between main ideas and supporting facts.
- Prefer clean, organized notes without a lot of extra work.
Outlining on paper or your iPad is pretty much the same; you can draw bullets and indent your writing yourself. A note taking app just gives you more formatting tools that make it easier.

Mapping Method
Best for: Brainstorming, connecting ideas, and seeing the big picture.
The Mapping Method takes a completely different approach to organizing information. Instead of working from the top down, like you would on an outline or in the notes section of Cornell, you start with a central idea and build outward, creating branches for related topics and details.
Because of that, it might feel a little uncomfortable at first. I don’t typically use it for lectures or meetings, mostly because I don’t know how much space I’ll need for each branch. But when I want to brainstorm or see how ideas connect, I use this method.
I’ve already shown you notes on photosynthesis in the previous two methods, so let’s use that same example here so you can see what that would look like as a mind map.

You can glance at the map and see the main idea, the concepts connected to it, and the details that support each one. That’s why it’s so great when you’re brainstorming, trying to understand the bigger picture, or studying a topic with a lot of related concepts.
Try the Mapping Method when you:
- Want to see how different ideas connect.
- Are brainstorming or generating ideas.
- Are studying a topic with a lot of related concepts.
- Prefer visual notes over traditional lists.
- Need to see the bigger picture before getting into the details.
On paper, you can start with your main idea in the center of the page and just draw branches as you go. I prefer to do mind maps on the iPad because I can lasso and move content to create more space or even just make my notes smaller so they fit better when I inevitably misjudge how much room I need.

Charting Method
Best for: Comparing facts, categories, or data.
Charting turns your notes into a table, which means you’ll have to get it set up ahead of time. You’ll divide your page into columns based on the categories you’re comparing, then fill in the details as you go. Think dates, names, causes, or effects. Really, it’s whatever categories that your topic would naturally break up into.
It’s not really great for lectures, because you need to know the categories ahead of time. But if you already know you’re going to need to compare several things side by side, it’s an easy to way to organize your information.
It’s probably not a great one to use for something like photosynthesis, but you could use it to organize the process by stage/part, what happens, and the details. Your notes would look something like this.

What’s nice about this method is that you can scan a row or column to make connections immediately, instead of reading through a page of notes.
Try the Charting Method when you:
- Need to compare categories or ideas.
- Are taking notes on information with clear patterns or groupings.
- Have lots of facts to organize.
- Want to make your notes easy to scan.
- Are studying a topic where differences between concepts matter.
As you can see from the example, it’s easy to draw your own rows and columns. That’s what I did, even though I was using my iPad. But it’s still much easier to adjust your layout or move things when you’re working in a note taking app.
The Boxing Method is another note taking technique that’s very similar to this, so I’m not going to do a full review of it. Basically, instead of using rows and columns, you’d separate related information into visual boxes. Instead of comparing, it’s more about grouping topics.

Sentence Method
Best for: Fast-paced lectures, meetings, or anything moving too quickly to let you sort as you go.
I think the Sentence Method is technically what I used as a kid. I’d like to say I was outlining because I used bullets, but really I was just making a new bullet for each sentence, not creating a hierarchy. And that’s basically what this method is.
You write each new piece of information in its own sentence or bullet, and just keep doing that straight down the page. You’re not trying to organize or categorize or create a hierarchy. You’re really just trying to keep up.
Here’s how that would look with the same photosynthesis example I’ve been using.

It’s great when you need to take down information fast, but I only use it if I absolutely have to because I don’t find it as helpful. It just gives you a bunch of bullets to read through, with no structure or organization, which makes it difficult to study or review later.
Try the Sentence Method when you:
- Need to take notes fast.
- Don’t know how to organize the information ahead of time.
- Want to capture lots of details without worrying about formatting.
- Prefer simple, straightforward notes.
This is probably the one method that you’d do exactly the same on paper or on an iPad. But when you go back to review, the nice thing about digital notes is that you can use the lasso to move or rearrange things. This means you can take notes super fast, and then you can add the organization, hierarchy, or whatever structure you want later.

Other note taking methods to try
The five I covered above are the most popular, but that doesn’t mean they’re the only ones out there. Search the internet and you’ll be surprised by how many you find, but most are just a different take or a slightly different setup than the ones above. There is one other method that’s pretty different, though, and that’s sketchnoting.
Sketchnoting is best for visual learners or creative subjects. It’s what you’d use if your notes need a lot of drawings or diagrams, or if you just need to see what’s happening instead of reading about it.
You can take a look at our full guide if that sounds like something that would work for you.

Tools for note taking
You don’t need a fancy setup, but you do need to make some decisions on what to use to take great notes. I’d recommend switching from paper to digital note taking, so that’s what I’m going to focus on here.
Besides your iPad and Apple Pencil, the first thing you’ll need is a note taking app. Goodnotes and Notability are the two most popular, but they’re far from the only options.
| App | Best For |
| Apple Notes | Free, comes installed on iPad. |
| Evernote and OneNote | Good for note taking and productivity/ |
| LiquidText or MarginNote 4 | Best if you do a lot of research and work with PDFs. |
| Noteshelf | Great for customization and cross-platform compatibility. |
| MyScript Notes | Excellent hand-writing recognition. |
Not sure which one to use? Take a look at my guide on the best note taking apps for iPad to compare them.
The next thing you may want to add is a template, especially if you plan to use the Cornell method or something more structured. You can find a lot of these built into your note taking app or in their gallery/store, but you can also search the web or Etsy if you don’t like any of those. I’ve also put together a blog filled with my favorites, if you want to see what’s out there.
And if you’re using your Apple Pencil to handwrite your notes, there’s another thing to think about, which is how it feels to write on a glass screen. (Spoiler alert: it sucks.)
It’s slippery and makes it hard to control your strokes, leading to messy handwriting and mistakes. A Paperlike Screen Protector adds friction between your Apple Pencil and the glass, bringing back that pen-on-paper feel that you were missing.
There are a whole host of other tools that aren’t necessarily essential, but that will make your life easier if you’re taking notes on your iPad. You can take a look at my favorites here.
Tips to stick with it
Choosing your note taking method is the easy part. Sticking with it until it becomes an ingrained habit is harder.
I’ve tried more note taking systems than I can count, and I can tell you that I’ve quit using just as many. If you’re stuck in the same boat, here are some tips that should help:
- Set things up ahead of time. The more steps in your system, the less likely you are to keep up with it. That’s why it helps to have a template that you can use when you open a new note. If you’re using a method that doesn’t have one, try to get it organized and/or drawn out ahead of time. That way, you’re ready to go when you need to take notes.
- Keep it simple. No matter which method you choose, don’t add anything extra until you’re comfortable with it. For example, if you’re mind mapping for the first time, just draw your nodes and fill them in. Don’t worry about color coding. Same goes for any other method. You don’t need to highlight or get creative in how your notes look. You can worry about that kind of thing later.
- Don’t aim for perfect. I think this rule can be applied to pretty much anything in life, but especially here. Messy notes are fine, as long as they’re legible. The more time you spend formatting or making your handwriting perfect, the less time you have to actually get your notes on the page. You can always clean them up later. (Once you’ve got that down, check out my blog on how to take neater notes.)
- Match the method to your topic. You don’t have to use the same note taking method every single time. I used photosynthesis as an example for every method, but you can see that some are obviously worked better than others. Pick the one that makes the most sense with what you’re learning. For example, I like charting for history notes because I can keep dates, names, and facts in separate columns so I always know who did what and when.
- Review your notes. If you really want to learn the material, you can’t just take notes and be done. You need to go over it. A lot of these methods work so well because they force you to go over them again. For example, with Cornell, you have to go back and read through your notes to pull out the key details for the cue column and write your summary.
At the end of the day, the best note taking method is the one that you continue to use.
Final thoughts
I’ve used every method in this post at some point in my life, and I’ve found them all useful in different ways. Go ahead and try them out yourself and figure out which one (or ones) you like. And don’t forget to study and review your notes when you’re done. That’s the most important part.
Frequently Asked Questions
What are the best note taking apps for iPad?
A: Goodnotes and Notability are the top two ranked iPad apps for note taking, but there are plenty more that are just as great. It depends on how you like to take notes and what types of notes you’re taking. Take a look at our best note taking apps blog to compare the most popular choices.
What are good free note taking apps?
A: While most note taking apps have a free version with limited tools, there are a couple that are completely free, including Apple Notes and CollaNote.
What note taking apps are best for students?
A: Both Goodnotes and Notability include a lot of study tools, like flashcards and quizzes, alongside their note taking tools, so they’re particularly good for students.
Should I use an iPad for note taking?
A: There are a lot of advantages to taking notes digitally, including assorted tools that you don’t have to carry around, the ability to move or rearrange content, a search function so you don’t have to read through all your notes to find what you’re looking for, and much more.