


Everyone agrees that notetaking is an effective strategy for study and informational recall.
Whether you’re trying to ace your next exam or you need to summarize a meeting with clients and business partners, a good set of notes can go a long way toward keeping relevant information top of mind.
But, while jotting down a handful of bullet points is a great place to start, learning how to take effective notes in an efficient way is a little more complex.
In this article, we’ll show you a step-by-step process that can increase the effectiveness of your notes.
Let’s jump right in.
#toc#
What you’ll need
Before we get into how to take the most effective notes, you’ll need to gather all your supplies.
While the tools you need will vary based on the notetaking system you choose to use (more on this below), here at Paperlike, we’re all about using digital tools to make our lives easier.
The steps we’ll cover in this article can work for both pen and paper or digital notes, but we’re going to show you how they would work in a digital environment.
With that in mind, these are the main tools that we recommend:
- Digital tablet.
- Stylus.
- Notetaking app.
- Screen protector.
- Case.
For a more comprehensive list of all the tools you might want to pick up for digital notetaking, plus recommendations on which brands we like for each category, check out our buying guide for digital notetakers.

#caption#Image: leungchopan on Envato
#alt#A laptop is open with a notebook laying on the keyboard and a tablet is off to the side.
Step 1: Choose your notetaking space
The first step is to decide where and how you’re going to take your notes. This might seem obvious, but in a world where digital technology is constantly advancing, the answer might not be as simple as you think.
The question of whether to take analog or digital notes is a highly debated topic, and the answer is different for everyone. Both forms of notetaking have their benefits and drawbacks, so you’ll have to decide which works best for you.
Let’s take a closer look at each notetaking method.

#caption#Image: leungchopan on Envato
#alt#A person is writing on paper in their lap with a white pen.
Analog
Using pen and paper is a tried and true method that’s worked for notetakers for (literal) centuries.
Chances are high that you took your own notes this way in high school, and this approach will provide a certain level of comfort because of its familiarity. But, like all things, it does have its downsides.
If you decide to go this route, here are some of the benefits you’ll get:
- Familiarity. As mentioned above, writing with a pen or pencil is familiar and comfortable for most people, and you won’t have to learn how to use any new tools.
- Organizational options. You can choose between using a notebook with dividers or tabs or using a selection of separate, individual notebooks to differentiate between classes or topics.
- Ability to customize. You can get creative with colored pens and other tools to customize your notes in a way that makes sense to you.
- Affordable. Notebooks and pens won’t cost as much as electronics and digital devices, even when buying enough supplies to take notes for multiple semesters and/or years.
There are some drawbacks to using traditional tools that you’ll want to take into account, which include:
- Inconvenience. You’ll have to carry around a bunch of heavy notebooks, pens, highlighters, and whatever other tools you need to take your best notes.
- Time-consuming. Writing out all your notes by hand takes time and effort, especially if you need to get pretty detailed or add diagrams, charts, or graphs.
- Missing out on technological advantages. You can do things with digital tools, like adding images or recording audio, that give you a major advantage when it comes to capturing and reviewing your notes.

#caption#Image: Burst on Unsplash
#alt#A laptop sits open on a surface with hands typing on the keyboard.
Digital
With all the advances in technology, typing notes on a laptop has become increasingly popular. Going with this approach makes sense in a lot of ways. But that doesn’t mean that it’s a perfect solution.
Here are some of the benefits of using a laptop for taking notes:
- Efficiency. Typing is much more efficient than handwriting your notes. You can quickly capture the entire lecture or meeting almost verbatim.
- Convenience. Not only will you need to carry around just one notetaking tool, but you’ll also have the ability to use all the technology tools that we mentioned above.
- Faster. It’s faster to type your notes, and it’s also faster to get started. Just open up your word processor (Microsoft Word or OneNote, Google Docs, Notepad, etc.), and you’re ready to go.
- Easier to utilize. Keeping your notes neat and organized is a breeze, and you can copy/paste, find/replace, or search your notes with a few simple keystrokes. You can also share your files with coworkers or other students, making it easy to collaborate and work together on projects.
Laptops may seem like the best notetaking tool, but they’re not without some disadvantages, including:
- Lower test performance. Because typing is so fast and easy, most students end up taking notes verbatim instead of actually listening and getting a good understanding of the material, leading to lower retention rates and worse test scores.
- Less useful notes. The larger quantity of notes taken by laptop users can be overwhelming and difficult to sift through for the most important facts, making them harder to study and review.
- Distracting. Notetakers may find themselves periodically checking their email or social media, browsing the web, or utilizing any of the other functions on their laptop instead of focusing on their work.

#caption#Image: itchaznong on Envato
#alt#A man is sitting at a table and holding an iPad and an Apple Pencil while looking at a book off to the side.
Analog vs. digital: A middle ground
If you’ve looked at both options and you’re feeling a bit confused about the best approach, we’ve already got the perfect solution for you: digital tablets.
Digital tablets bridge the gap between these digital and analog notetaking options by offering the best of both worlds.
With a stylus, you can take digital notes by hand just like you would using a traditional method. This familiar approach is ideal for long-term knowledge retention, and it takes advantage of skills you’ve already learned.
At the same time, you can still bring the power of digital technology into your notetaking process. Digital tablets allow you to do any of the following:
- Take handwritten notes on endlessly scrolling pages (no need to swap between sheets).
- Record lectures as you take notes and timestamp the audio with your handwritten content.
- Use powerful search tools to study and review the notes you’ve taken.
And that’s only scratching the surface of what you can do with digital tablets.
The best notetaking apps offer templates, advanced organizational tools, and optical character recognition (OCR) that can recognize and search through handwritten text.
You can even import any handwritten notes from the past by uploading images of your note pages into your preferred app.
Here at Paperlike, we love using the iPad paired with our screen protector and the Apple Pencil to take our notes.

#caption#A notetaking structure, like the Cornell Method, keeps your notes more organized and makes them more effective for studying. (Image: Notability / Screenshot by Lindsay Armstrong / Paperlike)
#alt#A note page in the Cornell template with instructions on what to write in each section.
Step 2: Develop a notetaking structure
One of the most important steps to taking effective notes is to develop a notetaking system that helps you structure your notes.
Creating a consistent structure for your notes has many benefits. Some of these include:
- Better preparation. A notetaking structure helps you figure out what notes you should take before you even get started, and it takes some of the guesswork out of the notetaking process.
- Better organization. Most systems will also help you keep your notes neat and organized, making them easy to go over later.
- Effective notes. While every notetaking method is a little different, they all have one thing in common. They promote better learning and retention by focusing your notes on the main ideas (more on why this is important below).
It may take some time to figure out what method or structure to use, but the good news is that you can customize any system in a way that makes the most sense for you.
All of these methods can be used whether you’re taking analog or digital notes, so you’re not limited by the hardware you choose to use.

#caption#Image: nateemee on Envato
#alt#A person is holding an Apple Pencil and writing on an iPad.
Choose a notetaking method
There are plenty of different notetaking strategies and ways to format your notes. What works for one person may not work for another. That’s why it’s important to research and test out a few options to decide which works best for you.
Here are a few of the most effective notetaking methods:
- The Cornell Notetaking Method was created at Cornell University and is probably the most popular system out there. This notetaking technique requires you to split your page into three sections, with space for notes, questions, and a summary.
- The outline method keeps your notes completely structured, so you can easily differentiate between key concepts and supporting details. The hierarchical system makes it easy to sort through your notes when studying later.
- The charting method requires you to sort the important points into different columns. It’s pretty similar to a spreadsheet and may be perfect for certain types of notes where you need to keep track of relationships between facts.
- The mind mapping method is somewhat similar to charting, but it’s a more visual way of linking ideas and creating connections between concepts. By using circles or boxes around the main points, you can use lines and arrows to create those links.
If you’re still not sure which method is right for you or you’d like to learn more about these methods and a few others, we’ve covered them in more detail here.
When creating your notetaking system, keep in mind that you aren’t necessarily restricted to a single template, outline, or layout.
Some classes or lectures might be best served with one method over another, in the same way that many students prefer graph paper for math classes and regular notebook paper for English and history.

#caption#Many notetaking apps have different page templates to choose from built into the app. (Image: Goodnotes / Screenshot by Lindsay Armstrong / Paperlike)
#alt#Image of some of the available paper templates in Goodnotes 6.
Use a template
Whichever method(s) you choose, don’t forget that many notetaking apps offer templates that you can use with a tablet. Be sure to take advantage of them. Using predesigned templates is far more convenient than having to write or draw them yourself!
It may take a little extra work to build a template if you have to do it by hand, but that all depends on the system you choose to use. Some take quite a bit of setup, while others will only take a couple of minutes.
If you’re going with the Cornell Method, for example, you’ll only have to draw a couple of lines to split your paper properly. The outline method is another one that won’t take much extra work because you’ll be building it out with headers and bullet points as you take your notes.
Fortunately, if you choose to take digital notes, most notetaking apps have premade templates built into the program.
Goodnotes and Notability both offer Cornell templates and others in their basic selection, as well as the ability to check out their respective shops/galleries for additional layouts. You can also find plenty of templates on the internet just by doing a quick search.

#caption#Notability allows you to choose from in-app templates as well as search the Notability Gallery for more options. (Image: Notability / Screenshot by Lindsay Armstrong / Paperlike)
#alt#Image of page template options in Notability.
You don’t have to use a template (though it’s easier) if you’d rather create something yourself. In this case, you’d probably want to use similar headings, subheadings, and bullet points to build out a replicable structure that you can use over and over again.
Or, if you prefer mind mapping or charting (Apple Freeform or Nebo are great apps for that), you could use boxes for main ideas, circles for subpoints, etc.
Keep in mind that every lecturer presents information in a different way, and that can also affect how you take your notes.
So what do you do when your professor or coworker throws you a curveball?
We’ll cover that in the next step.

#caption#Image: chartchaik1 on Envato
#alt#Pages with charts and graphs sit on a desk with a pen laying on them.
Step 3: Make a plan for handling unconventional information
Not all of your notetaking will be as simple and straightforward as writing out the key terms and information. Whether you’re in a work meeting or a lecture, some of the information you need won’t come from listening to the speaker.
Visuals (diagrams, charts, etc.), handouts, or presentation slides are all supplemental materials that can help you fully understand the topic you’re learning.
If you’re going the traditional paper and pen route, capturing the visuals isn’t easy. You’ll have to try drawing or copying them into your notes.
For physical materials, you can print out slides and annotate, underline, and highlight directly on them and on your handouts.
The downside (aside from the fact that printer ink costs a fortune) is that you’ll have to find a place to keep them! You can stick printouts in your notebook, but you run the risk of them sliding out. Your other option is to get a separate folder to store them.
That's one reason we prefer digital. With digital, you can consolidate all your notes, regardless of how you receive them, into a single format.
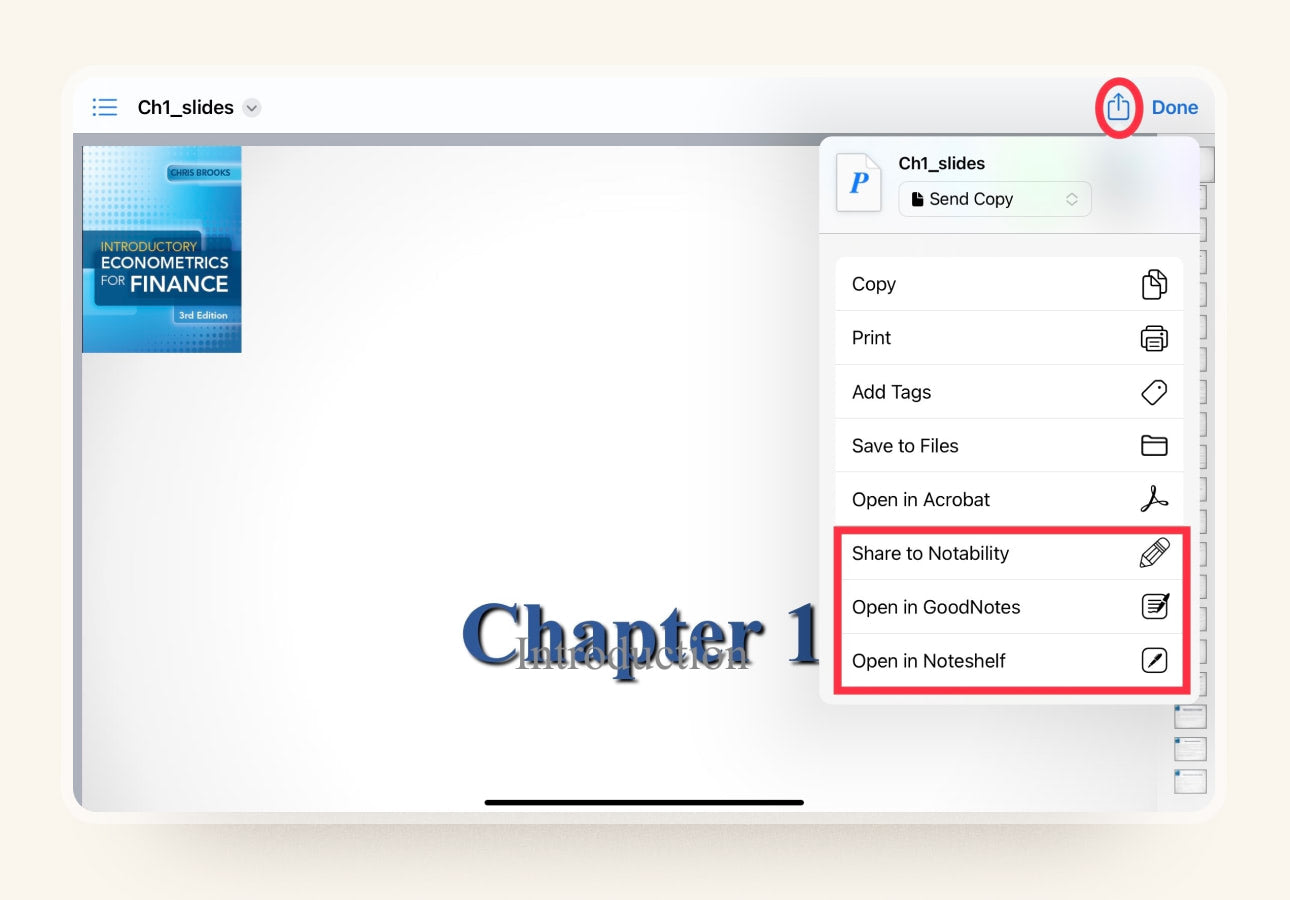
#caption#Importing PowerPoint slides into your favorite notetaking app is quick and easy. (Image: Screenshot by Lindsay Armstrong / Paperlike)
#alt#Image of PowerPoint presentation slides on Introductory Econometrics for Finance with the iPad Share button circled in red and a dropdown menu with the options to share or open in Notability, Goodnotes, or Noteshelf boxed in red.
Import supplemental materials
Most notetaking apps allow you to import images and documents into your workspace.
This process may vary based on your preferred notetaking app and the type of content that you need to import.
Here are a few examples of how to import content into Goodnotes:
- Slides: Download the PPT file to your iPad, open it, tap the Share button, and select Open in Goodnotes.
- Handouts: Tap the + button on the Home Page and tap Scan Document.
- Visuals, slides, and handouts that you want to import directly into a current note: Take a photo of the content with your iPad, open the note you where you want to add the image, tap the image icon, and choose the image you want to use.
Once you’ve uploaded these materials to your app, you can use the pen and highlighter tools to annotate and mark them up, just like you would with paper and pen.

#caption#Importing visuals like charts, graphs, and diagrams directly into your notes can save you a lot of time instead of trying to draw and recreate them yourself. (Image: Goodnotes / Screenshot by Kayla Williamson / Paperlike)
#alt#An image of a note in Goodnotes that says, “Goodnotes lets you add images anywhere in your notes. You can move, resize, and position them any way you want.”
Some apps (like Goodnotes) give you a lot more freedom in how you want to place your images. You can plant one right in the middle of your handwritten notes, and you can adjust the size, tilt, and exact placement to your liking. Other apps may force you to add images to the next blank space.
Regardless of placement, you’ll still be able to have all your visuals easily accessible within your digital notes.

#caption#Image: jacoblund on Envato
#alt#A woman sits at a table writing notes with an open textbook in front of her and a laptop next to her.
Step 4: Decide what information is relevant and/or noteworthy
Knowing what information will matter in the future can help you cut down on the notes you need to take.
Before heading to class or a meeting, take a minute to search for clues about your next topic. Check the syllabus. Review any handouts or required reading. Skim your notes from the last meeting or lecture.
You won't always be successful, and you should always approach every new lecture or meeting with an open mind — but it never hurts to take five or ten minutes to prepare.
The most helpful thing you can do is take a look at your textbook before class, even if you’re not required to do the assigned reading until later.
Here’s how you can use your textbook to help you figure out what to take notes on during the lecture:
- Skim through the appropriate sections.
- Create an outline based on the headers, subheaders, keywords, and review questions from the book.
- Take note of anything that you don’t understand, so you can focus on learning that concept during class.
Afterward, your notes should look something like the example below.

#caption#You can create a skeleton outline with headers and subheaders based on the assigned reading and fill it in during class. (Image: Goodnotes / Screenshot by Kayla Williamson / Paperlike)
#alt#Image of a handwritten outline about Metabolic Concepts with headers and subheaders for different sections.
Most of the time, professors expect you to do the assigned reading before class. If that’s the case, you can also use the notes you took during the reading as a reference so that you can focus on writing down anything new that wasn’t covered in the textbook.
This will help prevent duplicate notes and allow you to take down more details from the new topics or key points.
Side note: You can check out our blog on how to take notes from a textbook for tips on how to get the most out of your reading.

#caption#Image: monkeybusiness on Envato
#alt#An instructor stands in front of a group of students who have iPads, laptops, and notebooks out to take notes.
Step 5: Engage in active listening
Following all of the above steps before you even head to class or a meeting can start you off on the right foot, but if you don’t practice active listening during the lecture or presentation, it might be a wasted effort.
Whether your coworker tends to drone on or the lecture topic isn’t very interesting to you, it’s easy to quit paying attention.
Next thing you know, you’re in a Peanuts movie, and all you hear is, “Wah wah wah.”
To avoid Charlie Brown syndrome, try some of these active listening techniques:
- Avoid distractions. You can avoid any distractions by sitting up front, sitting away from friends, and turning off any notifications from your mobile devices.
- Participate. Ask and/or answer questions during the presentation and always keep your eyes focused on the speaker.
- Engage with the material. Focus on the words you’re hearing and try to understand what they mean so that you can put them in your own words.
Practicing these techniques will help you stay focused and engaged so that you don’t miss out on any of the key points that you’ll need to add to your notes.

#caption#Apps like Notability allow you to record audio and sync your handwritten notes to the playback. (Image: Notability / Screenshot by Kayla Williamson / Paperlike)
#alt#Image of the audio recording bar in Notability with handwritten text underneath that says, “Click the microphone to start recording audio. Click the play icon to listen and watch your notes come to life.”
Use audio recording
Active listening can be a struggle, especially if your mind tends to wander or you just can't engage with a given topic. Fortunately, you can use other tools to offset a lack of concentration.
Our advice: Record the lecture.
If there aren't any serious objections, use a notetaking app that syncs your notes with the audio. During review, play back the audio to understand what prompted you to write the note in the first place.
It's also possible to use an audio recorder or a smartphone to record the lecture. It will be separate from your notes, but it's still a powerful piece of information to have during a review.

#caption#Image: fauziEv8 on Envato
#alt#A group of tiles that spell out “Key takeaways” sits on a charcoal background with a pen lying in front of them.
Step 6: Capture the main points
The urge to jot down everything the lecturer says may be strong, but it’s impossible to fully comprehend the material when you’re copying it down word for word.
Studies have shown that the best quality of notes comes from only writing down the main points and any facts that help support those ideas.
Not only does this leave you with more effective notes in the end, but it also requires critical thinking and offers better memorization of the material long term.
So, what does this look like?
If you’re using an outline system, it would look something like the following example, with headers, subheaders, and bullets to differentiate between key points and supporting facts.
It’s also possible to create a similar structure by indenting details of your lecture notes in order to segment them if you want to avoid bullets.

#caption#When you’re taking notes, it’s important to capture the main points without adding too much detail. (Image: Goodnotes / Screenshot by Kayla Williamson / Paperlike)
#alt#Image of an outline full of notes about the cardiovascular system.
Other notetaking methods might look a little different than this, but the basic concepts are the same. In something like a mind map, you’d have your main points circled or boxed with your supporting facts connected by lines.
No matter which notetaking system you’ve decided to use, you’ll need to clearly designate your main points and your subpoints.
Tips for identifying main points
Still not sure how to pick out the key concepts and important points to write down?
Here are a few pointers:
- Pay attention to nonverbal cues. Some speakers may point, use gestures, or emphasize certain words. These usually indicate something important.
- Listen to opening and closing remarks. These sections will give you an overview or summary of the material, pointing you in the right direction.
- Look for signal words or phrases. There are plenty of clues that a speaker gives that you should write something down. Phrases like, “To sum up...,” “There are five ways...,” or “For example...”
- Listen for repetition. If your instructor or presenter has taken the time to say something more than once, it’s likely something to note.
By following these tips, you will be able to figure out what’s important to add to your notes.
Keep in mind that if you’ve been following all the previous steps, you’ll already have a good idea of what the lecture is going to cover, so it will be even easier to figure out what’s worth writing down.

#caption#Image: seventyfourimages on Envato
#alt#A woman sits at a table writing notes in a notebook with other students sitting further down the table doing the same.
Step 7: Use abbreviations or shorthand
Whether you’re typing or handwriting your notes, it’s almost impossible to keep up with someone who’s speaking. While Step 6 should help you keep your notes brief and to the point, you’ll still need to be able to get your thoughts down quickly.
A simple way to do this is to shorten what you actually need to write. Take a look at this example first, and then we’ll cover (below) how to create something similar.

#caption#These notes contain abbreviated words and symbols to take down the concepts quickly. (Image: Notability / Template by emilywood78)
#alt#Image of notes with abbreviated words and symbols.
There are a few different ways that you can maximize the quality of your notes while lowering the quantity:
- Write in phrases instead of complete sentences. Chances are high that not every word in the sentence is necessary for you to get the idea. There are plenty of words that you can leave out without losing the essential information.
- Use truncated words, abbreviations, and symbols. Many symbols and abbreviations are obvious, such as & for and, @ for at, and arrows for increasing, decreasing, higher, lower, or to connect points. Others may take a little more thought.
- Make up your own symbols or abbreviations for words. Just make sure that you’ll remember what they are (or create a legend for future reference)!
- Use shorthand. There are multiple different forms of shorthand, so you can research and learn the one that seems easiest for you.
Your best bet is to just choose the abbreviations and symbols that are obvious to you and leave out unnecessary words to avoid any confusion when reviewing your notes.
Abbreviate by sketching
Drawings and visuals are another way to quickly capture concepts. In many cases, you can create your own doodles or drawings that represent words or ideas instead of writing notes out.
These illustrations take up less space and help you better understand some of the important points, especially for visual learners.
This has become an increasingly popular way to take notes, so much so that it even has a name — sketchnoting. Sketchnoting is a great way to think outside the box and take notes in a unique and fast way.
Learn more about how to use sketchnoting to take notes.

#caption#Image: Benoît Deschasaux on Unsplash
#alt#A hand is holding a pen and writing notes on a piece of paper with two highlighters off to the left lying on a highlighted page of text.
Step 8: Leave space and highlight as you go
The entire point of taking notes is to have something to review later to help you understand the covered material.
We’ve already discussed plenty of ways that you can take the most effective notes, but there are a few other things you can do that will help when you get to the review phase.
Taking notes quickly during a lecture or meeting can lead to mistakes and missing information. To make up for that, leave extra lines and space between the main points so that you can come back later to rectify these issues.
If you’re using paper and pen, you’ll have to guess how many skipped lines you’ll need to leave on the page. The beauty of digital notes is that you can always add even more space later if you don’t have enough.
Highlight as you go
Your notes should already be short and to the point (if you’ve been following all our previous steps), but it’s still helpful to make your notes easier to skim and study later.
You can do this by highlighting or color-coding your notes as you take them. Using highlighters or different pen colors, you can quickly denote key ideas, changes in concepts, or even link information.
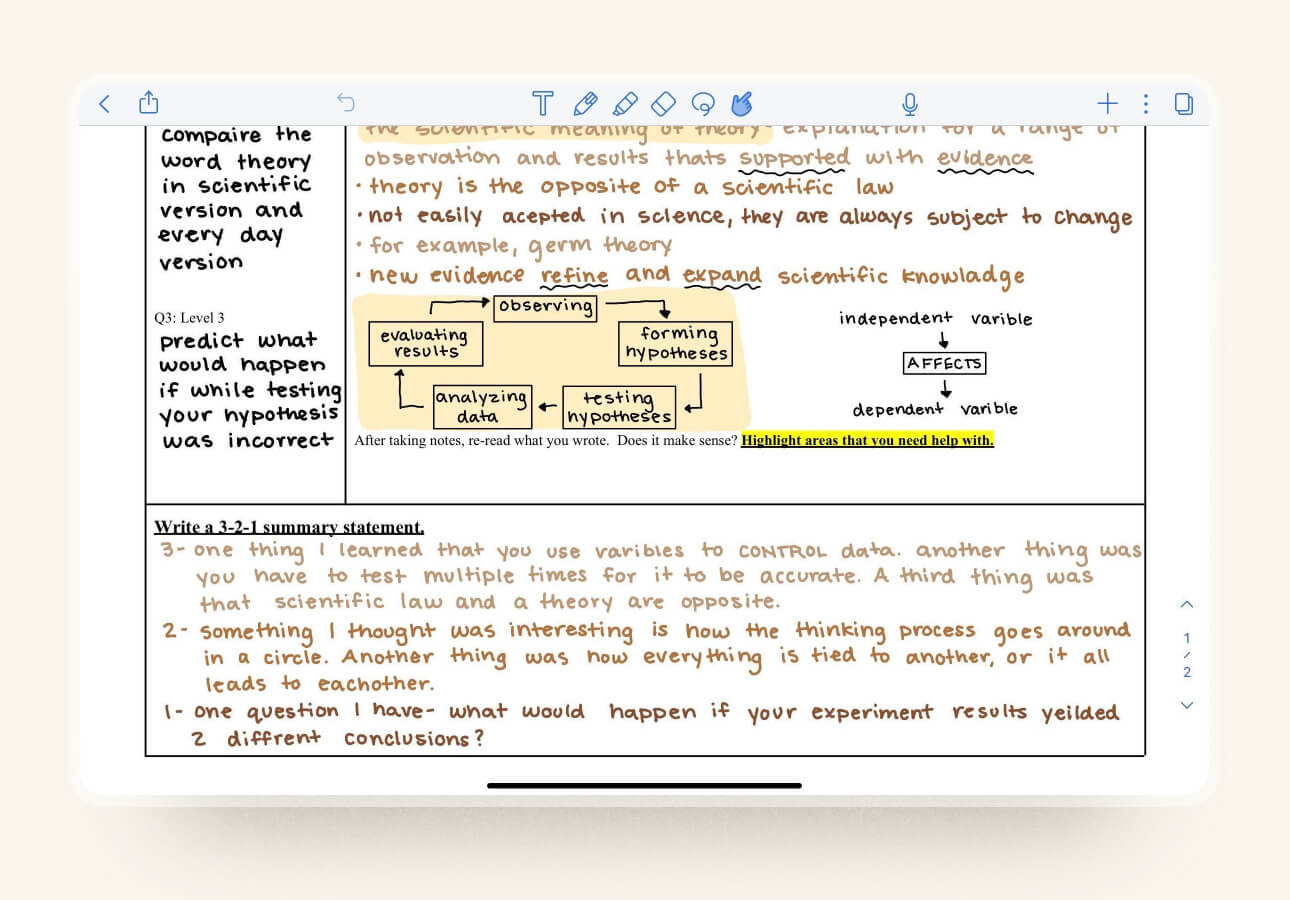
When you’re done, your notes should look something like this.

#caption#Highlighting in different colors helps to separate different types of content. (Image: Notability / Screenshot by Kayla Williamson / Paperlike)
#alt#Image of a page of notes about cataracts that are highlighted in different colors.
The different colors (especially if you’re using bright colors) should draw your eyes to specific words or phrases, allowing you to skip to those sections for review. When you’re studying and short on time, this can be a lifesaver.
You can finish this process during review, but it’s easier to remember what facts should be considered main points, which are subpoints, and how things are related when the information is fresh in your head.

#caption#Image: rfaizal707 on Envato
#alt#A stack of square notecards lies on a wooden table with a black question mark drawn on the top card.
Step 9: Write down questions
Questions help promote active listening, comprehension, and critical thinking, all of which are essential to the learning process.
That’s why we recommend that you create a space for questions somewhere in your notes.
Some systems, like the Cornell Method, already have a designated spot for questions and summary feedback, but in others, you’ll need to set aside space if the template you’re using doesn’t account for those items.

#caption#Keeping questions separate from the main body of notes makes them easier to study later. (Image: Goodnotes / Screenshot by Kayla Williamson / Paperlike)
#alt#Image of notes on a Cornell template about the Russian Revolution with questions on the left side of the page and answers/notes on the right.
There are two main types of questions that you’ll want to include in your notes:
- Questions that you think might be covered on an exam. These are the questions that the Cornell Method mainly expects you to focus on, and the split page sets it up so that you can add these questions next to the explanation or answer in your regular notes.
- Questions you have about the material. If something is confusing or you don’t understand the concept, write down the question so that you can find the answer later.
Listen carefully to any questions that are asked in class. If another student is confused about a topic, learning the answer to their question will also help you better comprehend the material.

#caption#Image: AmnajKhetsamtip on Envato
#alt#A woman holds an iPad in one hand while writing notes in a notebook with the other hand.
Step 10: Summarize your notes
Summaries are a great way to distill your notes to the essentials.
It’s best to create a summary after every major topic. This isn’t always possible during class if your lecture covers multiple topics, which is why Step 8 is so important. Even if you can’t get to it right away, if you leave space in your notes, you can come back and add a summary later.
To create a summary, you’ll need to really think about the material from your lecture or meeting. Then, in your own words, paraphrase the entire section into two to four sentences that convey the key points of the topic.
The easiest way to do this is to use the Cornell Method (see the example below) because your notes are already set up with a summary section at the bottom. However, you can create a space for a summary in almost any notetaking system you use, so selecting a different template can also work.
#caption#Summaries contain the most important information from your notes, making it easy to quickly comprehend the material later. (Image: Notability / Template by annabanana21)
#alt#Image of the bottom of a page of notes in the Cornell Method, showcasing the summary section.
While you’re creating your summary, you can use the possible exam questions that you’ve collected on the left side of the page (if you’re using the Cornell Method) to help guide your explanation of the topic.
Filling out this summary will leave you with a brief but thorough section of notes for quick review when you’re studying later.

#caption#Image: bernardbodo on Envato
#alt#Three people sit together looking at a textbook and writing notes.
Step 11: Review and revise
By the time you reach the review phase, your notes should feel mostly complete.
That doesn’t mean that you’re done!
To get the most effective notes, you’ll need to take the time to review and revise them.
If you’ve been following this guide, you probably left gaps and spaces on the page (see Step 8) so that you can circle back to supplement your notes with extra details.
While you review, take the time to go back and fill in those empty spaces that you’ve left with extra details (images, diagrams, summaries, etc.) to get a better understanding of those key concepts and ideas.

#caption#After class, you can go back and add relevant images that help you to understand the concepts. (Image: Notability / Template by ppaytin)
#alt#Image of notes about the skeletal system with relevant images added next to the handwritten text.
Read through your notes to make sure that everything makes sense and that you understand the concepts covered. If you don’t understand something, this is the time to look up more information to help you fully comprehend the material.
If you haven’t already highlighted all the main topics and ideas, supporting facts, and other information (Step 8), go back and do that now, as well.
After you’re done, reread and review in full. One of the best ways to ensure that you’ve captured all the essential information is to review your notes with others.
Find a friend, classmate, or coworker and compare your notes. You’ll catch mistakes more easily and be able to clarify any outstanding details you may have missed.
Once you’ve done this final review, your notes should be complete.

#caption#Image: Paperlike
#alt#An iPad with a screen protector lies next to graph paper and an Apple Pencil.
Take effective notes with Paperlike
We hope these steps will help you to take even better notes. If you need more notetaking assistance, you can check out our top notetaking tips here.
While you should now be able to take effective notes, you can improve them even more by using a Paperlike. Our screen protector adds the friction and resistance you need to provide a more natural writing experience, making it easier to handwrite your notes neatly and quickly on a digital screen.
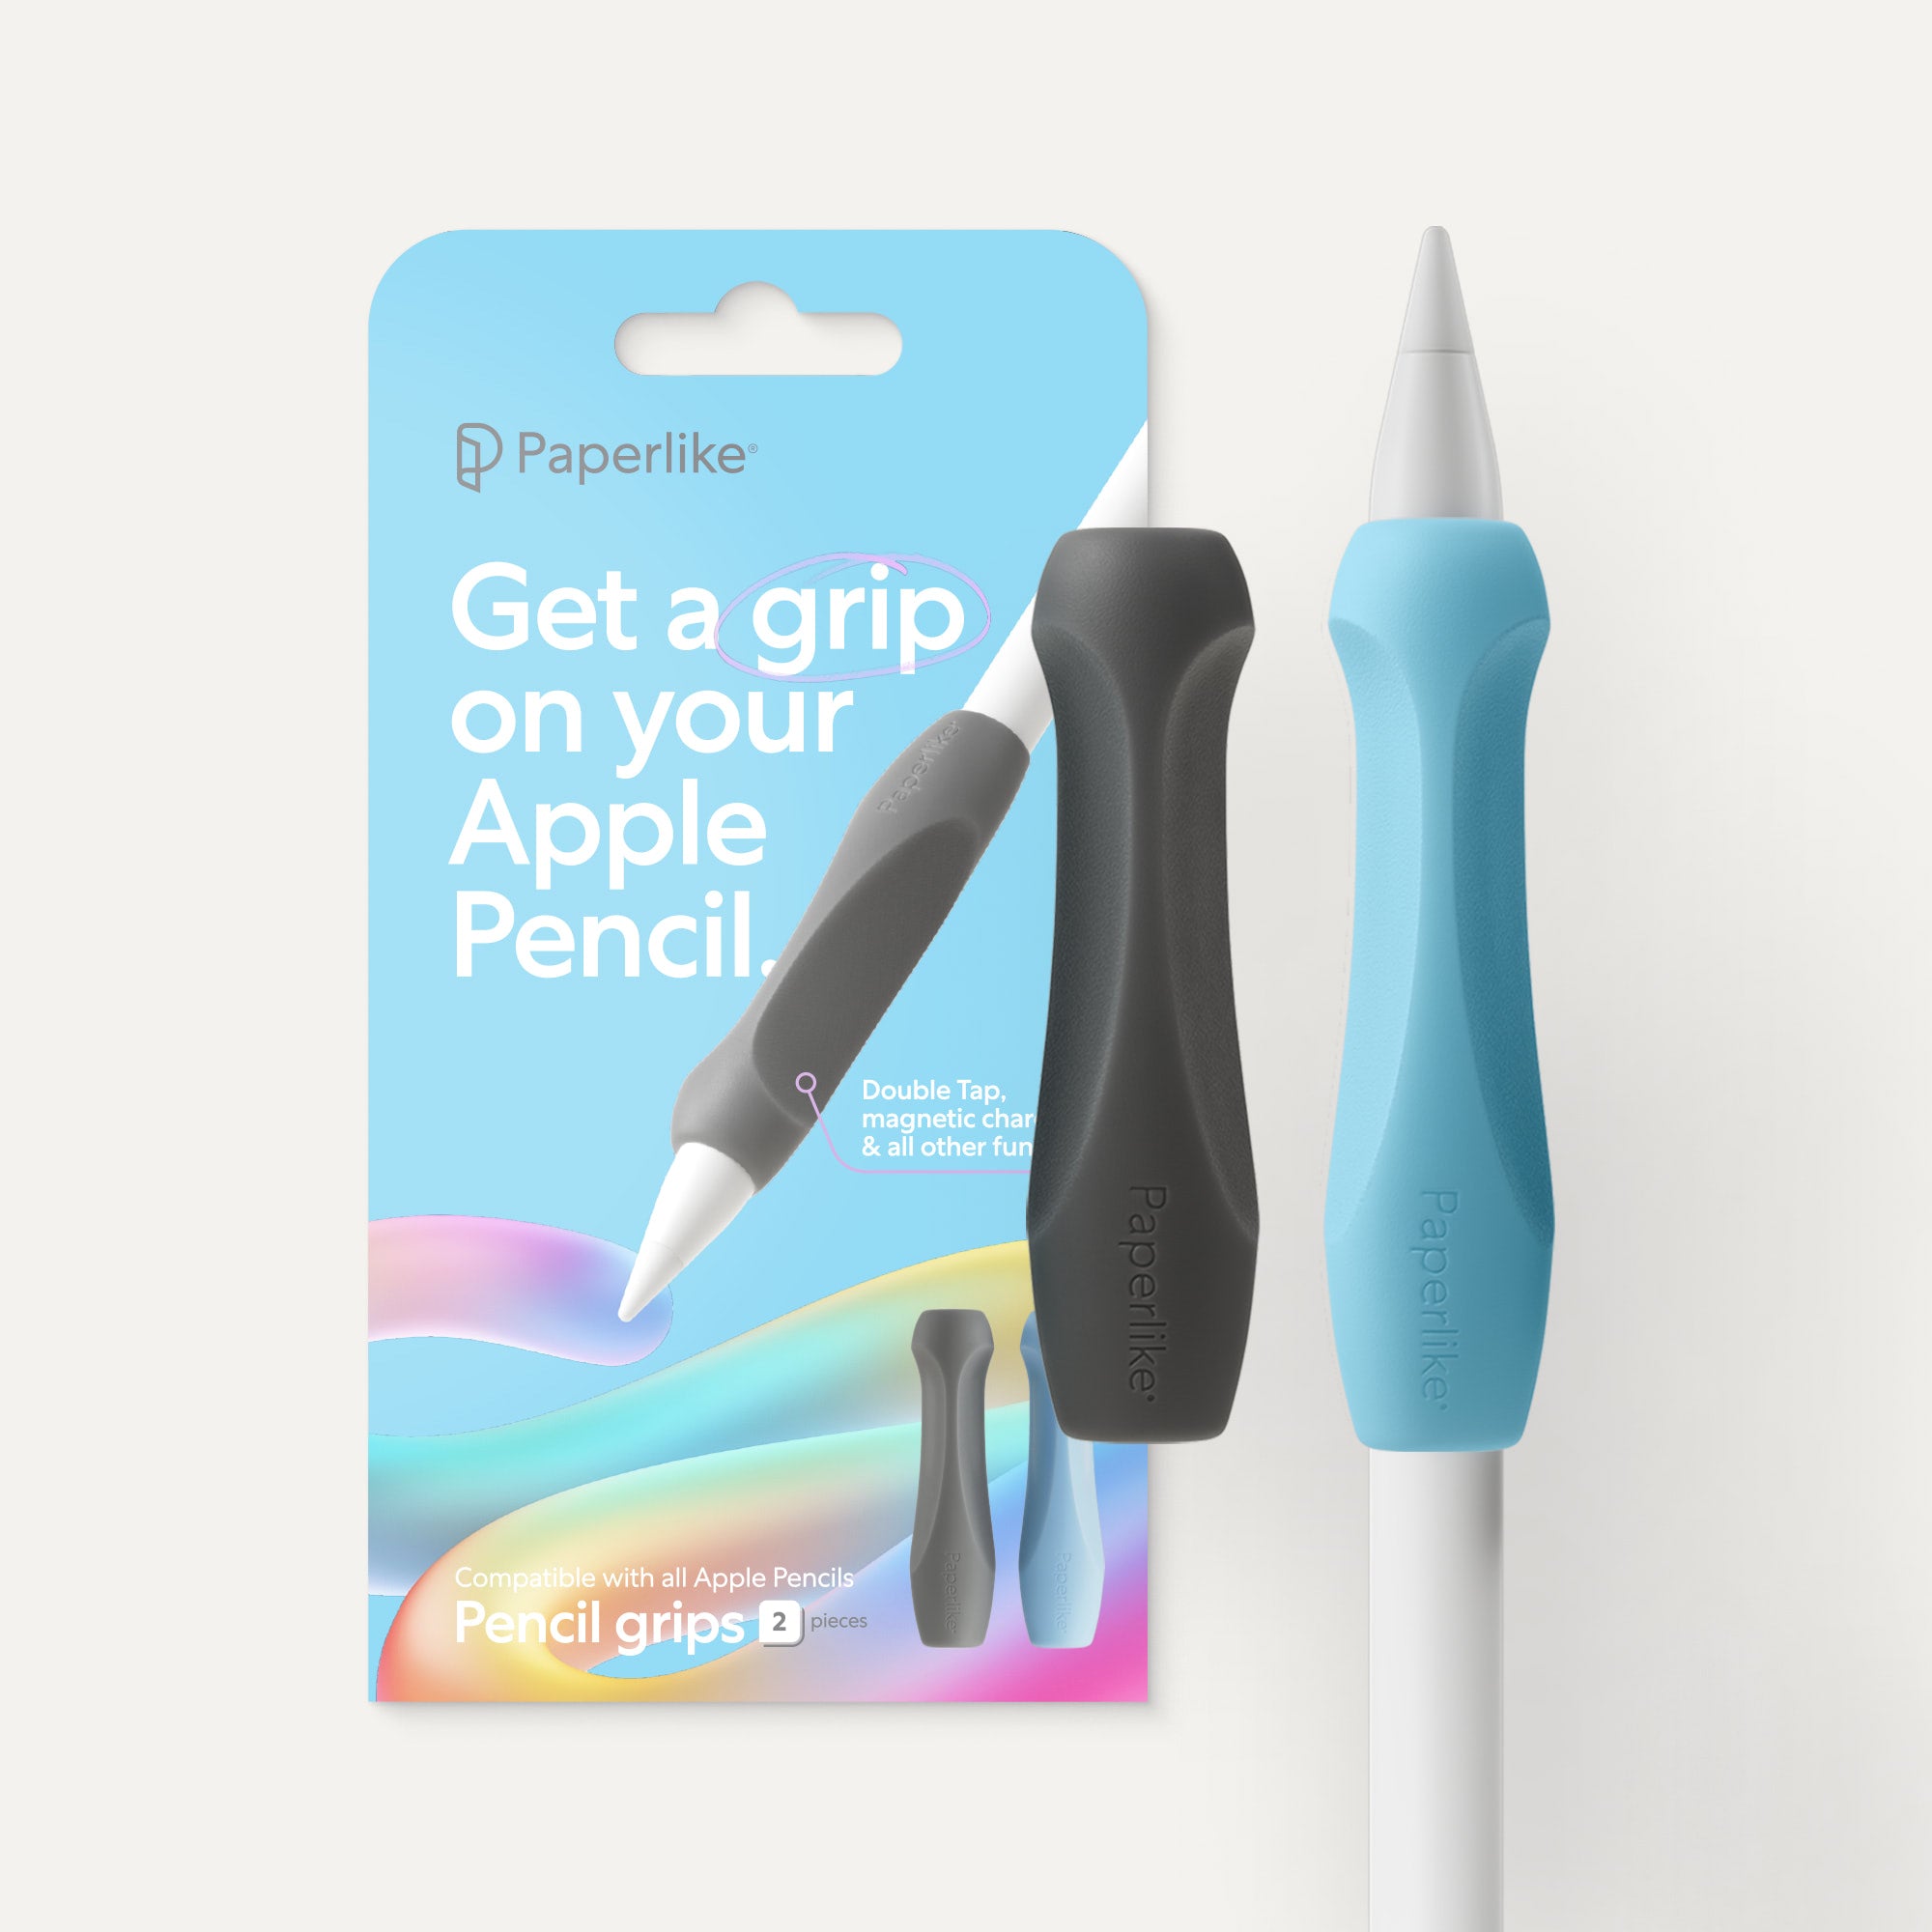
Level up your notetaking experience with a Paperlike, and don’t forget to try our Pencil Grips to reduce hand fatigue during those long writing sessions.


