


This article was originally published in 2022 and was updated in January 2026.
If you love the nice, neat look of typed text but prefer taking your notes by hand, you’ll love the MyScript Notes (Formerly Nebo) app.
While plenty of notetaking apps can convert handwriting to text, MyScript Notes is a cut above the rest in handwriting recognition, thanks to MyScript’s Interactive Ink technology.
MyScript Notes has been a top competitor in the notetaking world for years now, and it was named one of the Best Notetaking Apps of 2021 by AppleWorld, Forbes, and others.
But a great app needs more than one great feature to be successful, so how does MyScript Notes measure up against other notetaking apps on the market today?
Let’s find out!
Key Takeaways
- MyScript Notes is cross-platform compatible, allowing you to easily sync across all your devices.
- Handwriting recognition and conversion tools in MyScript Notes are superior to those offered by other notetaking apps.
- Gestures, sketching tools, math conversions, and other features allow for a customizable notetaking experience.

Specs, tech, & costs
One of the most unique things about MyScript Notes is that it is cross-platform compatible and available on iOS, iPadOS, Mac devices, Android, and Windows. Not only that, but you only have to buy it once, and you can use it on up to 10 devices! (Most other apps that offer both Mac and Android apps force you to purchase both.)
MyScript Notes also offers different pricing plans to fit your needs. Here’s a breakdown of the offerings and prices.
- Free 7-day trial includes most features with limited pages.
- $1.99/month or $7.99/year subscription for full access to all features.
- $24.99/lifetime, one-time payment for full access to all current features and future updates.
MyScript Notes was originally developed for the iPad and offered different add-on packs. But as the app became more popular, those features were rolled into a single offering, with the plans listed above.
Syncing & cross-platform
MyScript Notes is the only notetaking app (at this time) that charges a single price and covers all platforms.
You’ll need a MyScript account to sync across all your devices, but you can also sync your notes using iCloud, Google Drive, or Dropbox by changing the settings.
Family sharing for iOS devices is unavailable because you’ll need to create a unique MyScript account in order to manage your notes.
Additional accessories
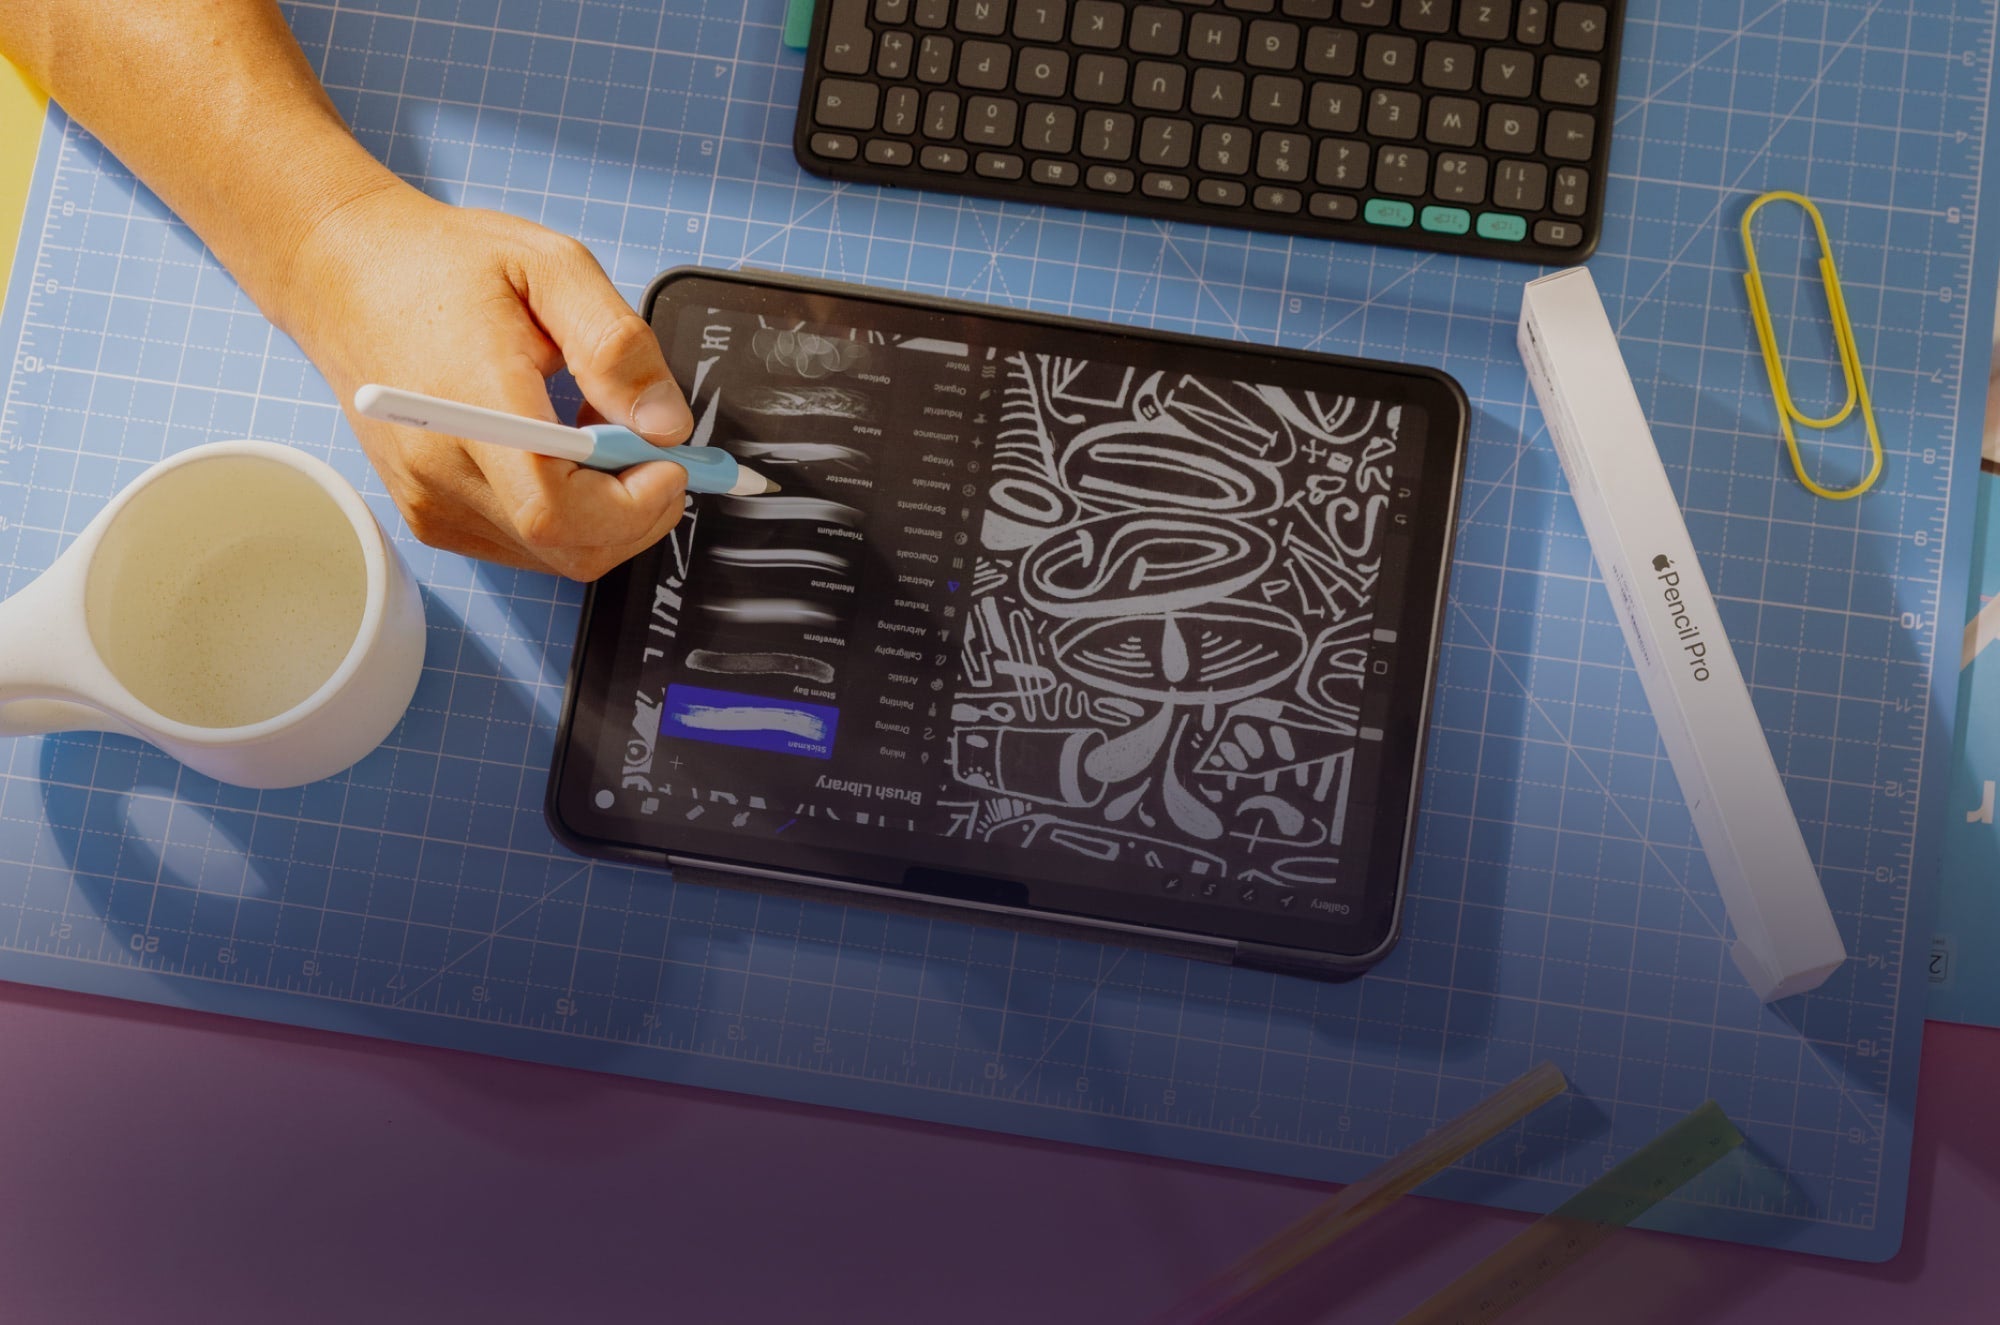
Since MyScript Notes is available on multiple platforms, you can use whichever device you want: iPhone, iPad, Mac, PC, or Android. While you can use your finger, MyScript Notes works better with an active pen, which means you’ll need an Apple Pencil or another compatible stylus.
To get the most out of the exceptional handwriting features, we recommend using an iPad Pro with an Apple Pencil Pro.

Note creation
MyScript Notes’ page setup is a little different than what you’ll find in other notetaking apps, but each new version gets a little closer to what you’d expect in a notetaking app.
When you go to create a new note, you’ll need to immediately choose whether you want a notebook, a board, a document, or to import a PDF. Each of these works a little differently and has a different use.

Notebooks
The notebook is likely where you’ll take the majority of your notes. It acts like a regular paper notebook and is very similar to what you’d find in Goodnotes. Like in Goodnotes, you’ll choose a notebook cover and title.
You can also choose the page size, orientation, and page color, and pick one of four page templates. These are pretty standard: blank, dotted, lined, or grid.
From there, you’re all set to start taking your daily notes.

Documents
Documents look like a lined sheet of paper and are great for more structured content, like checklists or math notes.
You can adjust the line spacing and font size for text conversion by tapping Settings > Writing > Text Display menu to customize your experience. You can also change the background color using the More button (three dots) in the upper right corner.
When you’re in a Document, handwriting recognition is active for text conversion, and MyScript Notes allows you to mix handwriting and text, even in the same sentence if you want! It does prefer text, though, and automatically offers a text preview when you are handwriting.
These pages also let you add different types of sections, like sketches, images, diagrams, math equations, and boards. This is something you can’t easily do in a notebook, which only allows you to add images.

Boards
Boards let you draw, write, doodle, and explore ideas freely, making them great for brainstorming sessions. There are no constraints on placement or positioning, with an infinite canvas, and the page resizes to fit your content.
By tapping on the More button, you can change the background to suit your needs. You’ll have four background patterns to choose from: grid, lined, dotted, or blank. You can also choose a background color here if you’d like.
MyScript Notes doesn’t automatically convert anything you put into this area, giving you greater freedom in what you’re able to do. But, if you decide you want to convert your handwritten text at a later time, you can select it with the lasso tool and tap Convert.

PDFs
The last option is to import a PDF document.
Once you have the PDF, you can edit it just like you would in a word processor. You can type, add perfect boxes around text, add colored backgrounds, and more.
Plus, using the PDF thumbnail sidebar, you can quickly navigate to any page and even move/rearrange the pages inside the document.
Of course, you can also annotate your documents. Use the Pen or Highlighter tool to mark up the document, and the Lasso tool to move, resize, copy, delete, or change the color of your annotations.
Once you’re finished, MyScript Notes allows you to export it to PDF with all your annotations locked in place. MyScript Notes also allows you to mark up your photos using the same tools.
Tools
MyScript Notes’ toolkit is full of all the usual suspects, plus a few extras. These tools may seem pretty basic compared to other apps, but they’re more than adequate to take down your notes.
Here’s a quick look at each of these tools and how you can use them to take great notes.

Text
Typing in MyScript Notes is simple and intuitive with either a virtual or a physical keyboard.
MyScript Notes’ Text Mode should feel pretty familiar to you. It uses the same text creation and manipulation tools you’ll find anywhere else on your iPad or mobile device, so you don’t have to learn anything new.
It’s also easy to seamlessly switch between the Pen tool and the keyboard. To start typing, select the keyboard icon on the toolbar and tap the screen at your preferred starting point. If you want to handwrite your notes, grab your pen, pick a spot on the screen, and start writing.
When you’re in Text Mode, you can add and edit existing text, including handwritten notes. Just press and hold to select the text and make your modifications. MyScript Notes uses Apple’s text ribbon for this. The pop-up menu will give options to cut, copy, and paste your text. Bold, highlight, and indent are also options.
Need to reformat the text? Double-tap words or sentences to convert them to a title, subtitle, or put them into list form.
Unfortunately, while this method wins points for familiarity, it can be a little frustrating when you’re trying to modify your text because you have to type everything out first.
Although, since MyScript Notes allows you to mix the keyboard and pen tools, you can always pick up your Apple Pencil or preferred stylus to quickly and easily reformat or add emphasis to any part of your notes (text or handwritten) using specific interactions and gestures.
MyScript Notes also lets you tap any text to move or resize it, which comes in handy if you need to add images or fit more on the page.

Pen
MyScript Notes’ Pen tool includes three types of pens: a Felt pen, a Brush pen, and a Fountain pen, giving you better customization and control over how your notes look.
Writing with the pen feels smooth, and there’s no lag when using an active stylus like the Apple Pencil, so you can always enjoy a pleasant and comfortable handwriting experience. As a bonus, if your preferred stylus happens to run out of batteries, MyScript Notes supports a passive pen — your finger — if you need to keep writing.
The Pen tool also offers six different line thicknesses, but keep in mind that if you’re planning to convert to text, the thickness of your handwritten notes won’t affect the size of your text.
One of the cool things about this app is that it lets you test out your choice in a customization window before using it in your notes, so you’ll know exactly what to expect when you start writing. While not necessary, this is a nice feature unique to MyScript Notes.
In addition to the eight preset color options for the pen, you can use the color wheel to create your own colors, and it will automatically be added to the menu for future use.
If you feel the color options are getting too cluttered, double-tap any color, including the preset options, and delete them one by one. To go back to a clean slate with only your presets on the bar, you can find the Restore colors option in your Writing settings.
Getting an exact color is a little more difficult because hex code inputs aren’t available, but you should be able to get close enough to what you want.

Highlighter
If you need to emphasize specific words or sections of your text, you’ll use the Highlighter tool.
Just like the Pen tool, the Highlighter comes in six line thicknesses and has the same preset colors and test window.
On a document, MyScript Notes’ highlighter only functions to highlight, but one of the neat things about this tool is that it automatically snaps to a straight line behind the text, similar to how shape tools work in other apps like Noteshelf. So far, MyScript Notes is the first and only app to implement something like this.
It’s also very easy to erase any highlights, without erasing the text, by going over the same text with the tool a second time. While this means you can’t layer the highlighter to make it any darker, using a darker color for the highlighter will help you achieve better contrast or visibility.
When you’re using a notebook or a board, the Highlighter tool gives you two options: Freehand or Smart. The Freehand highlighter converts to a marker, allowing you to write, draw, or color as needed, and you can even layer your strokes. The Smart highlighter acts just like a highlighter on a document, automatically aligning with the text.

Eraser
You’ll need MyScript Notes’ Eraser to correct any mistakes you make while taking your notes.
Just as with the previous tools, you’ll have six size options for your eraser. You also get two different eraser options.
The stroke eraser allows you to erase on a per-letter basis. This is where MyScript Notes’ eraser really excels. Unlike most other notetaking apps, it can easily pick up individual letters, even if they’re written in cursive or in a single stroke.
If you’d rather erase by pixel, the precise eraser functions like a normal eraser, allowing you to pick and choose what and where to erase. If you’re sketching or doodling, this eraser will make the most sense to you.
In some cases, you may not even need to use an eraser at all to correct your mistakes. MyScript Notes’ Erase gesture (more on this below) is faster to use than switching between tools.

Lasso tool
MyScript Notes’ Lasso tool comes in handy while you’re working in a notebook or board, but has limited functions when you’re in a document.
When you’re in a notebook, board, or sketch section (more on this one below), the Lasso tool allows you to move your drawings or text anywhere on the page. You can also resize your selection or convert handwriting to text.
On a document, the Lasso can select your text. Doing so will bring up Apple’s text ribbon, which offers the same options you’d see if you pressed and held the text. The redundancy makes this tool somewhat obsolete here. It doesn’t allow you to move or resize anything on a document page.
If you really need to move your text, it can be done, but not with the Lasso tool. Instead, you’ll tap once on your content, which will place a box around both text and handwritten notes. You may then drag and drop the text anywhere on the page.
Extras
MyScript Notes offers a few extra tools and unique features that really make the app stand out, like math equations, diagrams, sketch sections, and more.

Math Equations. MyScript Notes lets you write and edit math and chemical equations in your notes. It will easily convert these to text and calculate the results for you. When you’re done, it’s possible to export your equations as LaTeX or an image.
Dictionary. MyScript Notes has an onboard dictionary that allows you to add custom words or technical terms for better handwriting recognition. Unfortunately, this is a time-consuming process, since it must be done one word at a time.
Multi-Level Lists. Like other notetaking apps, MyScript Notes supports bullets or numbering options for lists. Its multi-level lists allow you to add up to four levels, and it even supports checklists.
AI Assistance. MyScript Notes has AI, which can summarize or explain, create quizzes, or answer questions from your notes. It also has AI Study Sets (iOS only right now, but coming soon on Android).

Diagrams. You can easily draw diagrams by hand and edit or reposition elements as you go. Once you’re done, you can convert them to text and perfect shapes. MyScript Notes supports shape conversion for basic shapes and arrows, and the diagram objects will remain interactive and editable even when pasted into PowerPoint or Keynote.
Sketches. In document pages, any stroke you make that MyScript Notes doesn’t recognize will automatically disappear when you lift your pen. If you’d like to doodle or draw in your notes, you’ll need to add a sketch section that’s designed specifically for drawings.
Taking notes
Even though MyScript Notes doesn’t have any of the templates or layouts that allow you to fully customize your notes, it does have some pretty cool features that enable a seamless notetaking experience.

Handwriting
MyScript Notes’ handwriting recognition accuracy is insanely good. It perfectly picks up cursive and (to my surprise) even super-sloppy handwriting.
One of the coolest features of this app is that, while you’re handwriting your notes, MyScript Notes has a conversion preview in the upper left corner showing how it’s interpreting your text as you write. If, for some reason, it doesn’t pick up the correct markings, you can fix these errors right away, before converting to text.
To get the best results, you’ll need to make sure you’re not writing outside the lines of your pages.
Handwriting that’s too big is harder for MyScript Notes to recognize and will automatically disappear once you pick up your pen. If you have large handwriting, you can adjust the line size in your settings under Text Display.
MyScript Notes also allows you to mix and match text and handwriting, giving you more flexibility in your notes.

Formatting & gestures
It’s quick and easy to format and edit your document notes before you convert them to text, whether you’re typing or handwriting your notes.
MyScript Notes uses simple interactions and gestures to make your text look the way you want.
Interactions include:
- Create a title by underlining a sentence or paragraph twice.
- Create a subtitle by underlining a sentence or paragraph once.
- Emphasize a word by underlining it once to convert it to bold.
- Highlight a word or sentence by drawing a box around it.
- Create a list by drawing bullet points, numbers, or other supported list types.
Gestures let you fix mistakes and edit on the fly, and they work in documents, boards, and notebooks. Here’s a quick rundown of each:
- Erase. Scratch out any unwanted text to erase it.
- Break. Separate letters by drawing a line straight down between them.
- Join. Connect letters by drawing a straight line upwards between them.
- Double tap. Tap handwriting twice to convert to text. Double tap again to edit the text.
These gestures even work on typed text, making it even more convenient to correct mistakes with your Apple Pencil or stylus.
Document management
When you’re looking for the perfect notetaking app, you need to consider how you’ll manage and organize your documents.
Let’s take a look at how MyScript Notes stacks up in this area.
Organization
MyScript Notes’s three-level hierarchy may not provide enough nesting capability for serious notetakers, and the setup is a little different from the other apps on the market. Whether you create a notebook, document, board, or PDF, it’s considered a note. You can then file any of these into a folder and assign it to a collection.
When you open MyScript Notes, you’ll have a sidebar that lists your collections with a drop-down menu where all your folders are visible. On the main screen, you’ll see all your notes within the selected folder.

Collections function similarly to folder and group features that you might find in other notetaking apps. These allow you to collect all your folders into one category. From there, you’ll create specific folders with whatever type of note pages you’ve created inside. The note pages are similar to the notes you’d find in Apple Notes, with unlimited vertical scrolling.
The difficulty comes when your collection label is too broad.
For example, you may have a “School” collection, which includes notebooks for different subjects, like math and literature. Inside each notebook, you’re able to create as many pages as you need, such as “Calc 1,” “Calc 2,” etc. But that’s about the best you can do.
In this scenario, you’d have to have all your lessons on one page, and with unlimited scrolling, it would be difficult to go back and review previous lessons. Alternatively, you could create a “Math” collection, “Calc 1” as a folder, and each lesson as a separate page.
On a positive note, MyScript Notes now offers a Trash icon in the More button of the sidebar, where you can recover previously deleted notes. If you’ve ever deleted something and then changed your mind, you know that this is an extremely helpful feature.
Searching & rearranging
MyScript Notes makes it easy to search your entire library quickly and reorganize your notes in a way that makes sense for you.
The app’s search function can scan handwritten content, PDF annotations, and the text in your diagrams to help you quickly find what you need.
As for moving your notes and folders, MyScript Notes makes it simple and easy to move them to the right place. The drag-and-drop function allows you to move individual notes into folders and folders into collections until you have everything the way you want it.
Importing/annotating
When it comes to importing and annotating, MyScript Notes offers plenty of options.
You can import PDF files, but MyScript Notes also lets you import PowerPoint or Word documents as a PDF.
(Refer back to the PDF section above for more information on what you can do once you’ve imported your PDFs.)
It also treats images the same way, letting you mark up and annotate them as you like.
Storage, backup, & sharing
If you’re going to take the time to write out digital notes, it’s important to understand how your information will be saved and stored.
Let’s take a look.
Storage/backup
MyScript Notes is cross-platform compatible, which makes it even more crucial to be able to save and sync your notes.
Fortunately, you can easily sync all your notebooks to your free MyScript account, which you’ll use to access them on any of your devices. You can also manually sync to iCloud, Google Drive, or Dropbox.
It’s always a good idea to back up your notes, just in case something happens. MyScript Notes allows you to back up your entire library of notebooks and notes all at once. Backups will be in a .MyScript Notesbackup file, which you can open with your MyScript Notes app.
Exporting/sharing
When it comes to exporting or sharing your notes, MyScript Notes gives you a few options.
You can export your documents as a Word document, as a PDF file, or in MyScript Notes format, which will allow you to share them with other MyScript Notes users. This is a great choice for backing up your work.
Notebooks or boards can be exported as PDF, PNG, SVG, or a MyScript Notes file.
Math equations can be exported as an image or LaTeX, and your diagrams will stay editable when moved to PowerPoint or Keynote.
If the document is short or you only need to export bits and pieces, it’s easy to copy content and paste it into other apps.
Your last option is to hit the More button, then tap on Create link, which will publish your notes on the web. You can limit access to a specific list of contacts or allow anyone with the unique link to view your notes. This option does require a (free) MyScript account.

Final thoughts
MyScript Notes offers a great compromise between something like Apple Notes and Goodnotes/Notability, so it’s definitely worth a try.
The ability to try out the free version before you purchase anything is great, and the cost of the lifetime version is very affordable if you decide you love it.
MyScript Notes’ handwriting recognition and text conversion are the best you’ll find, and the software integrates handwriting and text effortlessly.
While it isn’t as feature-rich as some of the more popular apps (limited organization and customization), the advanced handwriting capabilities might be enough to overlook these drawbacks.
The app also has a blog, which is a great resource to read and learn about all the latest features and upgrades, so you’re always in the know.
Plus, with the support of Apple silicon devices, it offers better cross-compatibility than the bigger notetaking apps like Notability and Goodnotes.
You can get MyScript Notes from the Apple App Store or the Google Play Store to try it for free.
If it doesn’t seem like it’s the right fit, you can check out the Best Notetaking Apps for iPad for other options.
Frequently Asked Questions
Is there any difference between Nebo and MyScript Notes?
A: No. The company just rebranded, changing its name from Nebo to MyScript Notes. A few minor upgrades came with the name change, but the app is still mostly the same.
And, good news! If you already own the lifetime version of Nebo, you’ll retain lifetime access to MyScript Notes and all its future updates.
What happened to MyScript Notes’ Freeform pages?
A: They’re still available! MyScript Notes’ freeform notes have always been a favorite user feature, but the app recently changed some of the feature names.
Freeform pages are now called Boards.
Regular pages are now called Documents.
In our view, the new names better reflect what each area should be used for and will make more sense in the long run as new users join the app.
Plus, MyScript Notes added Notebooks, which act as a middle ground between the two types of pages, giving you even more versatility.
Is MyScript Notes worth the money?
A: Yes. You can try the free trial to see if you like it first, but you’ll need to purchase the full version to continue using it.
Unlike some notetaking apps out there, MyScript Notes is available for a one-time fee if you don’t want to pay a subscription, so you’ll only need to buy it once.
And the cost covers up to 10 devices, regardless of whether they’re Mac or Android/Windows devices.
If I buy MyScript Notes for my iPad, do I have to buy it again for my Android or Windows device?
A: No! MyScript Notes is the only notetaking app that doesn’t make you buy different versions of the app.
Once you purchase it, you can sync across all (up to 10) of your devices using your MyScript account information, so you have your notes with you wherever you go and on whatever device you wish to use at the moment.
You can also use iCloud to sync across iOS and macOS devices, and Google Drive or Dropbox to sync across Android and Windows devices.
What other hardware do I need in order to use MyScript Notes?
A: Since MyScript Notes works on a variety of devices, you can take your pick from an iPad, Mac, PC, or Android device.
If you’re taking handwritten notes, we’d recommend a stylus like the Apple Pencil or the LAMY safari note+.
For iPad users, we’d also suggest trying out our Screen Protector, which makes the iPad feel like writing on paper, and our Pencil Grips, which reduce hand fatigue during long writing sessions.
Read next