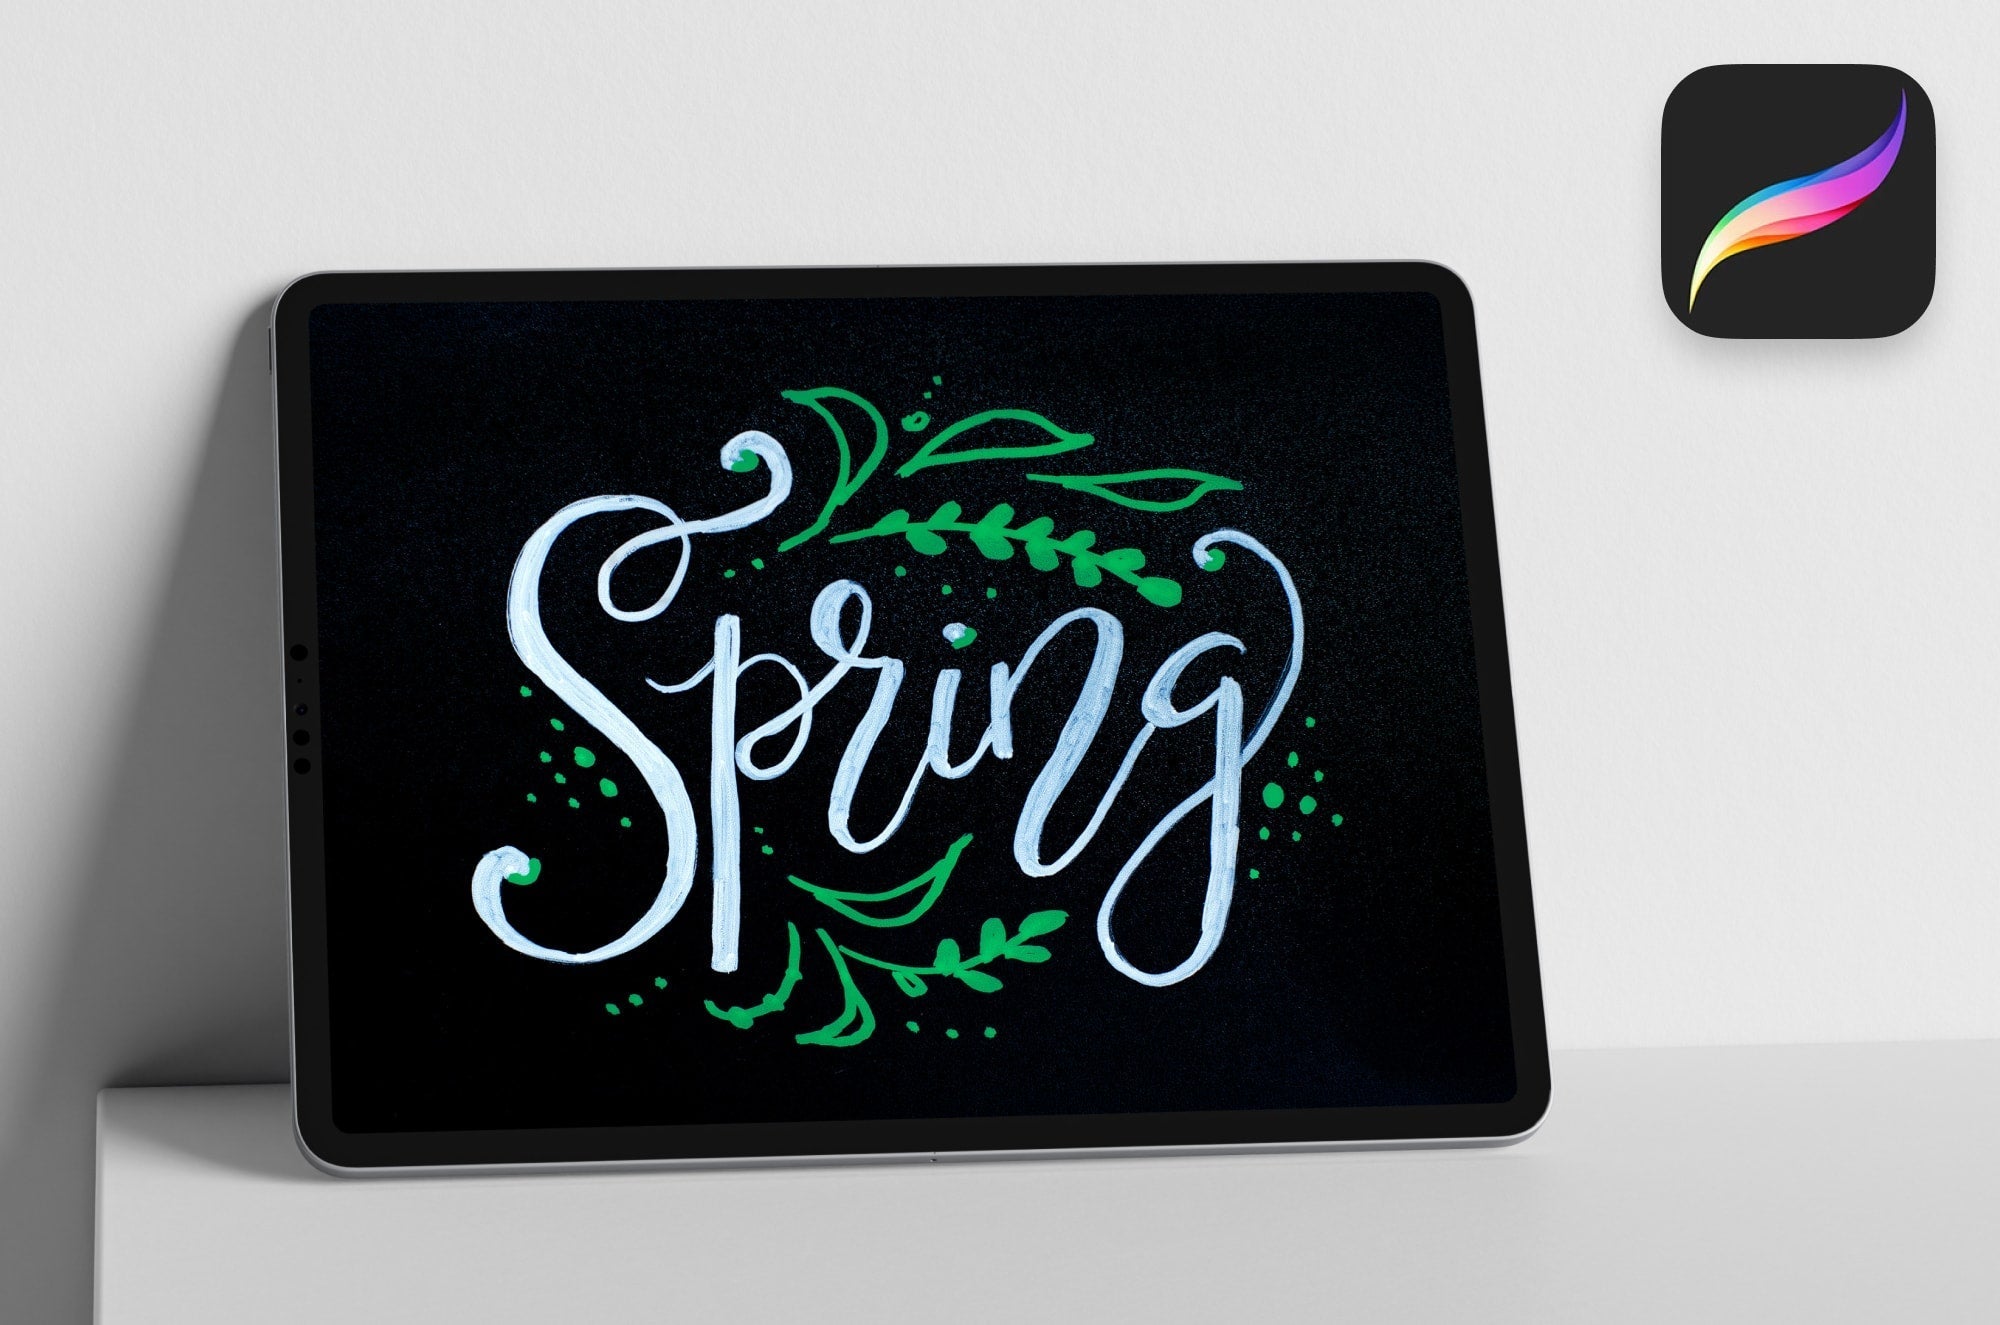


Procreate is one of the leading digital drawing apps, and it’s simple enough for all artists’ skill levels.
Because of that, there are so many tutorials out there that it can be hard to navigate. We’ve put together this list for you so that you can easily find free tutorials suited to your skill level.
We've featured Procreate tutorials for lettering, illustration, animation, and more. They've been chosen to help you learn transferable creative skills that go beyond simple copying.
Keep this page bookmarked so you can come back to it as you level up.
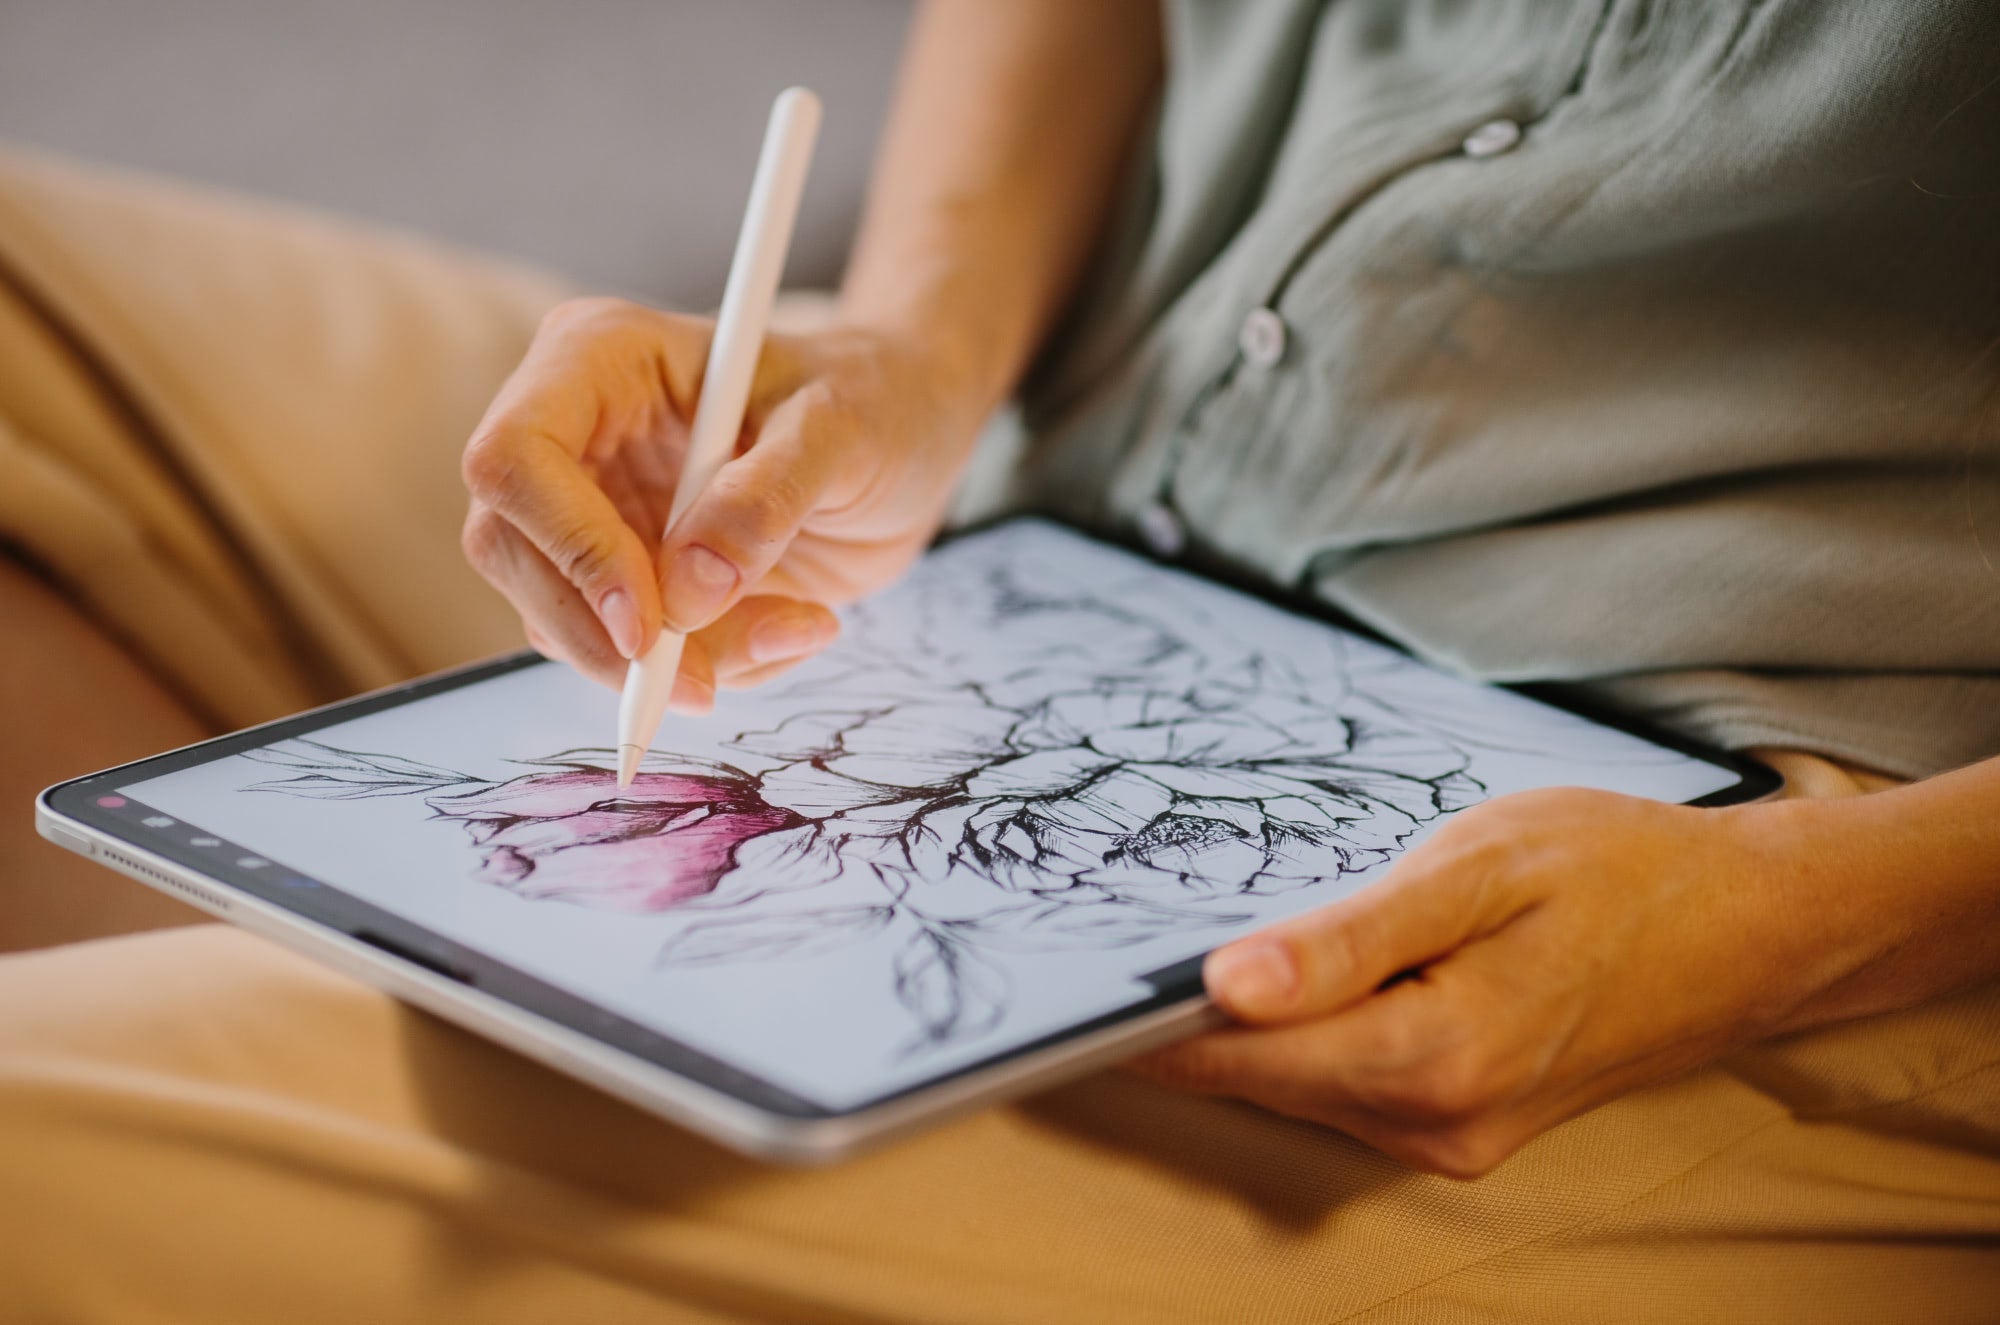
Ready to learn? Grab your iPad Pro, and let's jump in!
Getting started in Procreate
If you're new to Procreate, it can be helpful to read the handbook. But let's be honest, there's a lot packed in there. If you want to get a leg up on using Procreate, we've put together 27 tips that you need to know in Procreate here.
Since Procreate is such a powerful tool, there are a number of brushes and digital downloads for the program. That's why, here at Paperlike, we have you covered with a number of helpful resources.
We've collaborated with artists from around the globe to create exclusive brush sets for you to use for free. You can download them here.
Ready to learn from some of the best Procreate tutorials?
Beginner tutorials
Feeling overwhelmed? Start here.
These tutorials are perfect for artists just getting started with Procreate. You'll learn fundamental drawing techniques and tips that are great for illustrators, lettering artists, and hobbyists creating in Procreate.

Procreate Beginners Series: Part One | The Fundamentals
- Links: Watch here | Channel.
- Learning objective: Learn how to use Procreate through a complete overview of the app, from how to use brushes and gestures to using layers.
- Great for: Illustrators.
Who better to learn Procreate from than the creators themselves?
Watch this video to get you up to speed with all the basic tools and functions of the Procreate app. This is just the first video in a four-part series designed to teach you the basics.
You might be surprised by all that the app can do, but don't worry. The videos are perfectly paced for beginners to follow along. Get ready to become a Procreate expert!
The Procreate channel shares videos highlighting the creative community that loves and uses the app. They also create tutorials on how to use the program to create beautiful digital art on the iPad.

How to Choose the Right Colors by Brad Colbow
- Links: Watch here | Channel.
- Learning objective: Learn how to choose a color palette.
- Great for: Illustrators, lettering artists, and designers.
Adding coloring to your work can be a difficult part of the creative process. Maybe you're not always sure which color to choose or how to create a cohesive color palette.
This video explains one way of creating the perfect color palette in Procreate. Using color basics, you'll be able to improve your color combinations for your illustrations, lettering, and more.
Brad Colbow is an illustrator who shares his creative process and progress on YouTube and social media. He also reviews tech for creative professionals and has posted reviews for the Apple Pencil, tablets, and similar products.

How to Use the Symmetry Tool for Your Lettering in Procreate by Aurelie Maron
- Links: Watch here | Channel.
- Learning objective: Learn how to use symmetry in Procreate to add to your drawings and lettering.
- Great for: Lettering artists and illustrators.
The Symmetry Guide in Procreate can give you beautifully mirrored strokes that can help fill out your composition. In this tutorial, you'll follow artist Aurelie Maron step by step to learn the different features of the Symmetry Guide in Procreate. Among those features is how to adjust the guidelines to suit your preferences.
Then, she demonstrates how symmetry can be used to create lettering and illustrations. You'll also learn the different types of symmetry effects that you can achieve, from radial to horizontal, along with tips and best practices to get amazing results.
Aurelie Maron is a Paperlike Ambassador who is a lettering artist, teacher, and digital product creator. Check out her courses to learn about creating detailed lettering in a variety of styles using the Procreate app.

Make a Written Word Animation in Procreate by Bardot Brush
- Links: Watch here | Channel.
- Learning objective: Learn how to create a write-on text effect for a word that you illustrate in Procreate.
- Great for: Lettering artists and illustrators.
Want to animate your lettering but aren't sure what effect to use? In this tutorial, Lisa Bardot shows you a fun way to animate your lettering in Procreate to make it look like it's being written.
Demonstrated with a short word, you'll be able to follow along as you learn about using Onion Skins, Animation Assist, and more. By the end, you'll have an eye-catching write-on text animation that you can apply to any style of lettering.
Lisa Bardot of Bardot Brush is an illustrator who creates digital art tutorials and premium brushes for Procreate. You can check out her online shop, artist community, and templates on her website.

Easy Shading Procreate Tutorial by Dave Reed
- Links: Watch here | Channel.
- Learning objective: Learn how to easily add shadows to your drawings in Procreate.
- Great for: Illustrators.
It doesn't take a lot to make your characters stand out, and just adding a small amount of shading can keep your work from feeling flat and one-dimensional. Using a few basic principles and Blend Modes in Procreate, you'll be able to add convincing shading to your character drawings.
You'll also learn additional tips and techniques from Dave, like how to adjust layer opacity to help you create different shading effects. The results will be something that looks like a finished piece of work.
Dave Reed is a digital illustrator and designer with a large catalog of Skillshare classes and YouTube tutorials. Check out his Procreate group on Facebook to learn from other artists and ask questions.

How to Add Shading in Procreate Using Clipping Masks by Luma Llama
- Links: Watch here | Channel.
- Learning objective: Learn how to shade a 3D object using clipping masks.
- Great for: Illustrators.
Want to give your work a realistic look? This tutorial is essential for learning the fundamental concept of shading. From this, you'll learn how to choose colors and add light and shadows to give your work dimension. Perfect for beginners, this is an easy way to approach shading a 3D object that can be used in all types of drawings.
Ian Ruhfass, also known as Luma Llama, is a digital artist who shares Procreate tutorials on his YouTube channel. He's also created a variety of Procreate brushes and courses that he offers on his website.

How to Create a Neon Effect in Procreate by Ghost Paper
- Links: Watch here | Channel.
- Learning objective: Learn how to create a neon effect for type or lettering.
- Great for: Illustrators and lettering artists.
Creating a neon effect might sound hard, but this tutorial makes it very easy. It shows you how to use the Bloom effect to give your lines a glow that looks like a neon sign. The best part of this tutorial is that you can take this effect and apply it to the wide library of fonts available in the app, a custom lettering piece, or an illustration.
Leo, also known as Ghost Paper, shares painting techniques and product reviews for digital artists. His videos are designed to help others become better illustrators and artists.

Procreate Hand Lettering on the iPad Pro Tutorial for Beginners by How to Hand Letter
- Links: Watch here | Channel.
- Learning objective: Learn how to create lettering on your iPad in Procreate with helpful tips, tools, and techniques.
- Great for: Lettering artists.
As you start using Procreate, you'll find amazing brushes and tools that are great for lettering artists.
Calligrapher and lettering artist Suzy Grace shows you features like Streamline and the Text tool to help you create your own digital lettering. With Procreate, there's also the benefit of having pressure-sensitive brushes that allow you to create styles like scripts and calligraphy that often feature varied stroke widths.
You'll also see the benefits of creating your lettering digitally with the flexibility of being able to make Selections from parts of your artwork you want to change. To take your work to the next level, you'll see how you can add different effects to your work, like drop shadows and shading.
Suzy Grace of How to Handletter will show you how to create modern calligraphy and hand lettering. You'll find a great playlist of Procreate videos so you can create beautiful lettering on the iPad.

Procreate Quick Tutorial: Using Bloom for Lighting Effects by Dave Reed
- Links: Watch here | Channel.
- Learning objective: Learn how to add a more dynamic lighting effect to your drawings using the Bloom setting in Procreate.
- Great for: Illustrators.
The way lighting is conveyed in your work can completely change its visual impact. With just a few strokes, you can create a dramatic, glowing lighting effect.
Once you choose the direction of your light, you'll see how simple it is to add a Bloom effect to make your work look like it's glowing. It doesn't take long to take your drawing from basic to stunning with this technique.
Dave Reed is a digital illustrator and designer with a large catalog of Skillshare classes and YouTube tutorials. Check out his Procreate group on Facebook to learn from other artists and ask questions.

Procreate Tutorial: Easy Flower Illustration by The Creative Bix
- Links: Watch here | Channel.
- Learning objective: Learn how to draw a flower in Procreate using clipping masks and blend modes.
- Great for: Illustrators.
Flowers can be a beautiful and simple addition to illustrations. Whether you're creating a landscape, outdoor scene, or really anything, knowing how to draw flowers is a great place to start with your art.
In this tutorial, you will not only learn how to draw a flower, but you'll also learn how to use blend modes and add texture. Texture helps to elevate your drawing and keep it from looking flat.
Abigail Bixler of The Creative Bix is a digital artist, illustrator, and product creator. She creates tutorials on social media that are easy to follow and will teach you something new in a matter of minutes.

5 Ways to Make an Animated GIF in Procreate by Bardot Brush
- Links: Watch here | Channel.
- Learning objective: Learn how to animate using Procreate.
- Great for: Illustrators, lettering artists, and animators.
Animation sounds intimidating, but this Procreate tutorial makes it easier than you think. You’ll learn five different options for animating your work using the Animation Assist feature. With this tool, you can create your own GIFs and bring your work to life in new ways.
Each technique has its own level of difficulty, giving you something to work towards as you grow more confident in the app. By the end, you'll be able to export a looping GIF that you can use on social media!
Lisa Bardot of Bardot Brush is an illustrator who creates digital art tutorials and premium brushes for Procreate. You can check out her online shop, artist community, and templates on her website.

How to Cartoon Yourself in Procreate by Genevieve's Design Studio
- Links: Watch here | Channel.
- Learning objective: Learn how to draw a stylized cartoon from a photo.
- Great for: Illustrators.
Certain styles can be hard to achieve as an illustrator, especially if you've never tried them before. This tutorial outlines an easy-to-follow framework for creating a cartoon-style illustration from a photo of yourself.
You'll also see exactly which brushes to use in the program for this type of work. With the tips and tricks that are shared throughout, you'll have a good idea of how to apply the techniques to your own photograph.
Genevieve of Genevieve's Design Studio is a children's book illustrator and content creator. She releases her art tutorials twice a week with easy, step-by-step instructions to help all levels of artists.

Easy Watercolor Illustration by Print Me Some Color
- Links: Watch here | Channel.
- Learning objective: Learn how to create a simple watercolor illustration in Procreate.
- Great for: Illustrators and digital painters.
The beauty of digital painting is that you can create traditional effects without the mess. This watercolor tutorial will make you forget that you're using your iPad. With just a few paintbrushes in Procreate, you can create a simple illustration.
You can even use the same color palette as inspiration if you'd like. Learn techniques that make your color effects work best for your art with watercolor brushes that maintain their look.
Ashwini of Print Me Some Color shares her mastery of digital art through her online blog and YouTube channel. You'll always learn something new from her resources.

12 Digital Drawing Exercises | Get Better at Digital Drawing by Art With Flo
- Links: Watch here | Channel.
- Learning objective: Learn 12 different drawing exercises that will help you master the basics.
- Great for: Illustrators.
When you're a beginner, it's important to build a good foundation. While this video tutorial won't teach you how to draw a specific type of image, it will prepare you to draw anything.
With 12 different exercises, you'll learn essential tips for how to draw from a reference, combine swatches, and more. Even if you're not a beginner, these exercises can be a great warm-up or refresher for all artists.
Flo of Art With Flo will teach you how to draw pretty much anything you can imagine in a variety of styles. You can also get free resources from her website, such as brushes in Procreate.
![An image of the “Procreate Selection Tool Does That: And No One Talks About it [2024]” YouTube tutorial thumbnail.](https://cdn.shopify.com/s/files/1/1644/5247/files/Free_Procreate_Tutorials_2025-15.jpg)
Yes...the Procreate Selection Tool Does That: And No One Talks About It
- Links: Watch here | Channel.
- Learning objective: Learn all about the selection tool and its various functions in Procreate.
- Great for: Illustrators and digital painters.
The most common tools and features tend to be the most underrated. The selection tool might just be one of those tools, and in this video, Hector shows us why. Making selections is a very basic concept on its own for digital illustration. You can use it to remove parts of your image or add color and other details.
In this tutorial, you'll see just how much more versatile the settings are for the selection tool in Procreate, thanks to the different settings. From the program being able to remember your selections even after you've gone on to another layer to making multiple selections at once, you're going to see just how much it can do for you while you work.
Hector Montalvo of The Doodle Works channel will show you how to get comfortable using Procreate through step-by-step illustration tutorials. Check out their videos to learn how to master the program through character design, illustration, color, and shading techniques.

How to Compose Hand Lettering Easily in Procreate by Will Paterson
- Links: Watch here | Channel.
- Learning objective: Learn how to create hand-lettering compositions.
- Great for: Lettering artists and designers.
The composition you choose for your lettering can change the way it communicates visually. If you're a beginner, creating compositions for your lettering can definitely be a challenge. Thankfully, this video by designer Will Paterson breaks down simple techniques for creating dynamic lettering compositions.
He uses the Drawing Guides in Procreate and then shows you how to quickly get your ideas out and onto the canvas. From there, with the help of shapes, layers, and opacity tips, you'll have a solid workflow to help you create a composition for any piece of lettering you create.
Will Paterson is a designer specializing in brand identity, lettering, and logo design. His expansive catalog of tutorials covers a variety of topics in a digestible way for artists of all skill levels.

Painting in Procreate by SamDoesArts
- Links: Watch here | Channel.
- Learning objective: Learn how to create a digital painting in Procreate using fundamental tips and techniques.
- Great for: Illustrators and digital painters.
Have you ever wondered what goes into creating a great digital painting? Maybe you have a lot of unfinished sketches because you don't know where to go from there. Digital artist Sam shares tips in this chill and fun tutorial that you can follow to create dynamic digital paintings.
Starting with loose sketches, he reviews composition and how he applies lighting to his characters. It's beginner-friendly because he takes you step by step so that you can see exactly how he decides how he'll render the final piece. If you enjoy creating cool character scenes, you'll get a lot out of this tutorial.
SamDoesArts is a digital artist from Toronto who combines fun trends with helpful tutorials. Beginners and seasoned artists alike will be able to learn from and enjoy this channel.

Beginner to Expert Embossed Text in Procreate by Laurie Russell Design
- Links: Watch here | Channel.
- Learning objective: Learn how to use the Text Tool in Procreate to create embossed and debossed effects.
- Great for: Illustrators and lettering artists.
Embossing is a popular raised print technique that gives the look of shadow and depth. Using a font in Procreate, you'll learn how to use Layers, Alpha Lock, and more to create a realistic emboss and deboss effect on your letters. The key to achieving the best results is finding the balance between the highlights and shadows so that the text pops.
Laurie will take you through the process in an easy-to-follow tutorial with Procreate tips throughout. As an added bonus, the tutorial also includes a free paper texture download to help you add even more depth and realism to your final piece.
Laurie Russell Design shares her love of productivity and design through easy-to-follow tutorials for the iPad. If you want to learn more about digital art from Laurie, check out her Skillshare courses.
Intermediate tutorials
Know your way around the Procreate app already?
These tutorials are perfect for anyone who wants to dive deeper into Procreate's features. You'll learn how to animate, add dimension to lettering, and more.

How to Create Retro Text Effect in Procreate by Tatyworks
- Links: Watch here | Channel.
- Learning objective: Learn how to use the Text Tool in Procreate to create a fun retro effect.
- Great for: Lettering artists and illustrators.
Using specific font styles in your work can give it the look and feel of a different time. In this tutorial, you'll learn how to import a font and manipulate it to create a unique piece of retro-themed artwork.
Taty will also demonstrate how to add 3D effects to your text with additional walkthroughs for shading and casting shadows. You'll also be using the Symmetry Guide and Liquify to create a color and dynamic background with noise for texture. For more font fun, check out our Procreate fonts article.
TatyWorks teaches drawing in Procreate for beginner and pro users. With her step-by-step tutorials, you can unlock your creativity and learn something new.

How To Make a Procreate Brush - 5 Easy Brush Tutorials by Art with Flo
- Links: Watch here | Channel.
- Learning objective: Learn how to create brushes in Procreate using the Brush Studio settings.
- Great for: Illustrators and digital painters.
While Procreate boasts an impressive brush library, who says you can't create more? In this tutorial, Flo shows you how you can make five different brushes in Procreate. Starting with creating your Canvas, you'll learn the ideal setup to start creating your own brush.
Using the brush features and capabilities found in the Brush Studio Settings, you'll learn to create brushes for hair, stamps, patterns, and more. As you finalize your brush settings, you'll be able to test them within the app along the way. This is a great video for artists who are comfortable with the basics of the brushes in Procreate and want to dive deeper.
Flo of Art With Flo will teach you how to draw almost anything you can imagine in a variety of styles. You can also get free resources from her website, such as brushes to use in Procreate.

How to make beautiful calligraphy flourishes in Procreate | iPad calligraphy flourishes by Loveleigh Loops
- Links: Watch here | Channel.
- Learning objective: Learn how to create and add flourishes to your digital calligraphy.
- Great for: Calligraphers and lettering artists.
Flourishes are a great way to add a beautiful flair to your calligraphy. But knowing where to put them and finding the right forms can be tricky. Jillian and Jordan of Loveleigh Loops will show you the natural placements of flourishes, as well as tips and techniques to help you along the way.
You can use their flourish stamp brushes or use the principles they outline to create your own. They also help you finish off your piece with textures and a starry night sky background.
Sisters Jillian and Jordan of Loveleigh Loops are lettering artists and calligraphers teaching others how to create both traditional and digital art. They share their love of letters through tutorials, free downloads, and live classes.

The Complete Blending Mode Guide in Procreate (Procreate Tutorial) by Ghost Paper
- Links: Watch here | Channel.
- Learning objective: Learn how to use all of the blending modes in Procreate.
- Great for: Illustrators, digital painters, and photo editors.
Blend Modes are very useful for your artwork, but when should you use them? With over 15 that you can apply to any layer, it can be difficult to know where to start. In this tutorial, you'll find out how each type can change and add to your work.
Leo uses his own work as a use case of how you can apply each blend mode type. Throughout the tutorial, you'll also get additional tips and techniques in Procreate and how to use blend modes depending on the effects you want to achieve in your artwork. These are principles that can also be applied to photography and that you might want to incorporate into your work.
Leo, also known as Ghost Paper, shares painting techniques and product reviews for digital artists. His videos are designed to help others become better illustrators and artists.

Interlaced Text in Procreate by iPad Lettering with Karin Newport
- Links: Watch here | Channel.
- Learning objective: Learn how to import and combine text and images.
- Great for: Lettering artists.
Incorporating more than one element into a composition is a way to add instant flair to a piece. This tutorial will teach you how to use Layer Masks and other techniques for your own lettering projects. There are plenty of fonts to choose from within Procreate by default, or you can import your own font using the Files App.
Karin will suggest a font for you to use for this tutorial, but feel free to try it with your own lettering if you'd like to as well, for a look that is uniquely yours.
iPad Lettering with Karin Newport offers a treasure trove of helpful tutorials for digital lettering artists. You’ll learn fundamentals that you can take from the iPad to traditional mediums, as well.

How to Paint Light Like a Pro by Lucas Peinador
- Links: Watch here | Channel.
- Learning objective: Learn how to transform lighting in three ways.
- Great for: Illustrators and painters.
Thanks to Procreate, you can pick up digital painting without needing to load up on supplies. This tutorial will take you through how to create three different lighting scenarios using the same drawing. Being able to properly light your subject can dramatically change the mood and feel that your art communicates to viewers, so this is a great concept to master.
This tutorial will take your drawing from a daytime scene to a night scene with a few key tips and changes. You’ll also learn more advanced features in the app that will make you feel like a pro.
Lucas Peinador is a concept artist and illustrator who shares his passion for art with others. Follow his tutorials for tips and techniques for creating in Procreate and Photoshop.

Procreate Cut Paper Effect by iPad Lettering with Karin Newport
- Links: Watch here | Channel.
- Learning objective: Learn how to create a paper cut effect for your lettering in Procreate.
- Great for: Lettering artists and illustrators.
Sometimes, using Procreate feels like magic. This is how you’ll feel following this Cut Paper Effect tutorial. You can take any line of text or lettering and recreate this effect for your own work.
With the incorporation of shadows under each layer, the effect looks better and better. The best part is that you can even add additional illustrations inside your lettering to create a more advanced and dynamic look.
iPad Lettering with Karin Newport offers a treasure trove of helpful tutorials for digital lettering artists. You’ll learn fundamentals that you can take from the iPad to traditional mediums, as well.

How to Draw in Perspective Using Drawing Guides by Bardot Brush
- Links: Watch here | Channel.
- Learning objective: Learn how to draw a scene and objects in one-point and two-point perspectives.
- Great for: Illustrators and lettering artists.
As you progress as an artist, you’ll find that learning more advanced concepts will enable you to create even more art!
This is what learning to draw in perspective is all about.
Watching this illustration tutorial will help you create a scene in a one-point or two-point perspective. With the help of a handy free download, you’ll have a solid framework for drawing your own scene. From there, anything in 3D is yours to draw!
Lisa Bardot of Bardot Brush is an illustrator who creates digital art tutorials and premium brushes for Procreate. You can check out her online shop, artist community, and templates on her website.

3 Ways to Create 3D Lettering in Procreate by Ian Barnard
- Links: Watch here | Channel.
- Learning objective: Learn how to create 3D lettering using a variety of Procreate tools, including Motion Blur, Perspective Guides, Alpha Lock, and more.
- Great for: Lettering artists.
Once you get past learning how to build your letters and can get consistency in your shapes and styles, a great place to go next is adding dimension. This is especially great because it can take your work from looking flat to popping off the screen.
This tutorial shows you three ways to create 3D lettering using helpful tools and features in Procreate, like Perspective Guides, Alpha Lock, and more. From basic extrusion to a cast shadow, you'll want to have these techniques on hand.
Ian Barnard is a lettering artist and digital product designer who teaches his audience about lettering, calligraphy, and typography. You can grab free Procreate brushes from his website.

Why Are My Lines Pixelated in Procreate? // 2 Tips to Avoid Blurry Edges! by Let's Draw with BeeJayDel
- Links: Watch here | Channel.
- Learning objective: Learn how to make sure your lines in Procreate are crisp and clean when drawing and exporting.
- Great for: Illustrators.
As a raster-based program, Procreate uses pixels to create your amazing artwork and brush textures. However, this can make pixelation and blurry lines an issue if you don't know about certain settings in Procreate.
In this tutorial, BeeJayDel teaches you how to avoid and remedy those issues you might encounter with your art. He shares two tips about how to use Canvas and Interpolation settings in Procreate to save yourself from the headache of low-quality linework. You'll want to make sure you have these tips down before you dive into creating something new.
BeeJayDel focuses on digital art and the fundamentals of drawing. Check out his tutorials to learn how to use Procreate to draw as a digital artist.

Draw Isometric Letters in Procreate: A Step-by-Step Process! by Shoutbam Creative Studio
- Links: Watch here | Channel.
- Learning objective: Learn how to draw isometric letters and use the Drawing Guides in Procreate.
- Great for: Lettering artists.
There are a lot of ways to add dimension to your lettering, but I doubt you've seen it like this. At first glance, you might be scratching your head on how to even achieve an isometric effect, but you’ll find that it’s not as hard as you might think.
It’s always fun to push yourself and your work. To make this intermediate tutorial easier, try it with a block-style letter first. This will make it easier to draw out the angles and add color and shading before trying other styles.
Shoutbam Creative Studio is a Paperlike Ambassador with a wealth of knowledge on lettering and adding stunning details to your work. If you want to take your lettering to the next level, their products and tutorials will definitely get you there.

How to create a Mask in Procreate, Procreate Masking, Procreate Masks Explained by The Doodle Works
- Links: Watch here | Channel.
- Learning objective: Learn all about the ins and outs of all the mask types in Procreate.
- Great for: Illustrators.
When you want to make flexible edits to your artwork, using Masks can be a great option. They give you the flexibility to make non-destructive changes to your artwork as you're finding the direction you want to go in.
In this tutorial, Hector will explain the difference between the types of layer masks in Procreate so that you can use them like a pro.
You'll learn how and when to use certain layer masks in your work to help speed up your workflow, add color and details, and more. Use them in your next piece to experiment without worrying about committing to the changes right away.
Hector Montalvo of The Doodle Works channel will show you how to get comfortable using Procreate through step-by-step illustration tutorials. Check out their videos to learn how to master the program through character design, illustration, color, and shading techniques.

Character Drawing by Pierre Kleinhouse
- Links: Watch here | Channel.
- Learning objective: Learn how to create a character using three brushes in Procreate, clipping masks, and the symmetry tool.
- Great for: Illustrators and character designers.
Being able to draw fun characters is something that most artists enjoy. But knowing where to start can be a struggle. With the use of the Symmetry tool, Clipping Masks, and a limited color palette, you’ll find yourself creating a character in no time!
There are other ways to add to your character as well, which the tutorial will outline, like adding shadows, highlights, and texture. You’ll also get insight into the artist’s thinking throughout this Procreate illustration tutorial, which is helpful.
Pierre Kleinhouse makes tutorials on character drawing and illustration. He has a great catalog of tutorials that will take your character ideas and bring them to life.

How to Create a Seamless Repeat Pattern in Procreate by Every Tuesday
- Links: Watch here | Channel.
- Learning objective: Learn how to create a seamless repeat pattern in Procreate with this tutorial.
- Great for: Surface designers and illustrators.
Using Procreate to create patterns is popular because you can use them in a number of ways. However, there are a few essential steps you'll need to follow to have a successful and seamless pattern. The continuity and spacing within the pattern are the keys to creating your own, and this tutorial will show you how.
It’s a bit of trial and error as you try things out for yourself and see what empty spots can be filled with additional illustrations and elements. The tutorial will help you make those choices and achieve the best pattern possible.
Teela Cunningham of Every Tuesday is a Paperlike Ambassador and releases tutorials every week. You’ll learn a variety of topics from her, including lettering and illustration, for beginner and advanced artists.

Procreate - How to create Candy and Inky Lettering Effects (+Freebie) by Shoutbam Creative Studio
- Links: Watch here | Channel.
- Learning objective: Learn how to create a unique effect for your lettering or illustration.
- Great for: Lettering artists and illustrators.
Not sure where to go next with your lettering? Take your lettering to the next level with this candy ink lettering effect using Liquify settings in Procreate. Jimbo first shows you how to start your sketch from a font. This gives you a good structure to base your lettering on.
Then, you'll learn how to add highlights and depth to the final letter. If all of that wasn't cool enough, you'll even get to use Motion and Gaussian blur to create a dramatic drop shadow. If you want to have even more fun, Jimbo includes lettering freebies like Procreate brushes that you can experiment with.
Shoutbam Creative Studio is a Paperlike Ambassador with a wealth of knowledge on lettering and adding stunning details to your work. If you want to take your lettering to the next level, their products and tutorials will definitely get you there.

3D Painting in Procreate - How to Draw on 3D Sneakers by TatyWorks
- Links: Watch here | Channel.
- Learning objective: Learn how to paint on a 3D sneaker model in Procreate.
- Great for: Illustrators.
Forget drawing in 3D — Procreate's 3D modeling features allow you to take your imagination to another dimension. If you're used to creating in Procreate in a traditional way, then using a 3D model for the first time may be a little challenging.
Thankfully, this tutorial will not only give you a 3D model to use for free, but it'll also show you how the layers work for 3D models. They're slightly different than when you're creating in 2D. Once you figure out your way around the model, you'll be able to completely make it your own with colors and illustrations.
TatyWorks teaches drawing in Procreate for beginner and pro users. With her step-by-step tutorials, you can unlock your creativity and learn something new.

How to Make A Gradient in Procreate by Make it Mobile
- Links: Watch here | Channel.
- Learning objective: Learn how to create a gradient in Procreate using layers and color settings.
- Great for: Illustrators and lettering artists.
Blending colors gives you the power to create powerful color mixes and combinations. In Procreate, you can do this using Selections, Adjustments, and more. In this tutorial, you’ll learn how to create a two-color gradient and add it to a line of text using a font in Procreate.
With helpful Procreate features like ColorDrop, you can use the colors in the tutorial or choose your own blend to create amazing gradients that you can add to lettering, paintings, or illustrations.
Make it Mobile makes tutorials for learning graphic design on mobile apps like Procreate and Procreate Pocket. Check out their extensive library of videos to learn about topics like logo design, branding, and more.
Advanced tutorials
Ready to skip ahead?
These tutorials are perfect for artists who feel comfortable in their abilities but want a challenge. You'll learn effective workflows for coloring and portrait illustration, as well as how to work with 3D models.

Drawing Complex Ribbons in Procreate by Every Tuesday
- Links: Watch here | Channel.
- Learning objective: Learn how to draw a ribbon with illustrations and lettering.
- Great for: Illustrators and lettering artists.
The complexity of this ribbon tutorial comes from its multiple layers, folds, and interwoven illustrations throughout. You have the option to use the free monoline brush download that comes with the tutorial to help you create the linework for the ribbons.
There's even a fun pastel color palette available. You can create any style of illustration for your surrounding drawings and add any kind of lettering to make your ribbon illustration your own.
Teela Cunningham of Every Tuesday is a Paperlike Ambassador and releases tutorials every week. You’ll learn a variety of topics from her, including lettering and illustration, for beginner and advanced artists.

Shape Design Techniques you need to KNOW! Full Drawing Tutorial by Kaycem
- Links: Watch here | Channel.
- Learning objective: Learn how to draw character proportions to enhance the style of your character designs.
- Great for: Character designers and illustrators.
Creating natural-looking and fun characters can be challenging if you don't know the principles of proportions. This video is a master class on how to figure this out for your own characters so that they appear realistic while still being fun and unique to your style.
Kaycem does this by taking you through the parts of the human anatomy that he considers as he's drawing each section of his characters. He also provides guidelines that he uses when drawing younger characters so that his proportions stay consistent. You'll also see how fat distribution in certain character designs plays a role in how well they read in your final artwork.
Kaycem is a professional character designer who has worked with a number of animation studios. He also teaches anatomy, gesture, perspective, and more through weekly livestreams and resources.

How to Draw a 3D Bevel Word in Procreate by Aurelie Maron
- Links: Watch here | Channel.
- Learning objective: Learn how to create a bevel effect on a complex piece of lettering.
- Great for: Illustrators and lettering artists.
We've seen a few 3D lettering tutorials in this list so far, but what makes this one more advanced is the style and level of detail that go into it.
If you don't have a piece of lettering that you want to try this on just yet, you can start with the free downloadable file to follow the tutorial step by step. The results are beautiful and require you to take a look at the overall piece to see how things are communicating visually.
Aurelie Maron is a Paperlike Ambassador who is a lettering artist, teacher, and digital product creator. Check out her courses to learn about creating detailed lettering in a variety of styles using the Procreate app.

Drawing Digital Portraits on Procreate - Tips + Tutorial by Byron Dix
- Links: Watch here | Channel.
- Learning objective: Learn how to paint a digital portrait in Procreate.
- Great for: Illustrators and digital painters.
Drawing digital portraits is super popular for Procreate users because of the amazing brush library. This video is great for artists who have a grasp of their process for portraits but would like further insight into another perspective. Byron's video is set to some very chill music and uses subtitles to explain each part of his process. This way, you can tune in and out to the music while you work on your own piece.
The way Byron shows you how he sketches a portrait is by using the Reference Companion in Procreate. It's a great way to import a photo without having it directly on your canvas. That way, you can move it around your screen to whatever position best suits your process as you work.
Byron Dix is a digital artist and YouTuber. He shares his drawing process through time-lapses and helpful tutorials for artists using Procreate. He shares his portraits, speed paintings, and nature paintings on Instagram and YouTube.

Procreate iPad Drawing App Update Painting in 3D Tutorial by Stayf Draws
- Links: Watch here | Channel.
- Learning objective: Learn how to paint in a 3D model in Procreate.
- Great for: Illustrators.
This tutorial takes an in-depth look at 3D models in Procreate, starting with how to find the models that Procreate provides to users for free. Not only will you learn how to color the model, but you'll also see how to edit brushes specifically for 3D models.
You can use the Materials brush category, or you can go to the Brush Studio and edit the metallic and roughness features of your brush. This can help you achieve more realistic results depending on the model you choose to use.
Once you're done, you'll see how the Lighting Studio works so you can add or remove points of light from your model to give it a look based on over 10 lighting presets.
Stefan of Stayf Draws is a Dutch artist with over 20 years of experience. His tutorials are designed to help you improve your drawing skills, and he has a number of brush packs that he's created for you to use in his online store.

How to Make a Full-Length Comic in Procreate by Comicbooker
- Links: Watch here | Channel.
- Learning objective: Learn how to create your own self-published comic book in Procreate.
- Great for: Comic book illustrators and designers.
If you've ever aspired to create a comic book but were never sure how to actually do it, this video can help. In it, you'll learn how writer and artist Andrew Drilon used Procreate to illustrate his own comic book, called Secret Heart Attack. With the help of comic book printing templates, he gives insight into how he set up his files to illustrate each page of the book.
He also shares which brushes he used for the project and why. You'll also see how the Text tool, brush size memory, Gallery exporting, and selection tool speed up his workflow. Speaking of workflow, this video shows how it can help to have a clear vision for your project before you jump in. The tips that Andrew shares throughout will help you create a cohesive final product you can be excited about. Hopefully, this video will help save you time and inspire you to publish your own work.
Andrew Drilon is a writer and illustrator based in New York. He's worked with a number of clients, including DC Comics, Dark Horse Comics, and Anvil Publishing. His work has won multiple awards, and he shares what he's working on with his audiences on Instagram and YouTube.

Painting from Grayscale to Color by Ariabba
- Links: Watch here | Channel.
- Learning objective: Learn how to apply color to your drawing from grayscale.
- Great for: Illustrators and designers.
Starting with a base of values of your artwork in grayscale can actually make it easier for you to color your work. However, if you're not used to working this way, it can feel a little strange. This tutorial is well explained and goes through the thought process behind choosing where to place light and shadow in a piece.
This will require a bit of playing with blend modes and brushes, but in the end, you'll be able to lay down your colors without affecting the grayscale value base underneath. You'll also get a look at how to quickly test your color palette before bringing those colors to your final piece.
Ariabba is an illustrator and animator who shares her work process on her YouTube channel. She hopes that doing so will inspire others who might want to become artists one day.

How to Make Digital Art Brushes for Procreate + Photoshop | My Full Process by Mimimoo Illustration
- Links: Watch here | Channel.
- Learning objective: Learn how to create your own brushes in Procreate using real photographs and textures.
- Great for: Illustrators, lettering artists, and digital painters.
The brush you use can completely change the way your work looks. But once you reach a certain level, you might feel uninspired by your usual brushes in your library. That's where creating your own can come in handy.
In this video, Mimi shows her whole process from start to finish of creating her own texture brushes. Unlike only using shapes and settings within the Brush Studio, she starts hers with analog materials from scratch. From there, she goes through how the brush shapes work, how to edit them, and more. She even lets you step into how to market and sell your brushes online afterward.
Mimi Purnell of Mimimoo Illustration is an illustrator and YouTuber. Her soft illustration style gives her work a beautiful playfulness that makes it perfect for the many children's books she's illustrated. Mimi shares her creative process and digital art resources on her YouTube, Etsy, and Instagram. For even more resources and tutorials from Mimi, you can check out her Patreon.

Watercolor Bird Illustration by Calvin at Drifter Studio
- Links: Watch here | Channel.
- Learning objective: Learn how to achieve a realistic watercolor painting effect to color illustrations using a reference.
- Great for: Illustrators and digital painters.
There are over 200 brushes that come with Procreate, and a lot of them are designed to mimic traditional art materials. For this tutorial, you can use the Watercolor brush under the Painting category and get a convincing paint effect. You can start with a photo sketch as a base for applying color to your painting, and then slowly work your way through blending them.
This tutorial covers how to use a blending technique for watercolor brushes without overworking them and losing the texture. You'll also get to see how to add a bit of light linework to give your work more character.
Calvin of Drifter Studio is a creator who makes drawing videos in Procreate featuring landscapes and characters. His work shows a special emphasis on watercolor brushes for Procreate to help you achieve that look in your own work.

Fashion Illustration in Procreate / Digital fashion art tutorial for designers sketching on iPad Pro
- Links: Watch here | Channel.
- Learning objective: How to draw a fashion illustration from a reference image.
- Great for: Fashion designers and fashion illustrators.
This tutorial shows you artist Daria Stephenson's approach to fashion illustration. To start off, she shows you how she creates a fashion sketch in Procreate from a reference image. If you're not used to drawing for fashion design, the proportions of the model might look different at first.
You'll also notice that her sketch doesn't focus much on the face but more so on the clothing and how it's draped on the frame of the sketch. Daria starts rough and loose and then tightens her sketch as she adds layers. This shows off the unique aesthetic of fashion illustration and might just open a new world for how you illustrate clothing on characters in your own work. Like Daria, you can use a reference for inspiration or maybe find something in your own closet that inspires you.
Daria Stephenson is a fashion designer and illustrator based in the United Kingdom. Her background in fashion informs a lot of her tutorials in Procreate, where he shows how to create your own fashion illustrations. She also dives deeper into digital fashion illustration in her course on Teachable.
![An image of the “Brush Strokes [Advanced Tutorial]” YouTube tutorial thumbnail.](https://cdn.shopify.com/s/files/1/1644/5247/files/Free_Procreate_Tutorials_2025-46.jpg)
Brush Strokes [Advanced Tutorial] by Angry Mikko
- Links: Watch here | Channel.
- Learning objective: How to use brush strokes to build your compositions in Procreate.
- Great for: Illustrators and digital painters.
This video explains how to use patterns of brush strokes to fill in your composition. As opposed to trying to mask your brush strokes, you're leaning into using the texture and loose strokes to add more character to your digital paintings. Part of what makes this technique advanced is the combination of varied pressure in your brushstrokes as you paint.
Not only does Mikko go through in detail his process of using brush strokes in his paintings, but he also relates each example to a time-lapse of him creating one of his own pieces. It really helps to see each portion of his process reflected as he gives each tip. Try them out to bring something new and special to your work.
Mikko Eerola of Angrymikko is a painter who creates fun and approachable tutorials for Procreate. You'll learn helpful tips and techniques for painting, character design, and illustration.

Full Digital Drawing Process // Procreate Tutorial by Pypah's Art
- Links: Watch here | Channel.
- Learning objective: Learn how to create a stylized digital portrait from beginning to end.
- Great for: Illustrators and painters.
A huge part of being successful as an artist is establishing a good workflow. Your workflow is your process, and without one, it can take a lot longer to get through pieces. Thankfully, this tutorial will show you an entire drawing workflow, from a very loose sketch to a finished piece.
It can help to watch someone else work and explain their process, especially when it includes some additional tips and tricks that you can use to save yourself time. This is what this tutorial is great for, and you can take as much from this process as you'd like to apply to your next portrait.
Filipa of Pypah's Art is a freelance illustrator and animator who shares her drawing process in a way that's relaxing and easy to follow. While she does work in Procreate, she also works in a lot of traditional mediums, from acrylics to pen and ink.

How I Draw Eyes - Tutorial (Procreate) by Lorna Kelleher Art
- Links: Watch here | Channel.
- Learning objective: Learn a process for drawing a slightly stylized eye in Procreate.
- Great for: Illustrators and character designers.
In all honesty, as an artist, drawing eyes can be hard to master. This tutorial breaks down how to approach drawing an eye using default Procreate brushes. It begins with a basic loose sketch, and with each step, the drawing gets duplicated so you can see the clear progression between steps.
This will help you understand not only how to achieve this type of eye drawing for yourself, but also see where you can insert your own unique style.
Lorna Kelleher Art creates digital art in Procreate with a main focus on stylized portraits. Her videos show you how you can take photo references and transform them.

Mixed Serif Lettering by Dawn Nicole
- Links: Watch here | Channel.
- Learning objective: Learn how to mix serif letters in a single lettering composition.
- Great for: Lettering artists.
One of my favorite ways to make lettering stand out is by mixing styles. Serifs are a great way to do that because, within them, there are a lot of different types you can play with. This detailed tutorial is closer to a mini-course, and it takes an in-depth look at how to mix serif styles in your lettering.
You'll start with an overview of what types of serifs there are and then learn ten essential tips for creating this kind of lettering composition. After that, you'll be ready to apply those tips through a step-by-step guide on how to build your letters and add dimension, shadows, and more.
Dawn Nicole is a Paperlike Ambassador and a self-taught lettering artist. She shares what she knows through tutorials featuring lettering, vibrant colors, and playful illustrations.

How to Apply Textures in Procreate Using Clipping Mask by Peggy Dean
- Links: Watch here | Channel.
- Learning objective: Learn how to apply textures to your artwork using Clipping Masks.
- Great for: Illustrators.
Textures give your work depth and personality. They can transform work that feels flat into something that comes to life. With the help of Clipping Masks, you'll be able to add not only textures but also highlights, shading, and more to your work. The best part about them? You can do all of that without actually disturbing any of the layers you've already drawn on.
And did you know that you can use more than one clipping mask on top of each other? Well, in this tutorial, you'll see exactly how it works by following along with the sample piece of artwork or by applying the techniques to your own artwork.
Peggy Dean of the Pigeon Letters is an internationally published artist, best-selling author, and award-winning educator. In her courses, Peggy shares her unique framework not only for creating calligraphy and lettering, but also the keys to running her creative business.

Morph Animation in Procreate (Full Process) by Stefan Kunz
- Links: Watch here | Channel.
- Learning objective: Learn how to create a dynamic morphing animation in Procreate.
- Great for: Animators and illustrators.
As cool as animation looks, the thought of animating your work can feel intimidating. Procreate is such a robust app that you can even use it for animating any kind of art you can create (for the most part). In this tutorial, you'll learn how to create a morphing illustration in Procreate using the Animation Assist features.
Stefan will go through how to plan your movement for your animation, as well as the steps you need to create a fun morphing illustration. He goes in-depth about his process from start to finish, not only teaching you about Procreate but also key animation fundamentals. By the end of the tutorial, you'll have a fun morphing teapot, or you can use what you've learned on your own work!
Stefan Kunz is one of the most popular lettering artists around, who teaches lettering artists how to master hand lettering and calligraphy on the iPad. He also offers a variety of courses that dive deep and range from lettering to animation.

Become an intuitive painter + tips [Procreate Process] by angrymikko
- Links: Watch here | Channel.
- Learning objective: Learn all about how to paint intuitively in Procreate.
- Great for: Digital painters.
No matter what phase of your artistic journey you're in, it can be easy to overthink. While planning has its place in the creative process, it can sometimes limit the possibilities. In this video, you'll learn how to paint intuitively with a number of tips and tricks for Procreate along the way.
You'll be able to learn how to paint without worrying about planning too much in advance. Basically, you just have to go with the flow. This painting process encourages using imagination, not being too narrow in your ideas or color choices, finding brush rhythm with your stylus, and more.
Mikko Eerola of Angrymikko is a painter who creates fun and approachable tutorials for Procreate. You'll learn helpful tips and techniques for painting, character design, and illustration.
Wrapping up
Hopefully, these free tutorials have helped you feel ready to tackle creating art in Procreate. There are a lot of different techniques, tools, and tips within each guide, so feel free to try the more advanced videos as your skills progress.
Whether you're a lettering artist, illustrator, or hobbyist, there is something for everyone to learn new skills. If you're looking for more tips, you can check out our Procreate tips article to become even more of an expert.
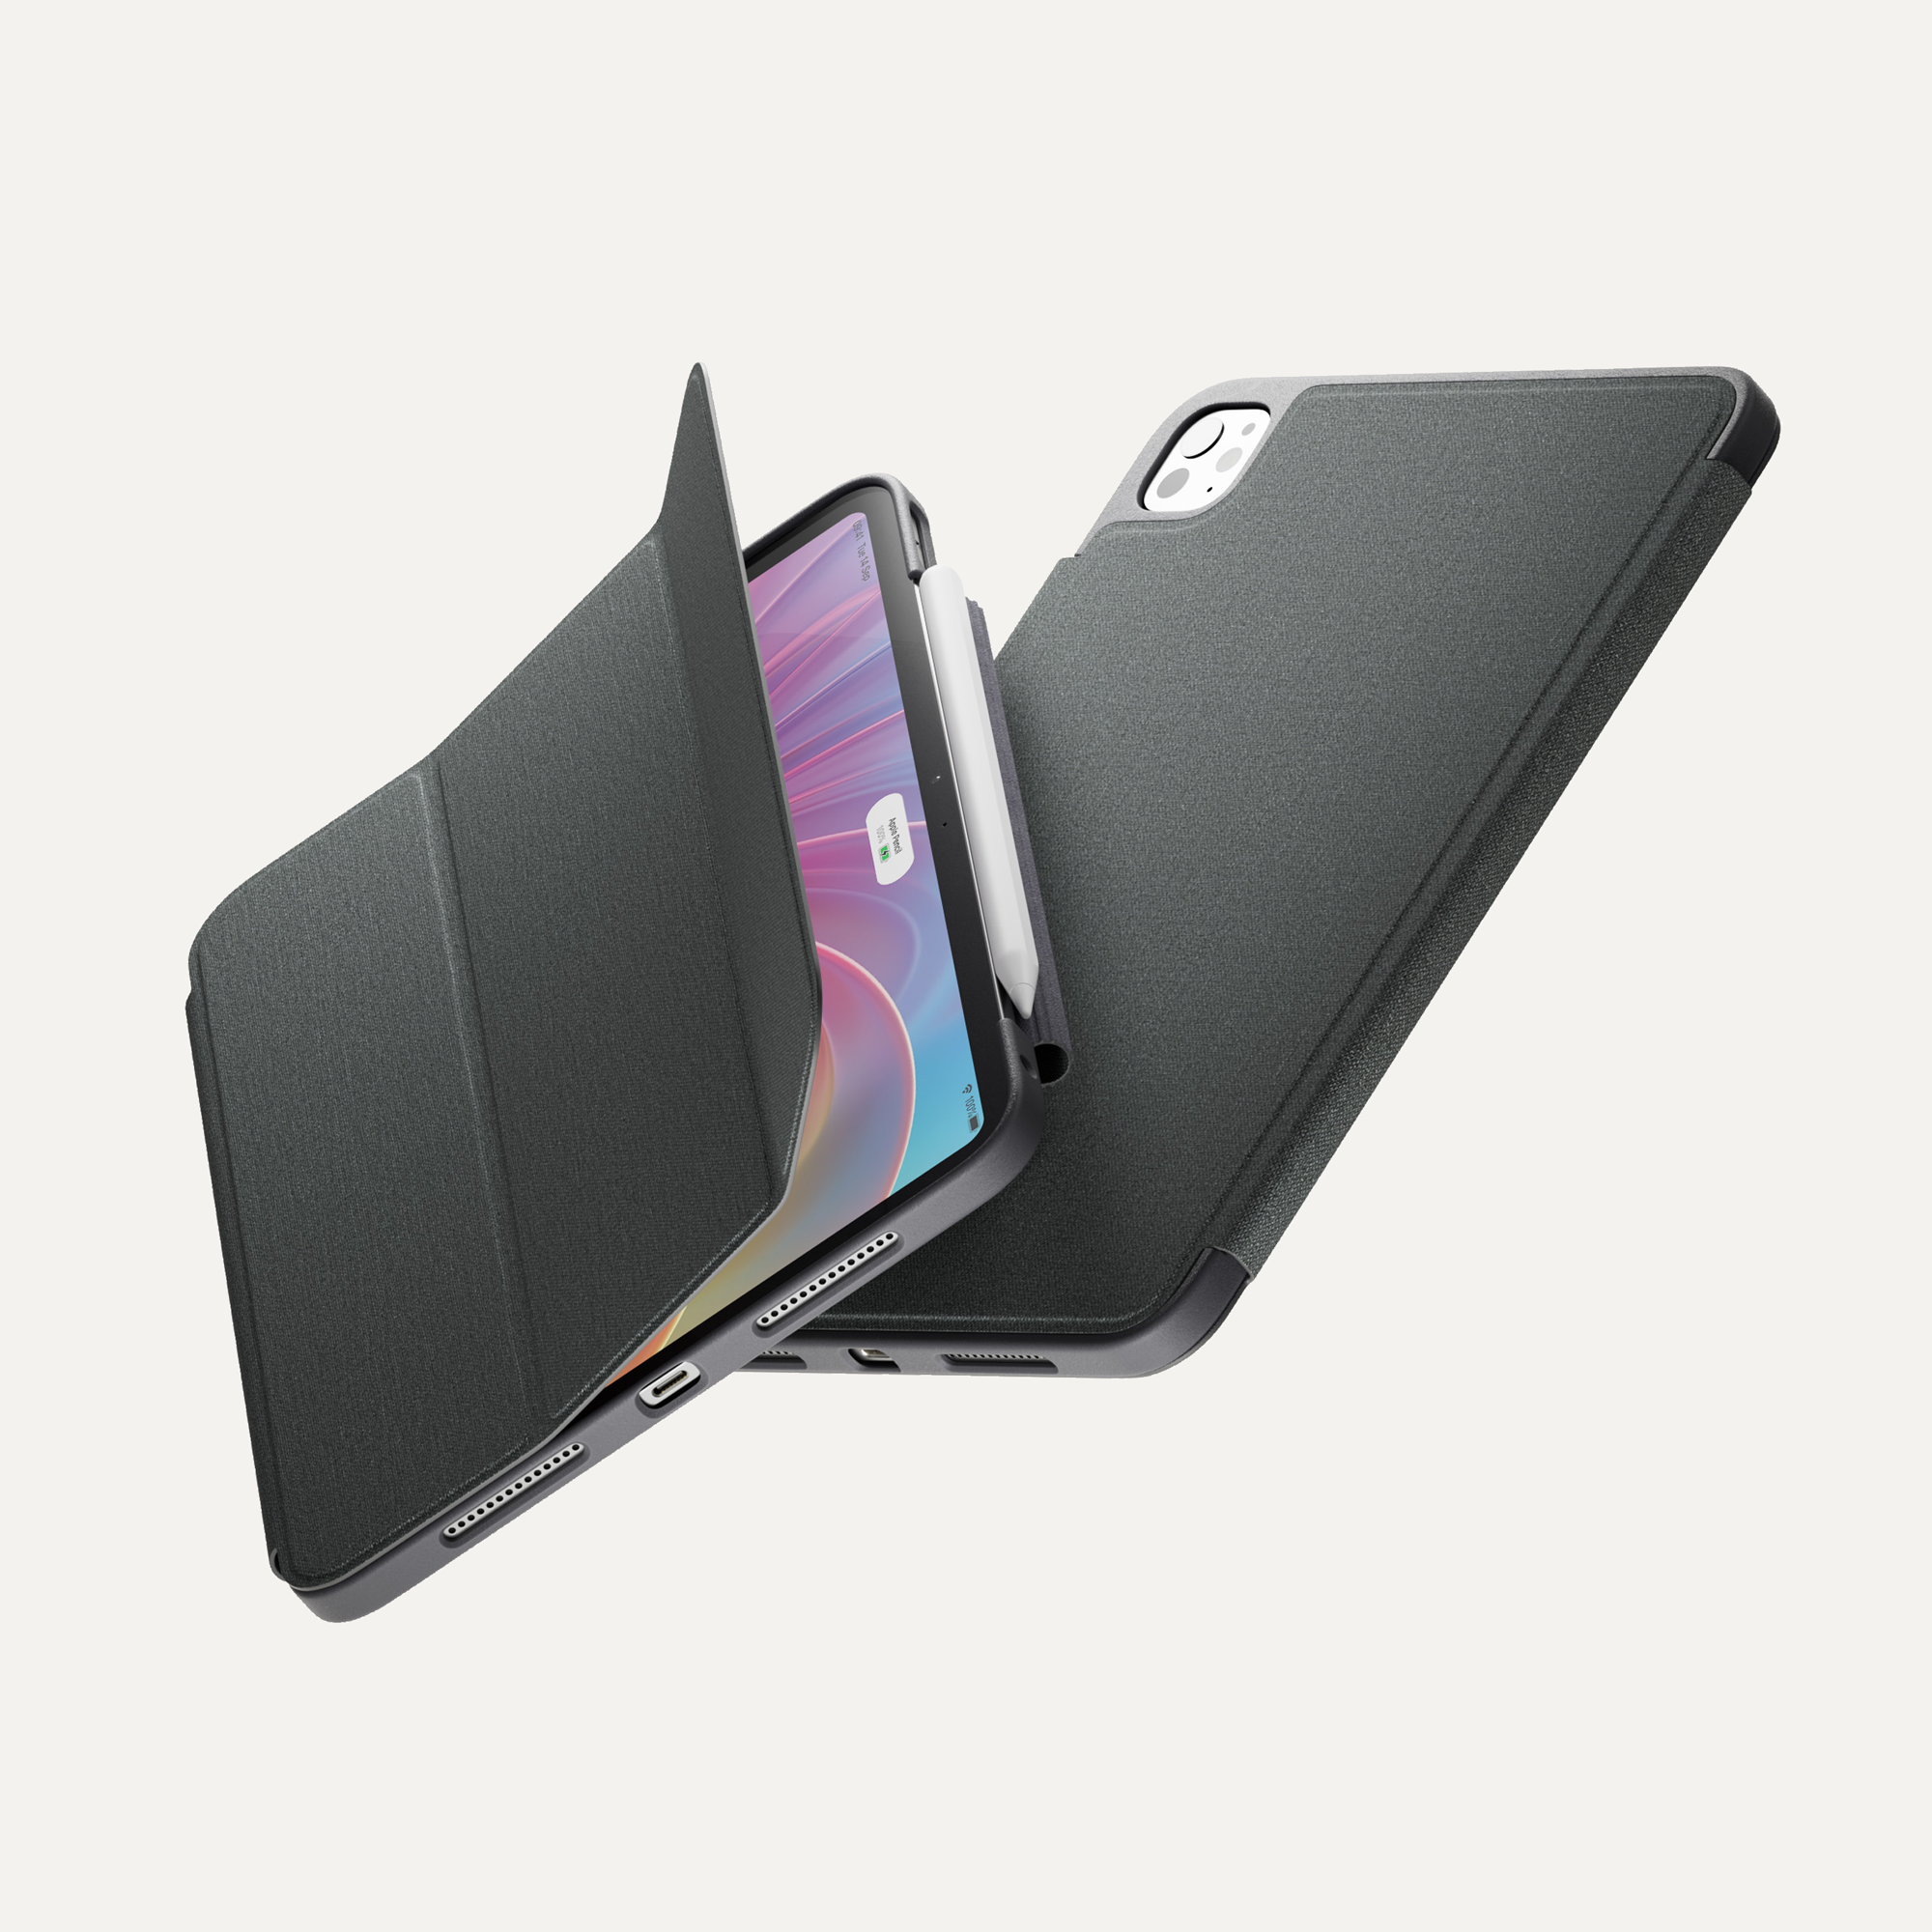
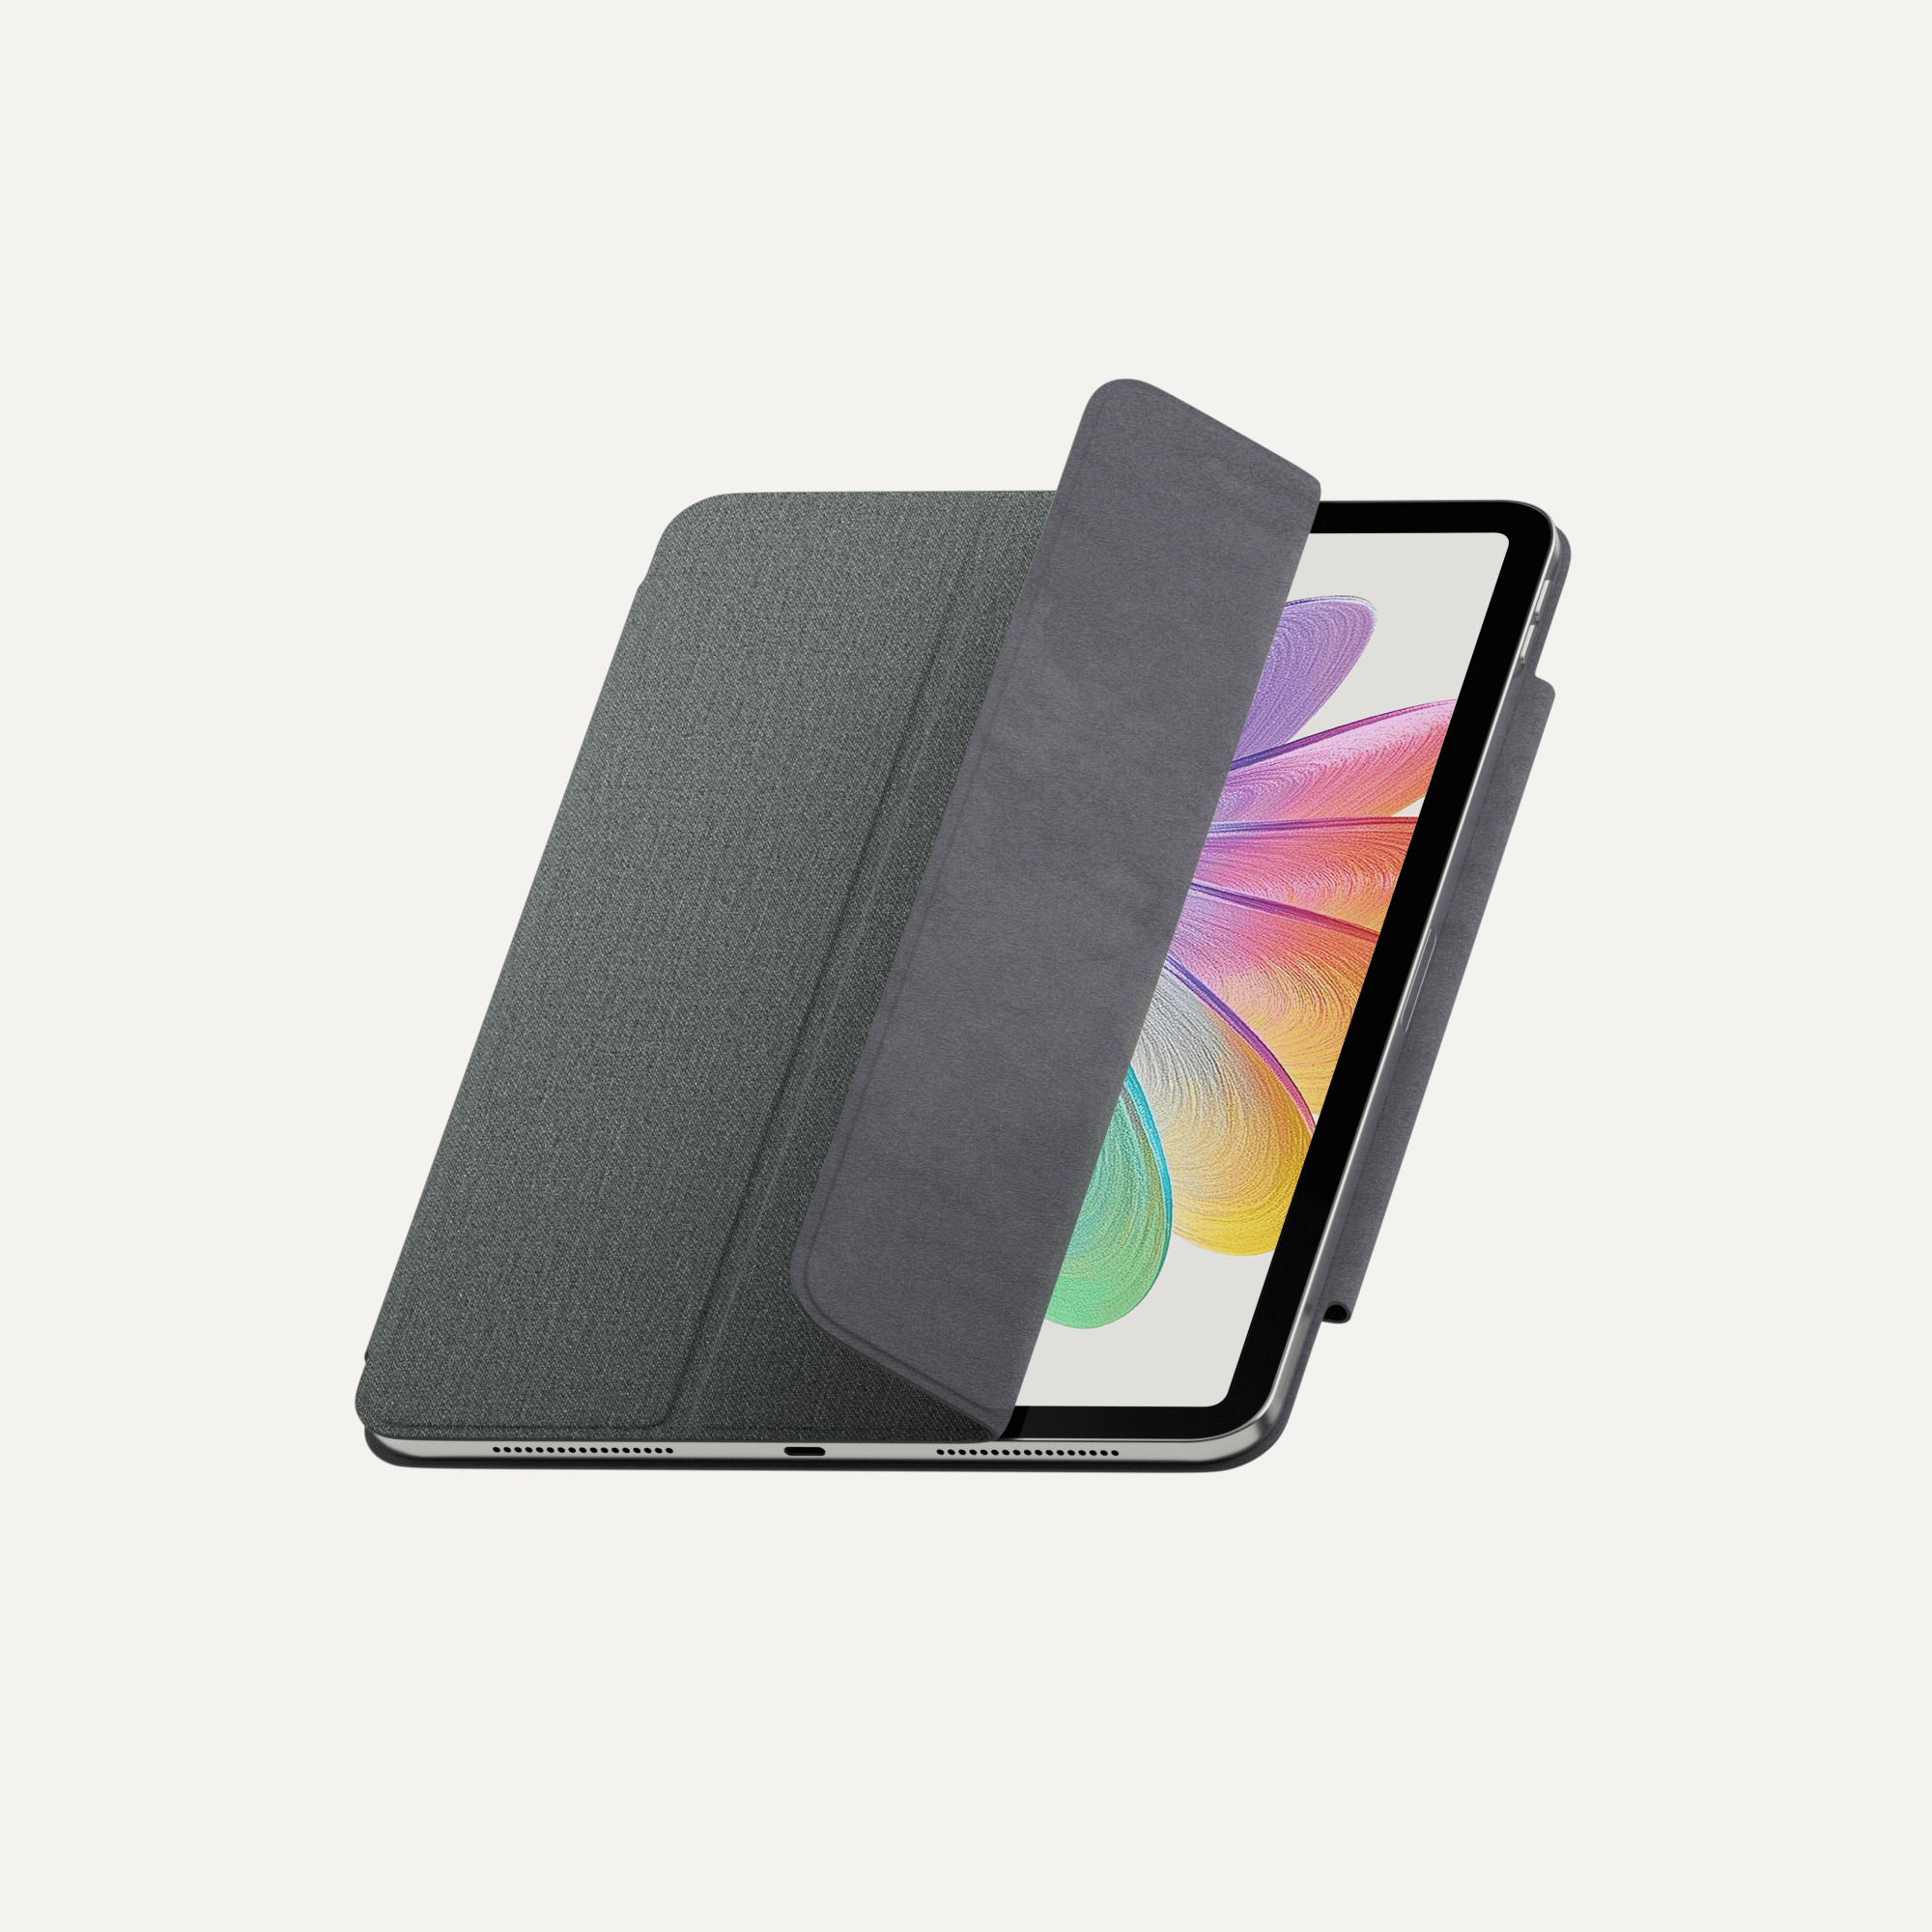
And as always, before you dive in, don't forget your Paperlike for iPad. After all, it's the ultimate creative companion to drawing and notetaking on the iPad, so you can put all of your focus on your creativity.
Read next