
Procreate is one of the most popular digital art programs for the iPad out there. It's blazed a trail for other digital art apps since 2011 and continues to innovate.
It's a great program for beginners and pros alike because of its simple interface and wide range of capabilities, from digital painting and 3D model support to animation. We've talked about a lot of digital art apps, but is Procreate still worth it in 2026?
From this in-depth Procreate review, we hope you'll see what makes it worth a look and how it could be the digital art app for you.
Let’s jump in!
Why we love Procreate
- Procreate is an affordable pixel-based app for iPad Pro & iPhone.
- There are over 200 Procreate brushes for digital painting, animation, and 3D model painting.
- You can customize your experience within the app in a number of ways, from Quick Actions menus to specialized gestures.
| Features | Procreate | Adobe Fresco | Adobe Photoshop for iPad |
| Pixel Brushes | Yes | Yes | Yes |
| Vector Brushes | No | Yes | No |
| Digital Painting | Yes | Yes | Yes |
| Digital Drawing | Yes | Yes | Yes |
| Layer Naming | Yes | No | Yes |
| Layer Limits | Yes | No | No |
| Photo Importing | Yes | Yes | Yes |
| Custom Font Importing | Yes | Yes | Yes |
| Reference Window | Yes | No | No |
| Cloud Storage | No | Yes | Yes |
| In-App Tutorials | Yes | Yes | Yes |
| Brush Customization | Yes | Yes | Yes |
| 3D Model Support | Yes | No | No |
| Platform Compatibility | iPad & iPhone only | iPad, iPhone, & Select Windows Surface Tablets | iPad, iPhone, Web, Mac, Windows |
| Single-Purchase | Yes | No | No |
| Subscription Model | No | Yes | Yes |
| Photoshop Brush Compatible | Yes | Yes | Yes |
| Animation | Yes | Yes | No |
| 3D Model Painting & Drawing | Yes | No | No |
| Layer Limits | Yes | No | No |

What is Procreate?
Procreate is a powerful digital painting program that will enable you to create anything you can imagine. They've leveraged the power of Apple engineering to deliver one of the best digital drawing and painting experiences to their users. And as iPad technology advances, its features and capabilities evolve.
With over 10 years of experience in the market, they continue to refine the digital art landscape for the iPad. So much so that other apps, in many ways, have followed their lead, as we'll see later.
And when it comes to choosing a digital art app, it's easy to feel overwhelmed. Usually, one of the first considerations for artists when selecting a digital art program is the price, so let’s break down Procreate’s cost.
The Procreate iPad app is available from the App Store for $12.99. There’s also an iPhone version, Procreate Pocket, available for $5.99. The single purchase model makes each app a lot more accessible than similar subscription-based apps like Adobe Fresco and Photoshop, and gives you immediate access to any new features that are added to the software.
The Procreate app is also an Apple exclusive, which means you’ll be limited to using an iPad and Apple Pencil as a stylus. However, Procreate is an amazing app, and the initial investment is minimal in comparison to apps using subscription models, so the decision seems like a no-brainer.
Upon opening the app, you can set your canvas size and be off to the races in moments.
Additionally, Procreate offers a simple user interface that focuses you on your canvas and shows two small sections of tool icons. Menus and customizations remain largely hidden, which can cut the learning curve for newer users looking to get straight into creating.
Procreate is a raster-based program, so the brush selection is where it really shines. It's also a powerful all-in-one program with 3D model support and an impressive painting engine, but more on that in the coming section.
Want to see how Procreate stacks up against other major digital art programs? Check out our Procreate reviews here:
In the following sections, you’ll find a deeper review of Procreate. If you already own the app and are ready to learn about next-level tips, we’d recommend checking out this article: 30+ Procreate Tips You Have to Know.

Digital painting, illustration, & 3D
When you're setting up your work in Procreate, there's a library of templated canvas sizes, but you can also create your own and save the dimensions for later use.
Depending on the size and resolution of your canvas and your iPad model, your maximum layer count will vary. Basically, the bigger the canvas, the fewer layers you'll have. Use this interactive chart from Procreate to determine how many layers your document will have.
Procreate is a pixel-based app, meaning everything you create within the app is composed of small dots or pixels. This brings us to the magic of the brush selection. With over 200 brushes to choose from, you can create with stunning realism through textured brushes that mimic traditional materials. Procreate also offers compatibility with Photoshop .ABR brushes for artists who use both programs.
For added convenience, you can pin your brushes and save up to three default sizes and opacity settings. This will allow you to get a consistent look when you use certain brushes. I also love that you can search your brushes by name in the brush library. This is a feature that I've been wanting to see in other digital art programs, so I was glad to see it in Procreate.
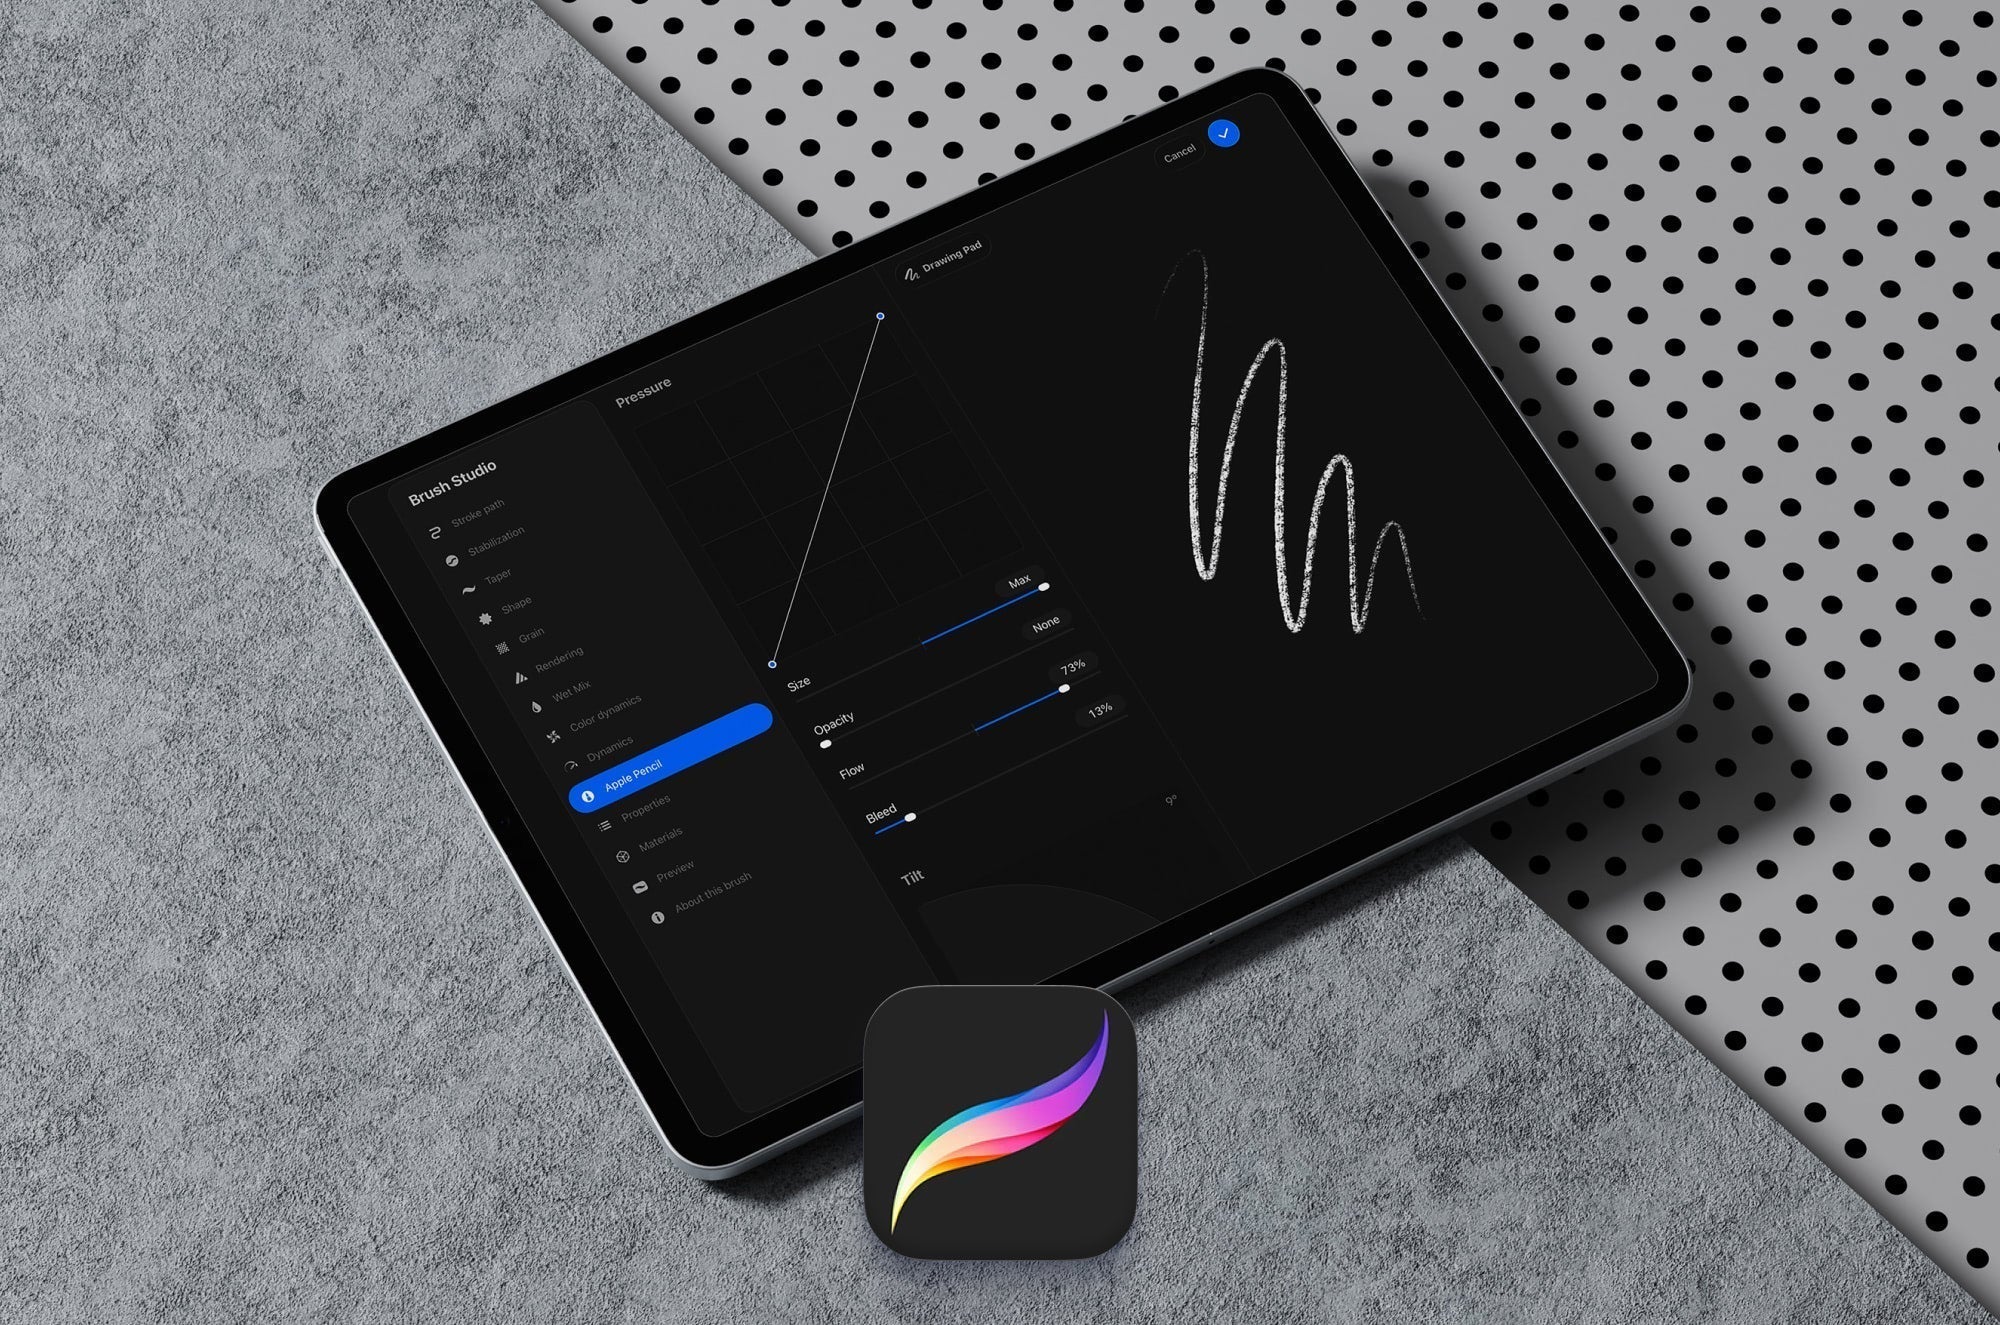
But what about making your own brushes? Thanks to the Brush Studio, you can do just that. You have the power to edit your brushes by adjusting settings like stabilization, streamline, taper, and more. This gives you control over your brush experience in the app. You can even combine two brushes to create a Dual Brush. From there, you can edit the way the two interact, creating something completely unique.
Download free exclusive brush sets from Paperlike's ambassadors here. There's something for every kind of artist, from lettering and inking to watercolor.
If you’re an Apple Pencil Pro user, you’ll also benefit from additional features exclusive to that stylus. Features like Barrel Roll, Squeeze, and Hover unlock more capabilities for artists in Procreate.
You can get more out of your brushes with settings like Azimuth & Barrel Roll. Hover lets you preview your strokes and eraser areas before you put down your stylus. Squeeze introduces workflow efficiency features like opening the QuickMenu or activating the Eyedropper tool.
While other apps like Adobe Fresco have capabilities for Apple Pencil Pro, Procreate has introduced the most features for it to date.
Procreate also offers additional tools to use while creating, like perspective and symmetry guides and the Reference Companion. These tools enable you to be the best artist you can be while creating an efficient workflow. They save time and take a lot of the guesswork out of drawing.
The Page Assist feature allows you to turn the Procreate app into a digital sketchbook with multiple pages. Once enabled, you can use it to create comics, graphic novels, and more that you can later export into a PDF booklet. Even coloring your work is simple with features like ColorDrop and ColorDrop Threshold that flood your canvas with color with a quick drag and drop.
But what really sets Procreate apart from other drawing apps is its 3D model capability. Within the app, there are eight pre-installed models available for you to explore. Each model has impressive levels of realism and detail. Draw directly on their 3D models to apply color and textures to them. This feature brings digital drawing and painting to another level. You'll get comfortable with the touch gestures as you use them to rotate and manipulate the object as you draw on it.
With the introduction of 3D models comes a category of brushes called Materials, designed for adding metallics and roughness to models. They're also great for detailed work such as hair, skin, and more. Procreate can read .OBJ and .USDZ files, and there are a few methods for importing your own models.

Animation
You don't have to be a professional to create fun animations of your work. What may have been considered intimidating previously is now user-friendly enough for beginners. With Animation Assist in Procreate, you can make fun GIFs and MP4 videos from your drawings.
Your animation timeline follows the order of your layers in your document to create your animation sequence. This means your bottom layer will become your first frame. You can use the Add Frame option to insert additional frames.
To put together a more fluid animation, the Onion Skin frames feature in Settings will be your guide. This allows you to create your next frame based on the previous ones in your timeline so that the illustrations flow and line up.
You'll also find that you can adjust the Playback type, Frames Per Second, and more. The higher the frames per second, the faster your animation will play back. Give your work new life with the animation features in Procreate.
If you’re looking to do more with animation in Procreate, you might enjoy its companion program, Procreate Dreams. It’s a great extension of the experience in Procreate with more advanced capabilities and specific features to help you bring your illustrations to life. It even has its own dedicated library of animation brushes. Get started with helpful tutorials for all skill levels.

Working with images
You can import images into Procreate in several ways. Get photos from your Photo Library, Files App, or take a new photo with your device. Procreate can even be used in split screen with any of these apps so that you can drag and drop images into the program easily.
Need some color inspiration? The colors from an image can be extracted to make an instant color palette. Depending on the image, you'll get up to 30 color chips to work with and tweak as you like. For more on colors in Procreate, check out our blog post: 30+ Best Procreate Color Palettes.
What about photo editing? Procreate is better suited for what I would call minor photo edits. Of course, you have access to adjustment layers, color balance, and clipping masks, just like in Photoshop — but would I really think of Procreate when I'm trying to make my photos look their best? Short answer: no.
If you shift your focus to experimenting while in Procreate, you'll see that the Adjustments panel has a lot of filters, like Noise, Glitch, and Liquify, that are fun to play with.
For anything more than light photo editing, you'll find that Procreate is lacking.
But, to be fair, photo editing isn’t what Procreate is intended to do, and they don’t pretend otherwise. A better, non-Adobe-based tool like Affinity Photo 2 would be a better fit for this, as it was specifically engineered for photo editing on the iPad.
If you find yourself intimidated by Photoshop, playing around with the clipping masks and adjustments in Procreate can be a good place to start, but it makes more sense to learn about those tools in Photoshop since you’ll eventually end up there.

Working with text
Procreate comes with three pre-installed default fonts: Eina, Impact, and Jack Armstrong BB. In addition to these fonts, you also have access to all of the fonts in iOS. On top of that, you can also install any fonts that you’ve purchased directly into Procreate.
With a seemingly endless amount of fonts to choose from, you might be tempted to install any files into Procreate. But before you jump in, you should make sure you have the right font files. Procreate can recognize OTF, TTF, and TTC files.
Although it has compatibility with OpenType font files, there are more advanced OpenType features that Procreate doesn't support. OpenType fonts can save additional glyphs, ligatures, and more within their file information, and without a good workaround like the one we've found, you won't have much luck accessing them.
When incorporating text, by default, it will be a vector. You can distort your text further by tapping the text layer and hitting Rasterize. This will make your text a pixel layer, so make sure you have your wording set because it won't be editable anymore.
For more on how to use fonts (and some we recommend) for Procreate, check out our article: 20+ Procreate Fonts and How to Use Them.

Gestures & features
Procreate set the standard for creating gestures in digital art apps and has since shared it with everyone to use in their own programs. Gestures like 2-finger tap to undo, 3-finger tap to redo, and drawing & holding to make a straight line are just a few essential shortcuts when using digital art programs today.
In Procreate, you also have the QuickShape function, which allows you to make perfect circles, squares, and polygons by drawing and holding. You can control scaling and proportion constraints by holding one finger on your screen while performing transformations, and you can further customize your gestures within the Gesture Controls menu.
There's also the option to enable the QuickMenu, which puts your favorite actions at your fingertips. Use it to set up a max of six different actions and make them just a tap away.

Organization, file management, & cloud storage
Staying organized is very important for digital artists. In Procreate, your files appear in your Gallery. You can reorder your files as you like by dragging them around. To group related files, you can create Stacks by dragging and dropping files on top of one another.
There are no filtering or search tools within the Gallery, but you can rename files and Stacks, and your canvas size for each file is always in view. Swiping across any of your files will also bring up options to Share, Duplicate, or Delete.
Procreate doesn't offer any automatic file syncing, so the responsibility falls to the artist to make sure their files don't get lost.
Speaking of losing work, did I mention that if you accidentally delete a file in Procreate, it's unrecoverable?
Even though the pop-up warns you before you delete it, the stakes are pretty high. Transferring your work between an older and newer iPad can also be risky.
To make up for the lack of automatic backups, you can use the Files App to save backups of your files. I recommend keeping a Procreate file version and a JPG or PDF version of each of your art files. This way, you'll have a version that can be read within the Procreate program and outside of it as well.
It's also important to incorporate routine device backups as part of your file management to keep yourself from losing your work accidentally in the future. Trust me, I learned this the hard way. Don’t be like me and wait until you lose all of your work before you make this part of your routine.

Exporting & platform compatibility
Procreate launched in 2011 and was specifically designed for use with iOS.
While it can be argued that focusing on one operating system translates into stellar performance, a lot of artists may view an iPad Pro and Apple Pencil stylus as a steep economic barrier.
Alternatively, Photoshop for iPad — despite its name — is compatible with Windows, Android, and iOS. The ability to work on the same piece on your tablet, phone, or desktop regardless of your operating system improves workflow and provides greater freedom to artists.
But how easy is it to export, share, and print once you finish your masterpiece?
Procreate exports to a number of formats using the share tool:
- PSD.
- PDF.
- JPEG.
- PNG.
- TIFF.
- Animated PNG.
- Animated GIF.
- Animated MP4.
- Animated HEVC.
This pretty much covers your bases when looking for ways to save your work. But once you pick your format, then what?
AirDrop is a helpful feature and another benefit of using Apple products. You can instantly AirDrop your work to any of your Apple devices or save it to your Files app. This is also helpful if you want to export your Procreate file to a desktop editing software. Just send it to your Mac and upload the file there.
The lack of automatic backups reinforces the importance of having a solid file export routine in place. This is one of the biggest differences compared to having your files in programs like Adobe Fresco and Photoshop.
Procreate supports exporting to social media platforms like Instagram and Pinterest as long as those apps are already installed on your device. Looking for printers is also the same for both apps, allowing you to take your work from screen to hand in moments.

Is Procreate still the best choice for artists in 2026?
In a lot of ways, it feels like Procreate is just getting started. It has established itself as a powerful program for artists using the iPad. Part of what makes it stand out is its stance on AI. They are one of the few programs that have no interest in AI and have made it clear to users that it is not the future of the app.
If that's something that’s important to you, you will probably feel most comfortable supporting Procreate as it continues to develop and update. 2025 was a big update year for the program, and even with the launch of Procreate Dreams, it doesn’t feel like Procreate has taken a back seat. The community presence is strong, the tools are professional-grade, and you’ll be able to create anything you can imagine.
Final thoughts
Procreate doesn't wear its complexity on the surface, but its vast capabilities make it an easy favorite among hobbyists and professionals. Want to learn more? Check out the Procreate handbook here.
At the end of the day, only you can determine if Procreate is the best app for your needs.
There are a lot of tutorials for Procreate, which you can check out in our article: 30+ Procreate Tutorials for Digital Artists. From beginner to advanced, you can get something out of them for every stage of your artistic journey.
And of course, don't forget your Paperlike. Enjoy the added resistance as you work, which makes you feel like you're drawing on paper. Make your iPad feel like paper with the Paperlike™ 3 iPad Screen Protector.
Frequently Asked Questions
Is Procreate only for iPad?
A: Yes. Their version for the iPhone is called Procreate Pocket and is a separate app with files that aren't linked to the iPad version of the app. Procreate was engineered for Apple devices and use with the Apple Pencil.
What is the cost of Procreate?
A: Procreate is available under a single purchase model for $12.99. This gives you access to all future updates, making it a powerful and cost-effective choice for iPad artists.
Is Procreate good for beginners?
A: Yes. Procreate is a beginner-friendly app thanks to its simple interface and accessible learning resources through their handbook and YouTube channel. Start with these recommended Procreate tutorials for beginners.
Is Procreate better than Adobe Fresco?
A: Both programs are great for digital painting and illustration. If you’re already using programs like Adobe Photoshop or Illustrator, integrating Adobe Fresco into your workflow would be a complementary addition. Procreate offers high-quality tools and features without a subscription. Compare their capabilities to see which is best for you.
Where are the best places to find Procreate brushes?
A: Procreate comes with a lot of amazing brushes. If you’re looking to add to your brush library, you can go to marketplaces like Creative Market or True Grit Texture Supply. There are also free options, such as the Procreate Brushes from Paperlike.