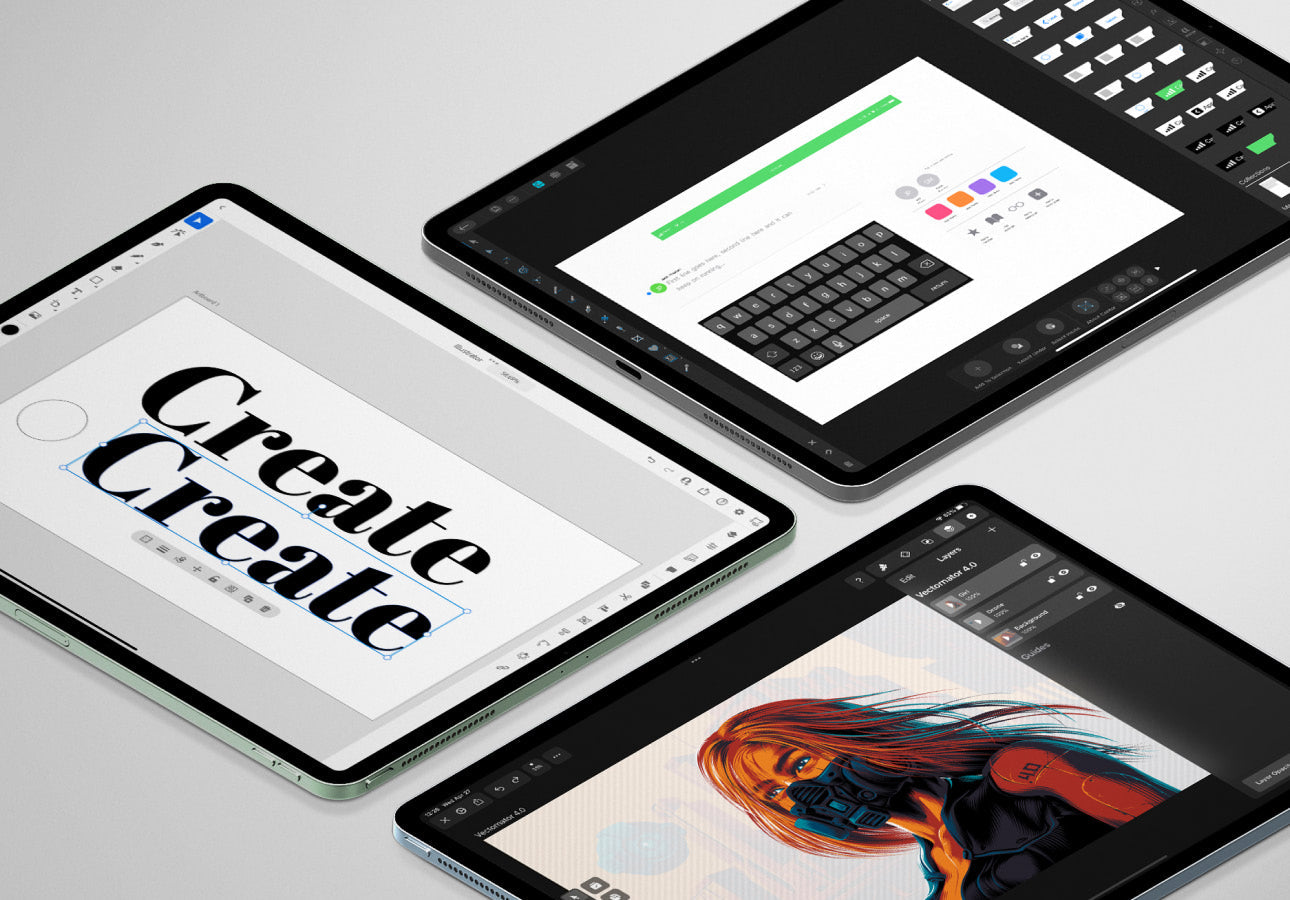
Vector graphics are known for being sleek, polished, and scalable, making them a great way for digital artists to create effective and flexible works of art.
We’ve taken a look at vector programs like Affinity Designer and Adobe Illustrator before, but how does a newer vector app compare to these legacy app experiences?
Curve is a graphic design software for desktop, iPhone, and iPad that allows you to create vector graphics, illustrations, branding, and more. How much can it do as a newer program, and is there an advantage to choosing legacy programs?
Let's find out what each of these vector graphic apps has to offer!
Interface
Interface plays a huge role in how we use and enjoy our digital drawing and graphics apps. It’s evident that Adobe has a unique advantage on this front simply because they've been on the market the longest, making them an industry standard.
However, there are newer apps that have decided to put their own spin on what makes a great interface for users. Let's start with a look at Curve.
Curve
- User-friendly. Simple, clean interface with standard tools.
- Built-in Tutorials. In-app tutorials to review the entire app.
- Artboards. Active artboards have their own layers.
Curve is simple in its presentation, so you can get started right away. You'll find tools at the top left and right and a single toolbar on the left-hand side. This makes it feel clean and organized, which is part of what I feel makes it user-friendly.
All of the tools that you’d expect from vector-based programs are there, such as the Pen Tool and Node Tool, without having to worry about how to use advanced design tools or new features. If you ever get stuck, you can press and hold any tool to learn more about it or even take a quick in-app tutorial.
In Curve, all of your artboards have their own set of layers that stay grouped with whichever artboard is active, which adds to its exceptional functionality. You can also customize your toolbar at the top by dragging and dropping tools and functions like Delete, Grid, Rulers, Snap to, and more.

Adobe Illustrator
- Industry-standard. Adobe has a long legacy of programs that are used among professional designers.
- Similar to desktop version. The iPad app is a simplified version of the desktop program.
- Ruler & custom guides. Create your vector graphics with precision.
Most users with experience in graphic design will likely be familiar with the Adobe Illustrator interface. The iPad app interface is noticeably similar to the desktop program, with a simplified layout, optimizing it for use on tablets.
Since Illustrator is a part of the industry standard for vector graphics, a lot of the classic desktop features, from the Blend tool and Gradients to vectorizing, are in the iPad app as well.
The toolbar is on the left side, with the taskbar on the right. All of the menus appear on one screen with the option to fine-tune your overall experience in the App Settings menu.
Creating vector graphics can be complex, so having the support of certain tools and features is always helpful. In Adobe Illustrator for iPad, the Ruler tool lets you measure the distance across your canvas and between objects. You also have the option of creating custom guides that offer you the flexibility to configure them to the needs of your projects.

Affinity Designer
- Raster support. Drawing modes that support vector and raster graphics.
- Advanced tools. Unique tools that add more personality and editing capabilities.
- Image editing. Selection tools for light image editing.
Affinity Designer offers the most unique interface of the three apps. It's unique because your user interface depends on the mode or Persona you're using. The Designer Persona is for creating vector graphics, and the Pixel Persona is for creating raster graphics.
Of the three apps, Affinity Designer is the only one that also has support for raster graphics. This is a nice option to have, as vector graphics are usually known for their sleek appearance, but not many options for adding texture.
Affinity Designer takes this a step further with tools like the Vector Brush Tool, which creates strokes with the texture of raster brushes and the editing capabilities of vectors. You'll also find features similar to Adobe Photoshop that offer light image editing capabilities like subject detection and a variety of selection tools.

Verdict
It’s a tie.
Every artist will have their own preferences, but I think that Curve's clean, simple interface and ease of use are the best for beginners. You can also translate any experience you have from using other apps like Adobe Illustrator, and begin using this app with ease.
Adobe Illustrator is the industry standard, and many users will probably have prior experience with the desktop version. It has a lot of the same tools as the iPad version, so you don't have to feel like you're compromising on features or learning new software.
Affinity Designer has the most complex interface, introducing Personas, each with its own toolsets. Being able to use raster graphics in addition to vector graphics is a nice option to have, but if that isn't the kind of work that you create, you might not see it as an advantage.
Price
Money is usually the first barrier that artists face when deciding which digital art apps and tools to use. This requires assessing the value that an app or tool provides.
Each of these programs represents three different pricing models:
- Curve is part of a freemium subscription plan.
- Adobe Illustrator is part of a subscription plan.
- Affinity Designer is a single purchase.
Let's see what each of these models offers for the price.

Curve
- Freemium app. Curve is available to use on iPad, Mac & iPhone.
- iPhone version. Curve has an iPhone app that allows you to access your iPad files on your phone.
Curve uses a model similar to Adobe Fresco, where there are limitations to the free version of the app. It's a good opportunity for you to give the app a try without having to invest anything up front. It’s also the only app with an iPhone app version.
While I can't say whether or not working on graphics from your phone is a preferred experience, what it comes down to is access and options. Having access to your iPad files from your phone offers more flexibility for artists on the go.

Adobe Illustrator
- Subscription model. Available as a single app or in bundles.
- Companion apps. Adobe Illustrator is designed to work with apps like Adobe Fresco and Photoshop.
- Premium features. Bundle subscriptions offer access to premium features in free apps like Creative Cloud Express.
- Range of packages. Adobe Illustrator can be purchased starting at $9.99 per month.
If you only want to use Adobe Illustrator for iPad, you can do that for $9.99 per month. The Adobe Design Mobile Plan gives you access not only to Illustrator for iPad, but also to Adobe Photoshop, Adobe Fresco, and Creative Cloud Express on the iPad for $14.99 per month when purchased through the App Store.
Adobe Photoshop and Fresco offer photo editing, and drawing and painting, respectively, while Creative Cloud Express is a graphic design and social media software that allows you to create posts and graphics with ease. This bundle was designed to give users all the apps they would need for design and digital illustration on the iPad without breaking the bank.

Affinity Designer
- Single purchase. Buying once offers lifetime access to future updates.
- Affinity Serif Suite. Affinity Designer is a part of a suite of apps similar to Adobe.
- Cross-platform support. The desktop version of Affinity Designer is available for Windows and Mac.
- Range of packages. Affinity Designer can be purchased for $18.49 for the iPad version and $70 for the Desktop version (Windows & macOS, free trial available).
Affinity Designer is similar to Adobe in that it’s also part of a suite of graphic design software alongside Affinity Photo and Affinity Publisher.
The entire suite is designed by Serif as a counterpoint to Illustrator, Photoshop, and InDesign, but without the subscription fees. In fact, the price you'd spend to purchase the entire Affinity suite is a fraction of the recurring monthly or annual payments from an Adobe Creative Cloud subscription.
Verdict
Curve takes the win.
Having an app that allows you to try it for free is going to be the most accessible for all users. And while there are limitations to the free plan, if you think you’ll be working with a subpar or low-quality app, think again.
Not only do you have all the tools that you need to create stunning work, but you also have the option to work on your phone. Having access to eight free Curve files and no tool limitations allows you to get a sense of the app before you invest any money into it.
If you want to spend the money, Affinity Designer is the next most accessible with its reasonable price point and single purchase model. Affinity Designer also offers raster capabilities and is a part of a suite of apps that expands your capabilities to create.
Adobe is the most expensive and, while you do get access to more than one app in many of their plans, you'll end up spending more money in the long run — even if you only want to use Adobe Illustrator on its own. That said, there are some additional benefits with Adobe’s subscription that aren’t immediately obvious that might justify the cost. For example, Adobe offers access to storage in the Creative Cloud, as well as access to apps like Adobe Fresco, which serve as companions to Adobe Illustrator on the iPad.
Illustration & design
All three of these apps are designed for vector graphic design and illustration.
When creating your document, you have a variety of templates to choose from across print, web, and digital illustration. A unique characteristic of vector-based programs is that when you draw, you'll notice a trail of points along your lines. This allows you to edit your paths with precision afterward by adjusting your points.
While each app allows for multiple methods of creation, let’s look at how each differs in its approach to illustration and design.
Curve
- Color-coding. The start and ends of your vector paths can be easily identified with color-coding features.
- Brush profiles. You can select and edit your brush stroke profiles.
- Advanced features. Background removal for images, blur and shadows for objects, and more.
A unique aspect of creating vector graphics in Curve is its use of color-coding. As you plot your points, your starting point will always be green and your end point will always be red, making the start and end of every path easy to identify.

The brush selection in Curve is simple in a way that follows suit with its simple interface.
For drawing in vector, you have two tool options:
The Pencil Tool is for drawing strokes and shapes that follow a uniform width. The Brush Tool is for drawing strokes with variable widths. You can choose from a number of preset brush profiles through the Style Tab.

Other than choosing these profiles and making edits to them, the brush selection is limited. There aren't any categories to choose from or much texture offered in their brushes.
Despite these limitations, you can add blur and shadow to your lines and objects, which is unique for vector graphics programs on the iPad.

In terms of design capabilities, you have the ability to integrate your existing UI designs from programs like Figma, Sketch, and more. This is where you can leverage access to their expansive stock image library to add to your mockups and projects.
Curve has also incorporated AI-powered features similar to those you'd find in Photoshop, Canva, and Adobe Express. The Magic Eraser and Background Removal tools make it easier for you to edit photos you might be using in your designs.
Adobe Illustrator
- Create & edit brushes. Create your own brushes from objects in your document.
- Adobe Fonts. Choose from over 20,000 fonts to use in your projects.
- CC Library support. Browse your Creative Cloud library to incorporate shapes and elements you’ve created into all your documents.
Adobe Illustrator has around 65 brushes across three main brush types:
The Pencil brush allows for drawing in a few basic ways, like dotted lines and stitches. The Blob Brush creates your strokes as already filled shapes that you can then intersect and join together. The Pencil and Blob Brush offer the least amount of default options within their categories, but you can still edit any of your brushes.
The Paint Brush category allows you to create your own brushes from objects on your canvas. Simply select your object, hit the + button, and select New Art Brush. While there aren't many brush options that add much texture or personality to your work, you can change your stroke size, create dashes, and change your width profile under the Properties menu.

You also lack the option of importing additional brushes into the program. Any brushes that you create become Document brushes that can only be used within a single project. While you can't import brushes, you can access your Creative Cloud libraries and use compatible shapes and other elements within Illustrator.
What about incorporating typography into your projects? Having access to Adobe Illustrator also gives you access to Adobe Fonts. This is Adobe's library of over 20,000 fonts.
Affinity Designer
- Expansive brush selection. Over 200 brushes to choose from for both raster and vector graphics.
- Vector brush tool. You can draw vector paths with the look and feel of raster brushes.
- UI design. Drag and drop built-in UI elements into your document.
Affinity Designer has the most robust brush selection out of these programs, with over 200 brushes across multiple categories. It also allows for both raster and vector creation, so you have a wide variety of brush options.

Affinity Designer’s selection of brushes has the best options in terms of offering a variety of styles, textures, and effects to add to your work. The Vector Brush Tool specifically gives you raster brush textures with the editability of vector brushes.
In line with Curve, Affinity Designer also has stock image support built in with the additional option to drag and drop iOS UI elements into your document.
Affinity Designer offers your standard iOS font selection and also the option to install fonts from your Files app. Its OpenType feature support also makes it possible to access advanced typography features for your favorite fonts.
Verdict
Affinity Designer is the clear winner here.
When it comes to drawing, Affinity Designer's brush selection is unmatched among these three apps. Affinity Designer also has a lot of support for designers who might want to use the app for projects outside of illustration. Curve has only one brush, and you can only change the width profile. Adobe Illustrator is great for drawing in vector for projects like logo design, but it still has a more limited brush selection than Affinity Designer does.
Even with the best brush library, it's helpful to have accessories that can improve your overall experience using the iPad. And no matter which vector app you choose, the Paperlike Screen Protector was created to give you the best experience while you create on the iPad. With the added resistance, you can achieve smoother and more precise strokes as you draw with your Apple Pencil. Get your Paperlike today.
Gestures & features
Gestures make creating digitally on the iPad a streamlined experience.
Procreate and a few other massively popular drawing apps redefined how artists work with their iPad, and many other apps have followed their blueprint. This means all three of these programs feature basic gestures like two-finger tap to undo, three-finger tap to redo, and pinching for zoom.
However, from the integration of stock images to automatic vectorization, each app also has features that make using it a unique experience.
Curve
- Multi-touch gestures. Pressing and holding the screen will snap and edit nodes and handles.
- Layer isolation. Zero in your focus on one layer while the others in your document are grayed out.
- Icons. Drag and drop vector graphics from a library of 80,000 icons.
Curve has a number of Pen Tool gestures:
- 1-finger hold. Change your previous node to one with handles that can move independently.
- 2-finger hold. Both node handles snap to 45º.
- 3-finger hold. Only one node handle snaps to 45º.
- Double-tapping the end node. Ends the path.
These gestures are designed to make the tricky task of plotting points easier and more controlled. With the added help from its color-coding system, beginner-level vector artists are likely to find this experience a comfortable introduction to the pen tool.
Similar to Affinity Designer, Curve features built-in stock image support from Unsplash. Curve also has Icons, which is a library of over 80,000 icons that you can drag and drop into your work.

As your project progresses, you can end up with a large number of layers with a lot of elements. To zero in on a single layer, just select it and toggle on Isolate Active Layer. This will automatically gray out all other layers, allowing you to focus only on the active layer.

Adobe Illustrator
- Touch shortcut. Pressing and holding the shortcut will allow you to perform other actions, like editing paths and handles
- Document sharing and commenting. Collaborate easily with others on your documents
- Vectorize. Take pixel images and turn them into vectors of varied complexity
Adobe Illustrator uses Touch shortcuts, which are similar to the multi-touch gestures in Affinity Designer, with a bit less flexibility. The touch shortcut has primary and secondary states, giving it over a dozen different functions, from rotational snapping to proportional scaling.

Adobe Illustrator features document sharing and commenting to make collaborating on projects easier. Comments can be left on documents, even if others on your team don't have Adobe IDs, giving the feature broader use and access. While you're connected and online, you can see edits being made to your documents in real-time.

Curious to know how your photos might look as vectors? You can automatically vectorize them in Illustrator.
You can choose from color, black and white, and grayscale, then adjust your settings to make the result as simple or complex as you'd like. Once you have a vector version, you can increase its size without having to worry about blurring any pixels.
Affinity Designer
- Multi-touch gestures. Unique multi-touch gestures add to an efficient workflow.
- History. Get instant access to your full document history.
- Assets Studio. Add elements from your document into a library that you can access across all documents.
Affinity Designer uses a number of multi-touch gestures for actions like duplication and constraining proportions. You can place your fingers anywhere on your screen, making it easy and comfortable to perform the gestures.
Another common set of gestures that you'll find is scrubbing gestures. By simply dragging your finger or Apple Pencil, you can increase or decrease your zoom level, stroke weight, and more.

In the previous section, we saw that Affinity Designer features built-in stock image support from Pixabay and Pexels, and UI support from its Assets Studio.
You can also use this feature to add shapes and elements from any document into a library. You can use this feature with pixel or vector elements in your documents. When you're ready to use them, it's as easy as dragging and dropping them into your documents.

Affinity Designer also contains a full, time-stamped history of every action you make within each document. Additionally, the app allows you to set the number of undo steps you want, all the way up to 2,048 actions.
Verdict
Depends on personal preference.
Based on the work that you create, you'll know which features matter most to you. I don't often need access to UI elements as a lettering artist, but having ready access to built-in stock image libraries is a cool feature.
Gestures across digital drawing apps have become pretty standardized over the years, with a few unique variations like we saw across each program. Anything extra is nice to see, but perhaps not completely necessary to have a good experience with the app.
Learning & community
When trying a new app, exploring its tutorials and joining its user community can often be a bonus.
As creative apps gain popularity, we naturally seek out places to learn skills and connect with fellow creators. Established apps like Adobe already have robust communities that are easy to find. It's encouraging to see newer platforms like Affinity and Curve growing their own thriving communities as well.
Curve
- Linearity Academy. Learn from hands-on tutorials created by the Linearity team.
- In-app tutorials. You can learn about the different tools in the app with helpful pop-ups and video tutorials.
- Branded template library. Start your designs off strong with over 4,000 Linearity templates.
Curve started out as a free-to-use program that grew in popularity as its features became more robust. Now, you can see that you have an opportunity to make a Linearity account that will streamline your experience across their apps.
The benefit of this is that you can have ready access to your files, no matter what device or Linearity app you're using. Did we mention it has an animation companion app named Move? When you're following along with the tutorials, the interface in their browser is great because you can see what you'll learn and each section of the Unit you're in.

When you want to get more hands-on and learn as you go, you have not only in-app pop-ups to guide you but also videos. You can learn more about any tool by tapping its name as it appears at the top of your screen when selected. It makes even the more complex features feel approachable. And thanks to their huge template library, you don't have to start your work from scratch.
Adobe Illustrator
- Adobe Live. Watch a community of creatives using Adobe tools to get inspiration and learn more about the app.
- In-app tutorials. You can learn about the different tools in the app by taking a guided tour through the app.
- User feedback. Leave feedback, report app issues, or submit suggestions for new features for the team.
Adobe Illustrator's Learn tab is where you'll find in-app tutorials guiding you through the app and its most popular tools and features.
While they don't play video tutorials while you're in your document, the guided app tour is a great place to start. Even if you're an Adobe Illustrator desktop user, this can be a great way to get familiar with where things are and how the experience functions on the iPad.
You can also suggest features from the Homescreen under the New and Upcoming features section. While you learn what the team is working on, you can also give feedback to help shape the future of the app.

With the Discover tab, you have access to livestreams from the Adobe Live YouTube channel. Every week, you'll find videos with artists who are using Fresco as part of their creative workflow to create fun and interesting projects.
If you scroll further, you'll see the latest Behance projects using Adobe Illustrator. Seeing different artists from around the world use Illustrator not only inspires but also fosters a sense of community. You won't have to go far to find something new to inspire your next project.
Affinity Designer
- Affinity Help Center. Learn more about the app through the ‘?’ on the home screen.
- Add-ons marketplace. Purchase brush packs for Affinity programs.
- Affinity Spotlight. Learn from the library of resources to help you get inspired to start creating in the suite of Affinity programs.
Similar to Curve and Illustrator, Affinity Designer is not leaving users without a lifeline. From the homescreen, you can navigate to the ‘?’ icon to learn everything about the app. While you won't find in-app videos or tutorials, you'll still find a link to the Affinity Designer YouTube channel with their full library of tutorials.

The Affinity Designer team also has a huge blog presence where they interview artists about their careers and creativity. They also have links to articles for Learning, Inspiration, Behind the Scenes, and more.
In line with the way they champion artists to get the most out of their programs, they also have an Add-Ons marketplace for Affinity artists. You can browse through the store and see their selection of brushes, texture packs, and more to help enhance your work in Affinity programs. You’ll even see Paperlike Ambassadors Aurelie Maron and Ian Barnard's products featured!
Verdict
Tie.
Is it fair to say that one community is better than another? Not really. But what I do know is that everything won't work for every artist, and that's okay. Maybe that's not what you're primarily looking for when choosing an app.
But each of these apps clearly values their communities of users with the way they have invested time into creating in-depth tutorials, and documentation if you ever get stuck.
I know that I've relied on tutorials when I was first opening these apps, and even once you consider yourself an expert, there's always something more to learn.
And don't forget to give your input as well! The teams behind these apps don't just exist to push out features. If there's something you'd like to see, engage in forums, calls for suggestions, and opportunities to engage on social media.
Export & platform compatibility
What good is being able to create if you can't export and share it in formats that are best for your workflow? Being able to utilize your work on as many programs and platforms as possible gives artists more flexibility and options.

Curve
Curve offers an impressive level of compatibility with a number of programs and formats.
Curve exports to the following file formats:
- Curve
- JPEG
- PNG
- SVG
- Adobe Illustrator
You can send your work to Illustrator on the desktop straight from the Curve app with your computer close by.
Uniquely, Curve also allows for exporting of single layers by pressing and holding without having to leave your document. From there, you can export to JPG, PNG, SVG, or PDF.
For added convenience, you also have the option to export by pressing and holding unopened documents straight from the home screen.
Adobe Illustrator
Illustrator can export to the following file formats:
- JPEG
- PNG
- SVG
- PSD
Adobe doesn't offer compatibility for other file types in the design industry. However, it works well within the Adobe ecosystem, offering additional support for Adobe Fresco and Photoshop.
The artboards in Illustrator give you the ability to export only select artboards. This allows for flexible creation and ideation without needing to export the full document when you're done.
Affinity Designer
Affinity Designer can export to the following file formats:
- JPEG
- TIFF
- PNG
- GIF
- EPS
- SVG
Affinity Designer is compatible with Adobe Illustrator and Photoshop files and can import them into their design programs.
Using Affinity Designer's Export Persona, you can export specific parts of your document by creating Slices.
It boasts some of the most impressive export capabilities, allowing for 1x, 2x, or 3x resolution exports of your document simultaneously.
Verdict
Affinity Designer wins.
While all of the apps offer a good amount of file format support, Affinity Designer's advanced export features offer a more flexible experience.
Curve offers a nice level of file support and compatibility if you're looking to make the switch from other vector apps.
Illustrator is going to be the most limited in terms of compatibility and support, as most artists are looking for alternatives to Adobe because of the higher price point.
Organization, file management & cloud storage
Creating digitally can lead to the accumulation of hundreds of files that are unnamed and disorganized. Having a workflow for keeping your files in order is critical for digital artists. Even more essential is having a way of saving your files for future access.
This is how the apps handle organization:
- Curve uses folder organization.
- Adobe Illustrator uses folder organization.
- Affinity Designer uses projects to organize documents.

Adobe Illustrator uses the Creative Cloud to keep your files backed up. You can access your files across devices, so any changes you make will automatically be updated. Depending on the plan you purchase, you have access to up to 100GB of cloud storage, which is convenient for users.
Verdict
It’s a tie between Affinity Designer & Curve.
Both apps offer automatic iCloud saving, which is essential for digital artists. It's easy to stay organized with folders and projects, and you don't have to worry about losing your work. I enjoy using the Adobe Creative Cloud, but the convenience and security of your files come with a hefty price tag.
Use Affinity Designer if you:
- Are transitioning away from more expensive apps like Adobe Fresco.
- Still want access to raster & vector brushes.
- Have access to an iCloud storage subscription.
Use Curve if you:
- Want access to your old Adobe Illustrator files.
- Desire a more simplified experience.
- Want import support for Figma and Sketch files.
At the end of the day, choose the program that works best for your creative workflow, and know that there is rarely a one-size-fits-all solution. Thankfully, there are a lot of options for digital artists, and hopefully, this breakdown helped you narrow them down.

Wrap-up
Curve is a great app for artists who want to create using vectors, and there isn’t a huge barrier or learning curve.
Since the app is free to start using, you won’t lose anything by trying it out, and you’ll have the added security of being able to use Adobe files within the app.
I see it as a great alternative to Adobe Illustrator for the iPad, especially since the difference in brush selection is minor and you have the option to save your work to the cloud, which is a huge plus.
Affinity Designer is the best all-around app for vector and raster graphics artists, offering the best features and value for its price.


